I find it particularly painful when I see people upgrading their PCs backwards, and sadly, it happens a lot. One sees a shiny new GPU launch, reads a few benchmarks, and feels that familiar itch. Suddenly, they’re pricing out parts without ever proving what’s actually holding their systems back. That is how you waste money.
The smarter way is diagnostic by provocation: deliberately pushing individual components into uncomfortable territory and watching how the rest of your system reacts. Bottlenecks don’t hide when you force them into the open. They announce themselves through utilization spikes, thermal throttling, stutters, and frametime chaos.
Upgrades should happen only when your system asks for them, and not when YouTube and the algorithm tell you to. All of this can be done using plenty of free tools and software, helping you apply controlled pressure and provide honest results.
RECOMMENDED FOR YOU
Establish a baseline first
Before you start breaking things on purpose, create a reference point
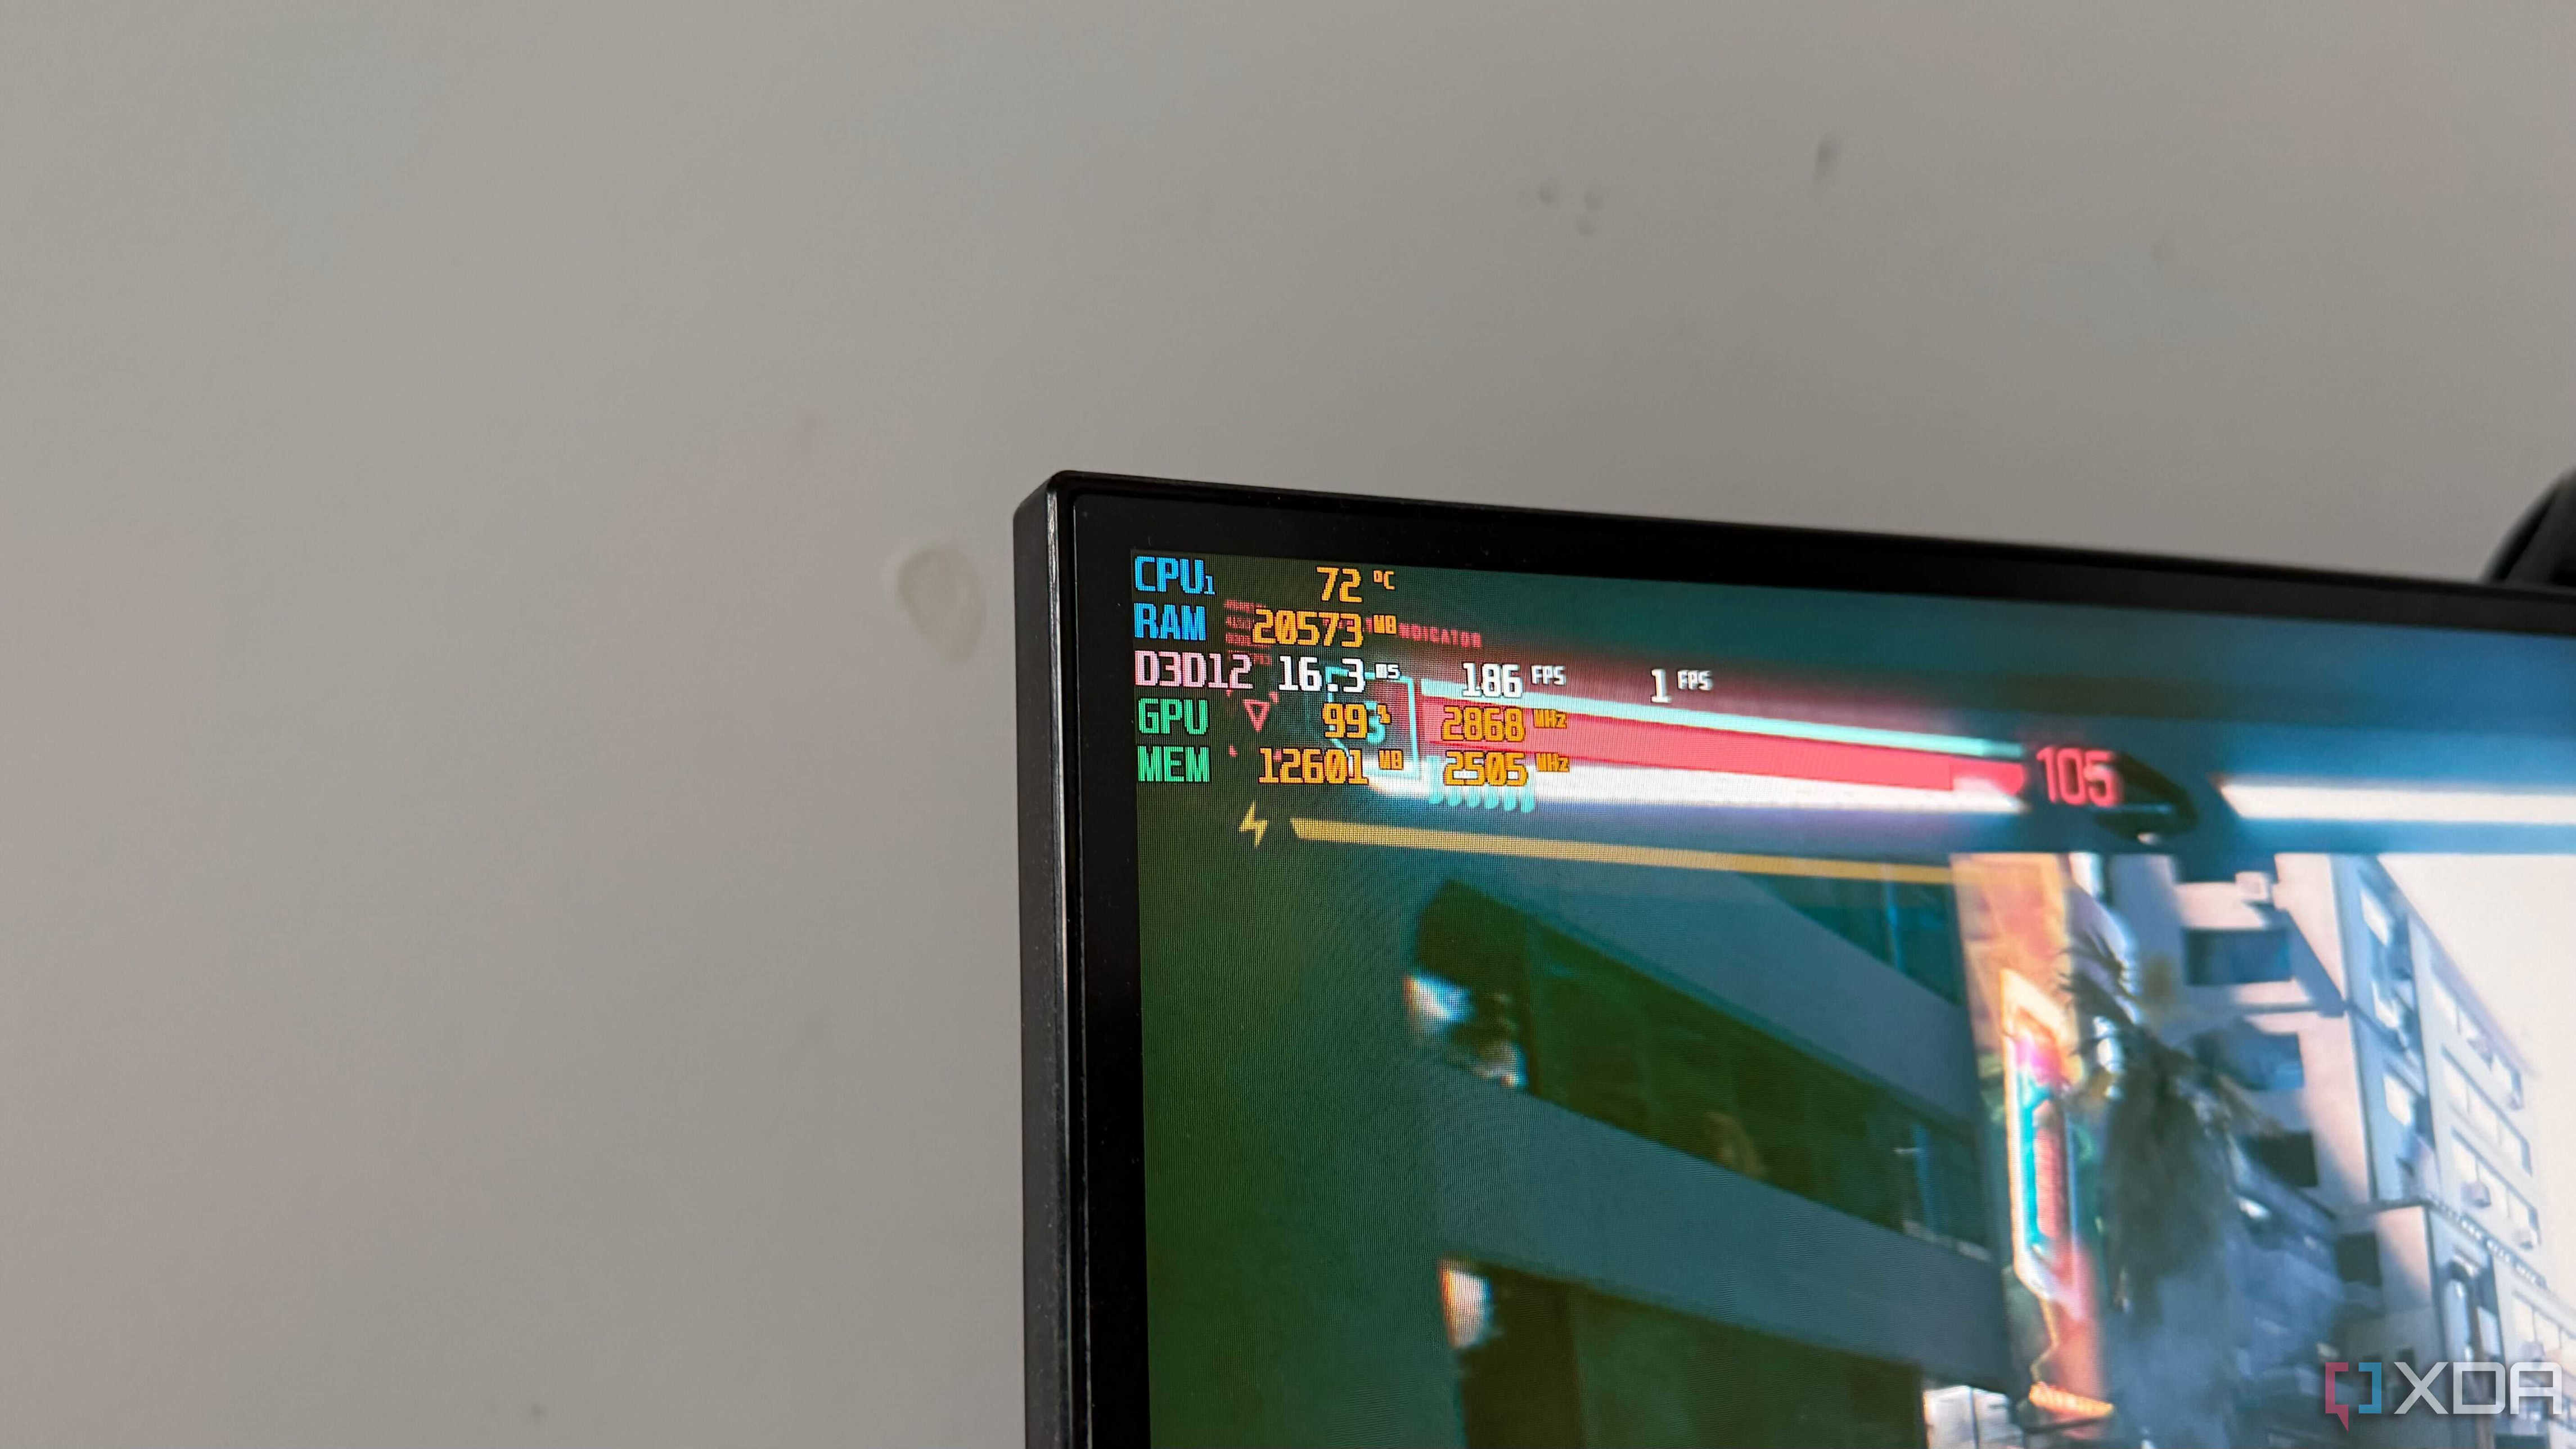
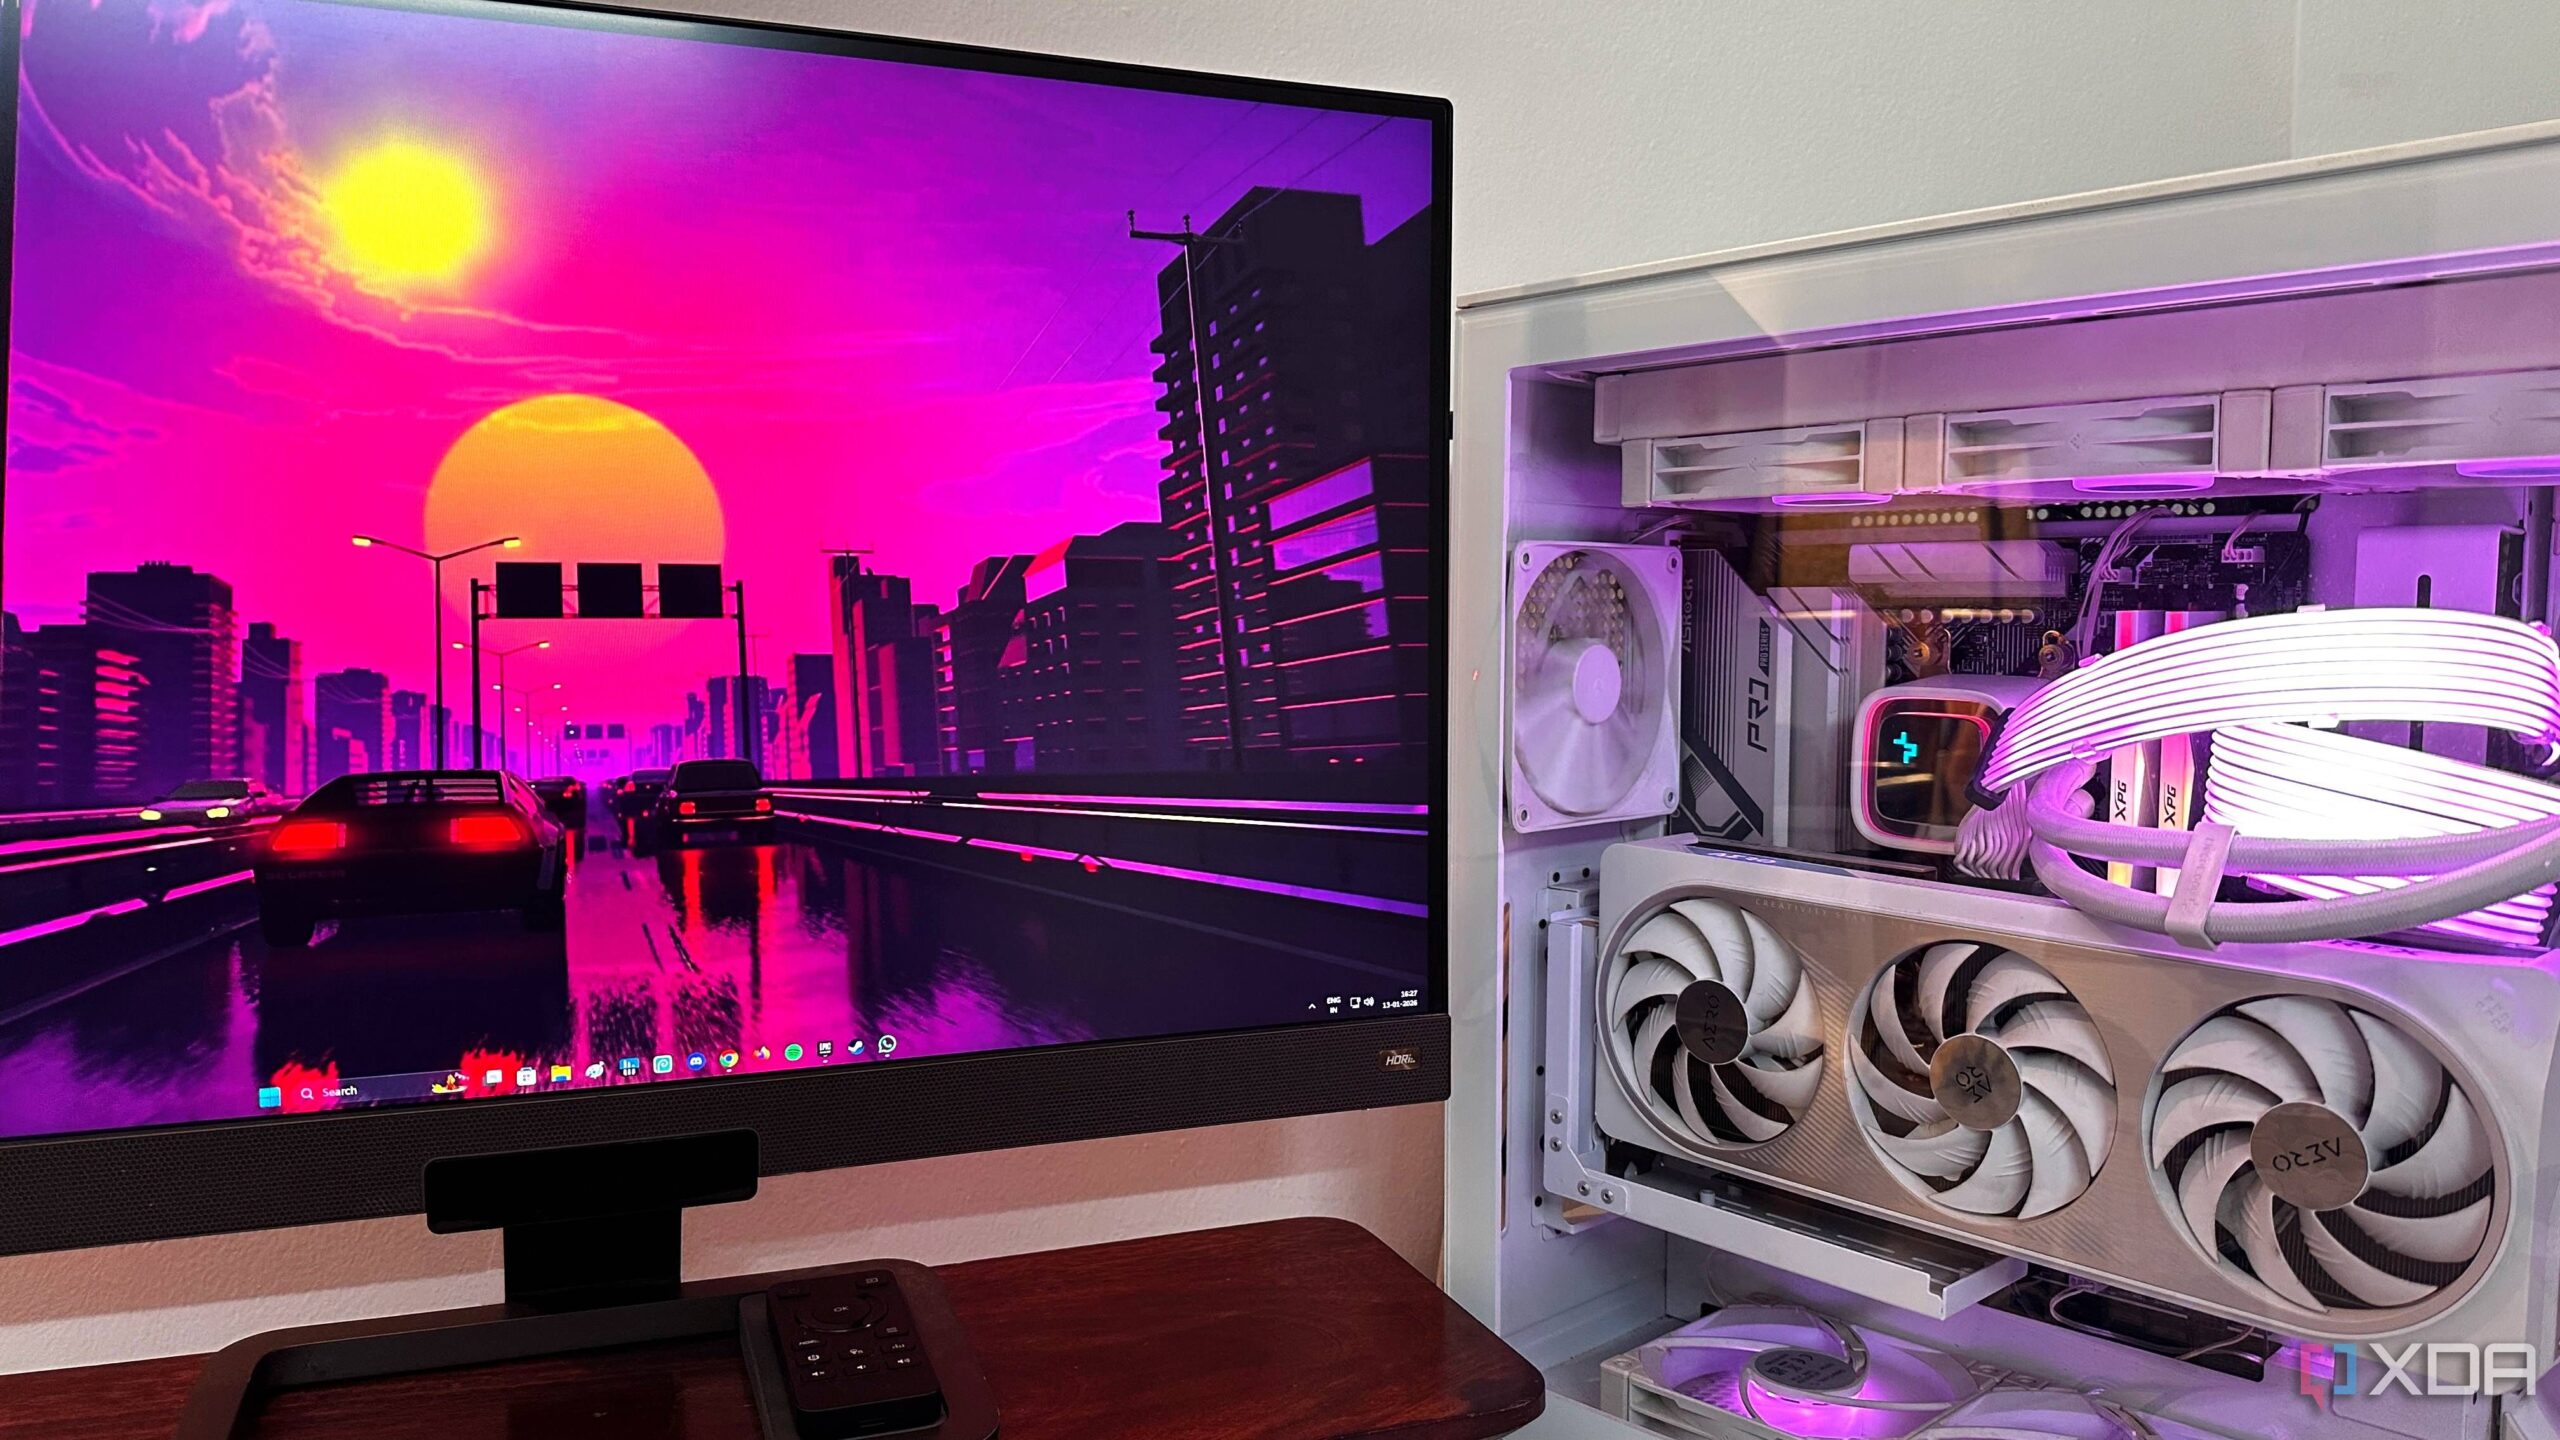
Fire up MSI Afterburner with RivaTuner enabled and launch a game you actually play. Use your normal settings that you always do. Don’t optimize anything yet; just observe. Take note of the average FPS, GPU usage, CPU usage (both overall and per-core), RAM consumption, temperature, and frametime stability. Then, open HWiNFO and confirm what the overlay shows: clock speeds, thermals, and power limits. This is going to be your system’s “resting state.”
Everything that follows gets compared against this moment. Skipping this step means losing context. You won’t know whether later drops in performance are meaningful or just business as usual. Baselines turn subjective impressions (“it feels slower”) into objective measurements (“GPU utilization fell 30% when X happened”). It’s like taking your vitals before running diagnostics. Without that starting snapshot, every conclusion afterward becomes shaky.
GPU: Check if graphics horsepower is your ceiling
GPU bottlenecks are the easiest to expose
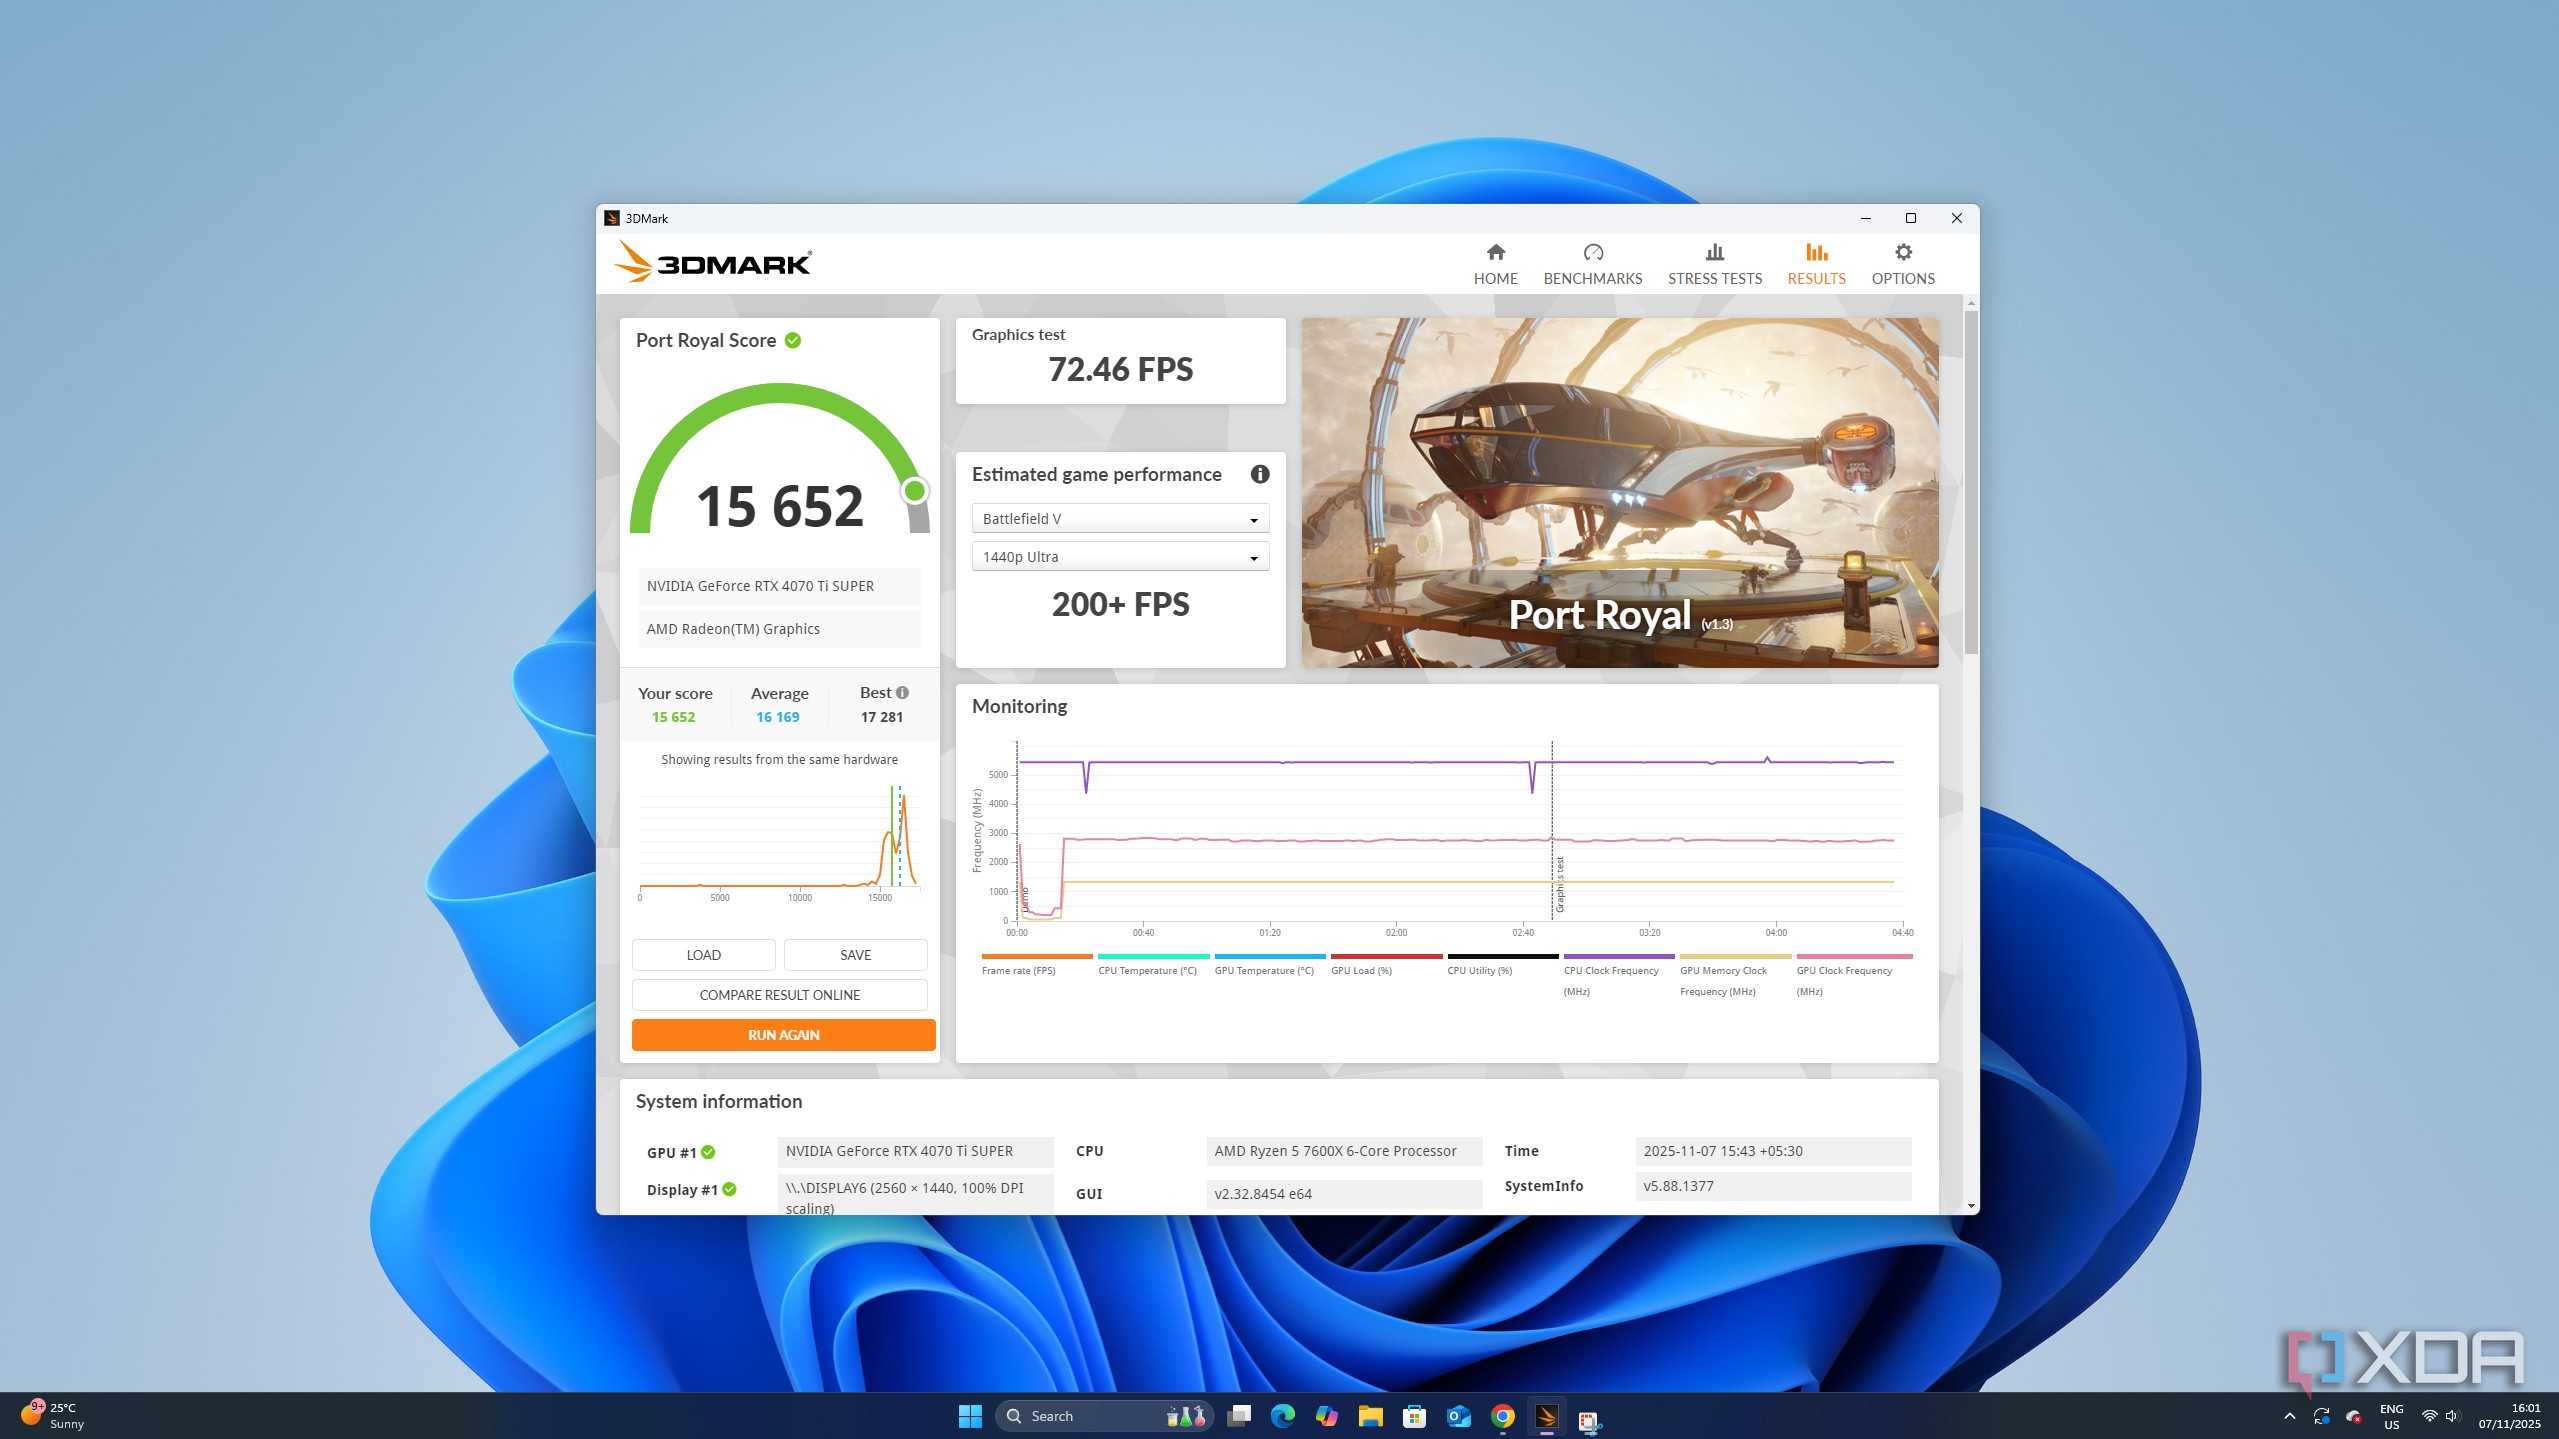
GPU bottlenecks are pretty common, and the term is thrown around quite a lot. To start, max out your resolution in any AAA title you play, and then push graphics presets to Ultra. If there’s room for ray tracing, enable it. Then, either run a demanding scene in-game, or run the benchmark if you’ve picked a game that comes with its own benchmark, like Black Myth: Wukong or Cyberpunk 2077. Either that, or fire up 3DMark’s Time Spy.
Watch your overlay now. If your GPU sits at 95–99% utilization while your CPU hangs comfortably below 60%, congratulations: you’re GPU bound. That means your graphics card is doing exactly what it should, and your frame rate is limited only by raw rendering power. Now, drop the resolution a notch below. Go from 1440p to 1080p, and if the FPS jumps meaningfully, that confirms it. You just reduced GPU workload and the performance scaled accordingly.
However, if lowering the resolution barely changes FPS while the GPU usage falls, then you’re not GPU-limited anymore. Instead, something upstream is capping performance. A true GPU bottleneck scales with visual settings. Shadows, resolution, effects — they all matter. CPU bottlenecks, on the other hand, don’t behave this way. When the GPU is the constraint, upgrading it produces immediate, predictable gains, without any mystery or diminishing returns. This is the cleanest upgrade scenario you’ll get.
CPU bottlenecks are much sneakier
Average FPS can still look fine
To expose CPU bottlenecks and find out if that’s the upgrade you need to make, reduce the GPU load first. Drop your resolution to 1080p and aim for high refresh behavior. Then, run a multi-core test on Cinebench while monitoring clocks and usage, or load into a CPU-heavy game scenario, like crowded hubs or simulation-heavy areas. What you’re looking for here isn’t the total CPU usage, but the individual cores.
Modern games rarely saturate every core evenly. Instead, one or two threads hit 100%, dragging everything else down with them. When that happens, GPU usage drops because it’s waiting on the processor. That’s your smoking gun. You’ll also notice inconsistent frametimes, micro-stutter, and sudden dips during physics or AI spikes. These are scheduling limits on the CPU side.
Sure, modern DX12 and Vulkan titles are highly-threaded, but a CPU bottleneck will still appear as high overall usage (70%+) with GPU usage fluttering at 85–90%. If the FPS refuses to rise despite lighter graphics settings, and one core is pinned while the GPU loafs, then it’s your CPU that is the bottleneck.
This matters because CPU upgrades improve raw FPS a little, but more importantly, they stabilize their delivery. What you then get are better minimums, smoother traversal, and fewer hitches. It’s the difference between “high numbers” and “good feel.”
A CPU-cooler bottleneck could be holding your chip back
A weak cooler quietly keeps stealing performance
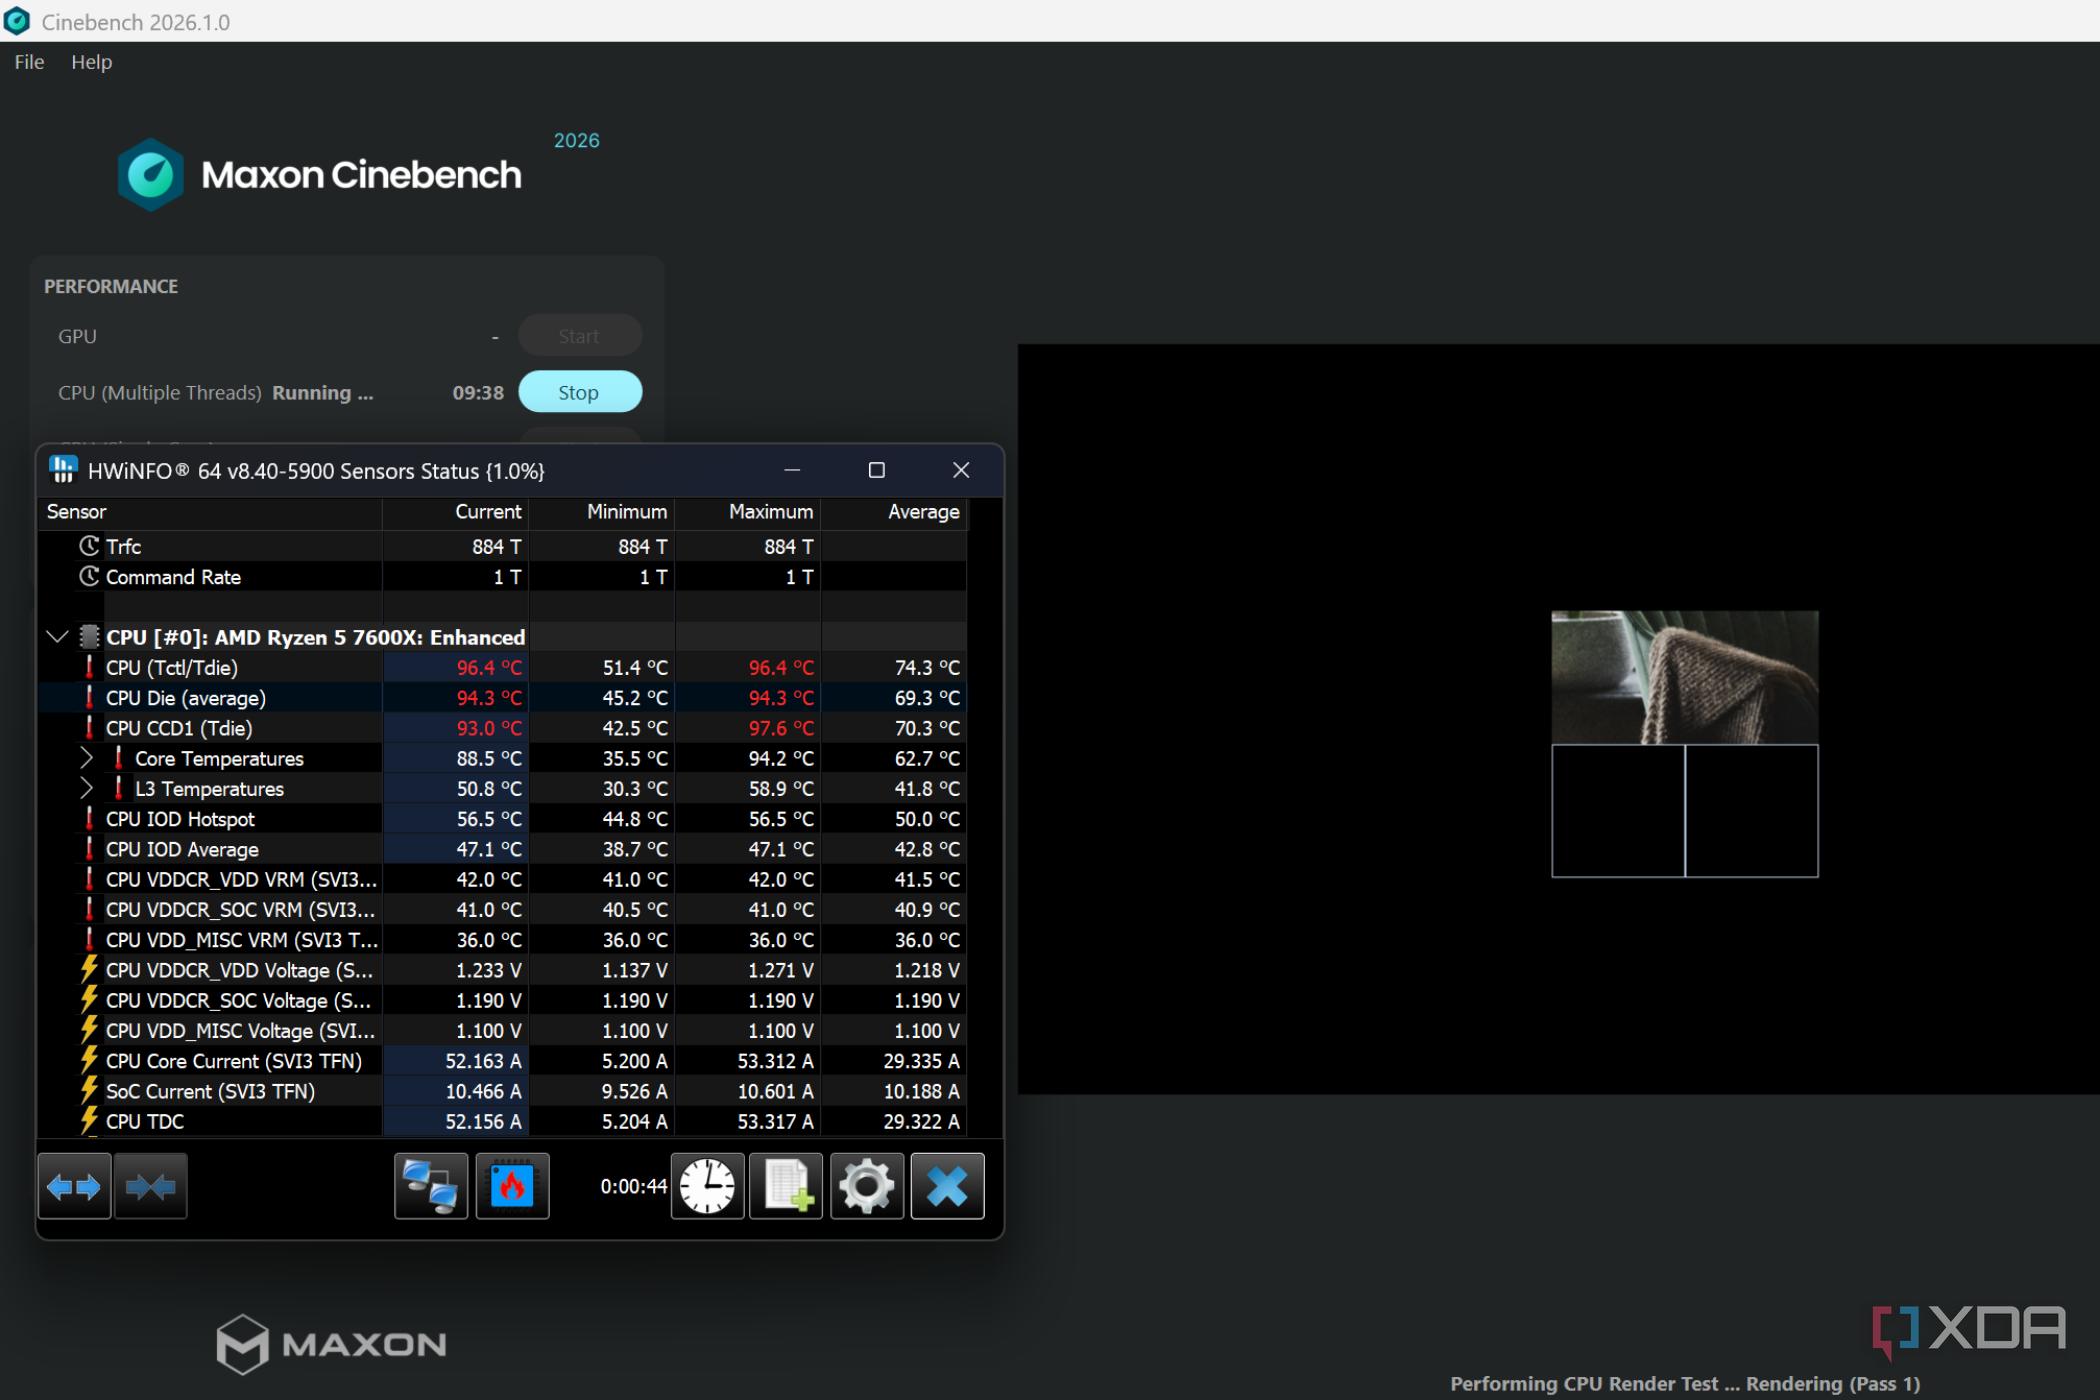
If you’re wondering if it’s time to swap out your CPU cooler, you can know for certain within a matter of minutes. Just run Cinebench for ten minutes straight while watching temperatures and clock speeds of your CPU in HWiNFO. Pay attention to the sustained behavior, and not the peak spikes. If your CPU climbs near 80°C or 90°C, and clock speeds start dropping mid-test, that’s thermal throttling. Some modern CPUs are built to go higher up in temperature, even near the 100-degree line, but clock speeds dropping are the giveaway you’d be looking for to check for thermal throttling.
Thermal throttling is the processor slowing down to protect itself, and it impacts your gaming experience rather devastatingly. Short boosts look fine, but prolonged loads like open-world traversal, shader compilation, and background tasks, all suffer. Your CPU may be technically powerful, but it can’t maintain that performance.
Upgrading your CPU while keeping an inadequate cooler is pointless, as you’ll bottleneck your brand-new chip with yesterday’s thermals. Of course, with a CPU upgrade in question, it’s important to know what platform you’re on and how far up the upgrade path you can go without having to change your current motherboard, too.
In a nutshell, cooling is foundational. So if you see clocks decaying over time or temperatures racing upward under modest load, fix your cooling first. Improve the CPU cooler, improve the airflow, and fix the mounting if needed. Sometimes, even a fresh coat of thermal paste could end up helping things along.
Diagnose your RAM to see if you need some more
RAM issues rarely show up as low average FPS
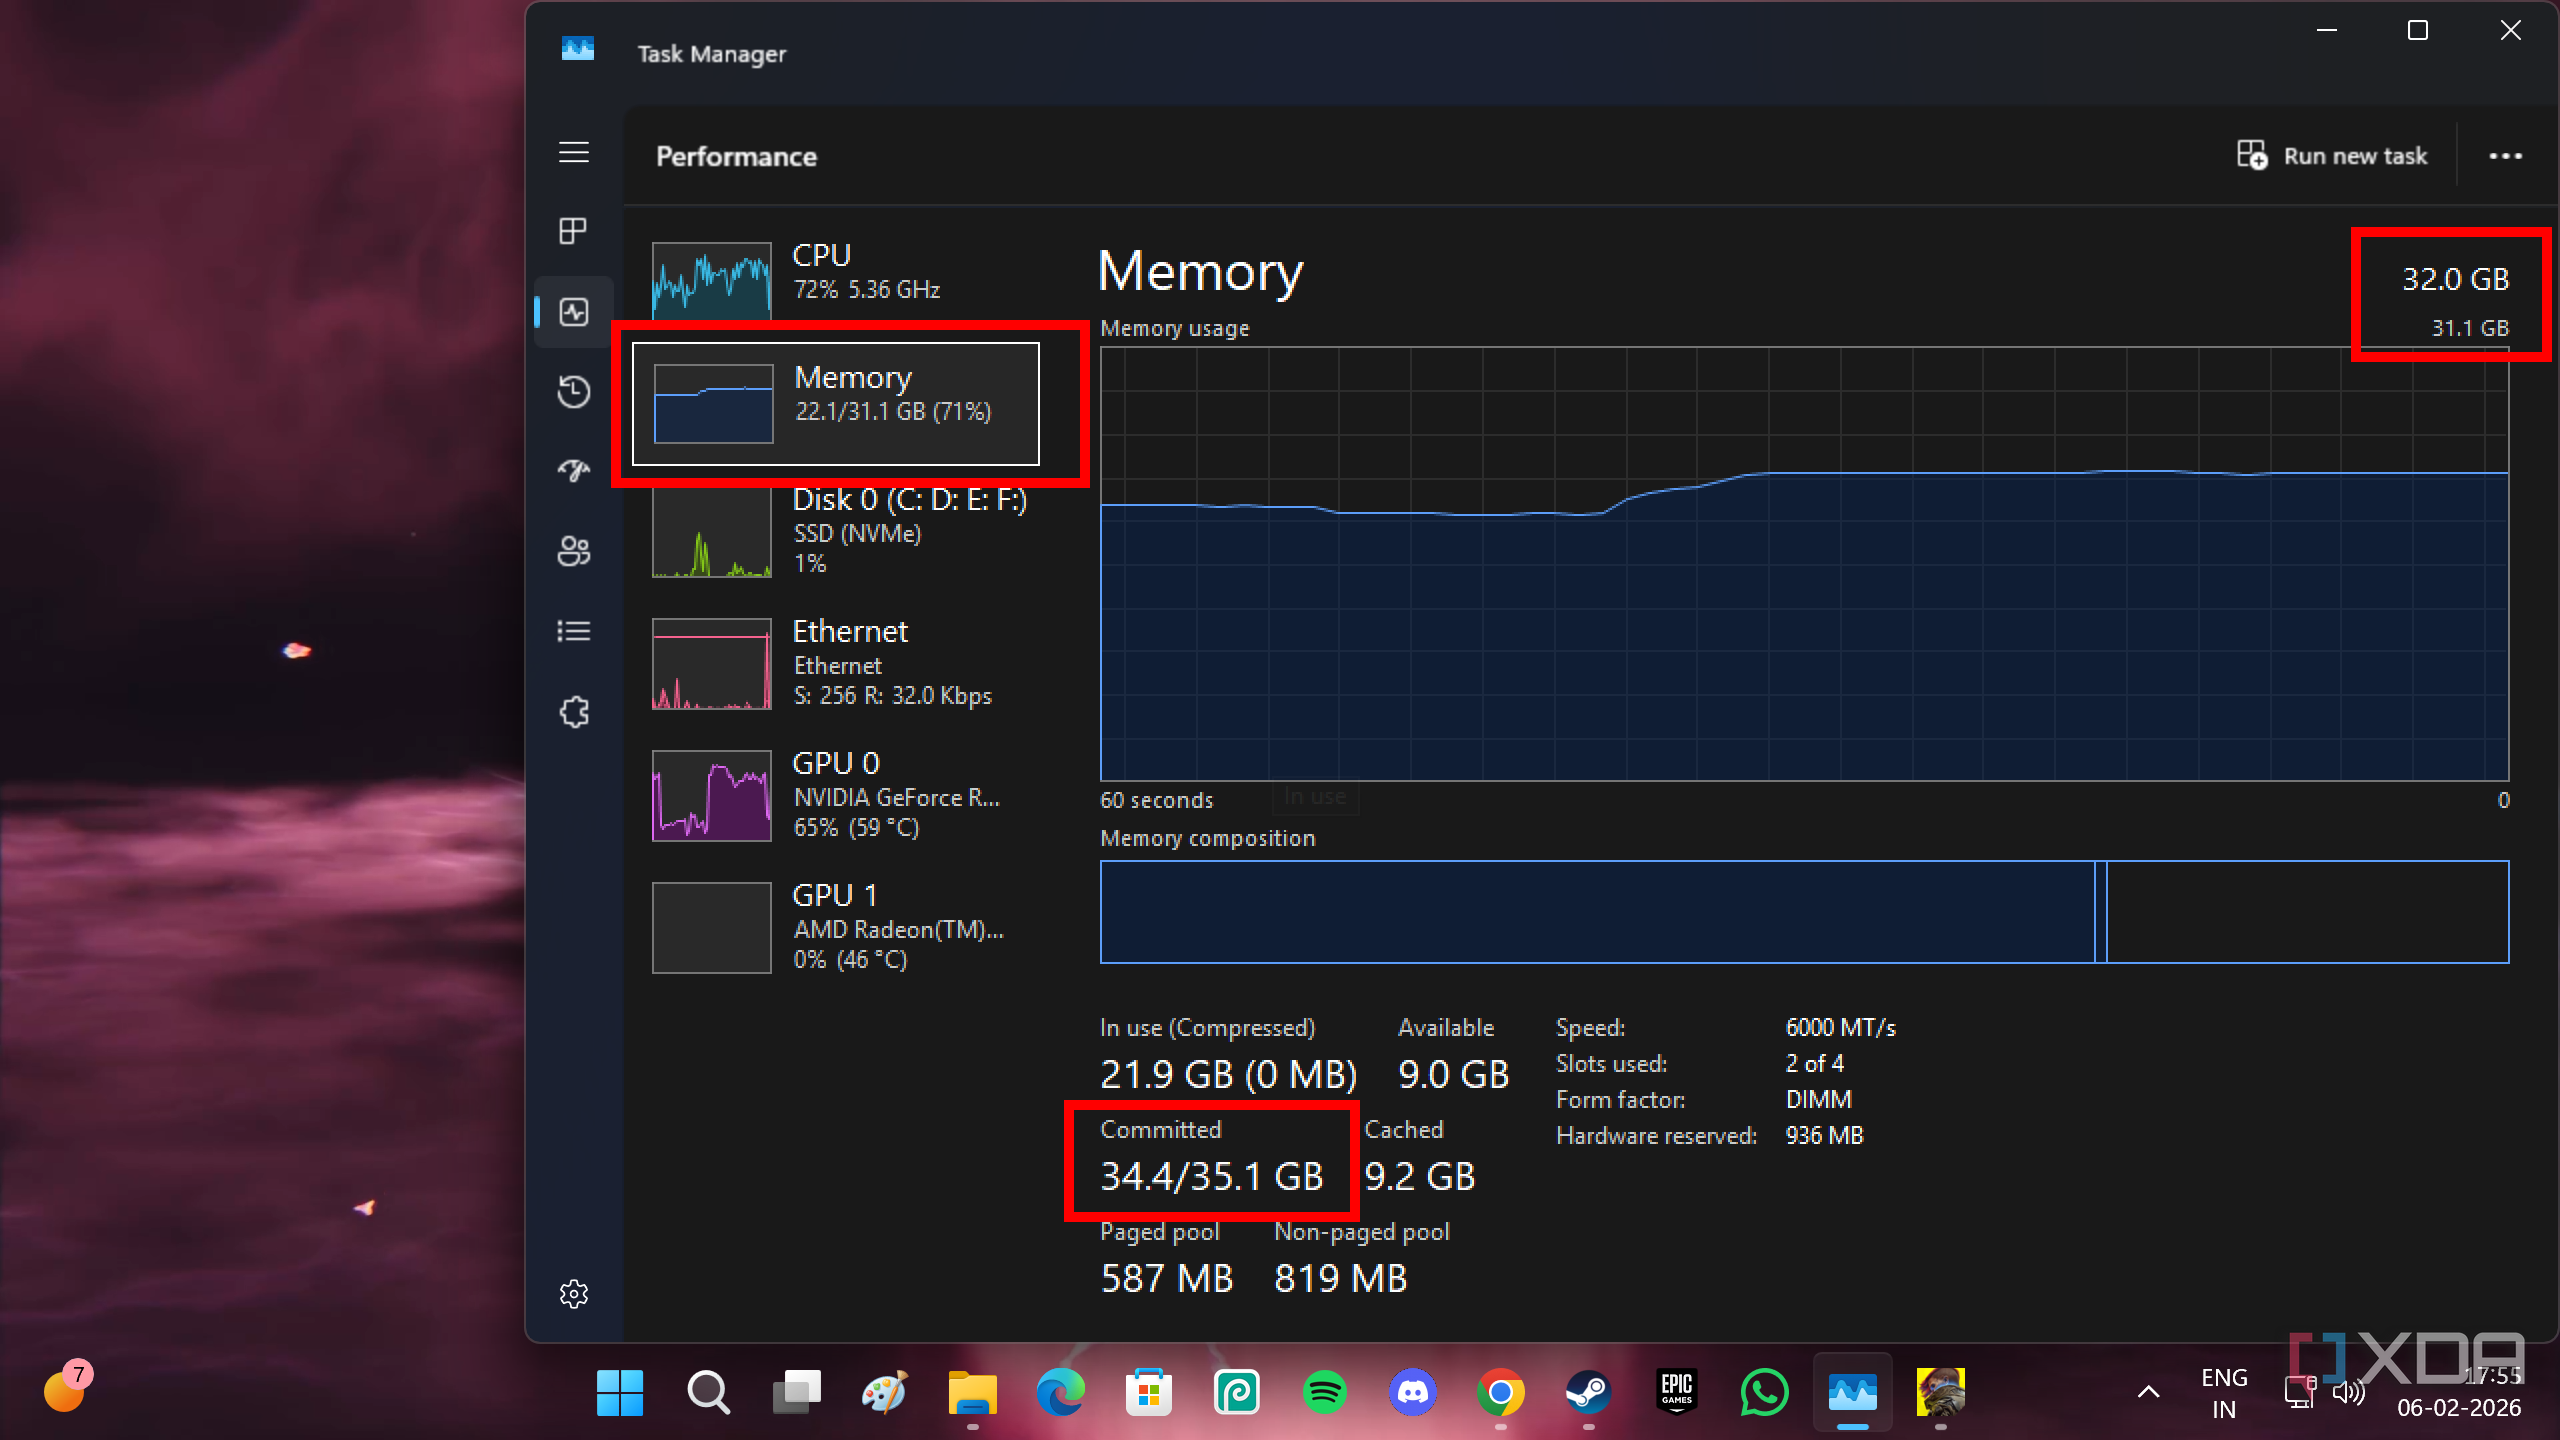
If you want to know whether or not you need more RAM, and it’s being used to its highest potential, keep a game running. Then, go ahead and open several browser tabs. Then, go ahead and open up Task Manager (Win+Shift+Esc), head into the Performance tab, and select Memory. Take a look at the Committed Memory information. If the Committed Memory exceeds your actual physical RAM capacity, that means the system is swapping to the SSD, which will cause stutters. It’s important to mention here that the test needs to be under your regular usage, and not under artificially-induced loads that you won’t ever recreate on a day-to-day basis.
Modern games paired with background apps chew through memory fast. If you’re sitting on 8GB or even a crowded 16GB, you’re living on borrowed time. Speed and configuration matter, too. Single-channel memory or slow kits reduce CPU efficiency, especially in gaming workloads that rely on rapid asset access. The symptoms are subtle but consistent: traversal stutter, inconsistent frametimes, and sluggish multitasking.
RAM upgrades won’t always boost headline FPS, but an extra couple of sticks when you get around to them will dramatically improve smoothness and system responsiveness. Of course, you’ll have to chase a rainbow to find the pot of gold at the end if you’re looking to buy new DDR5 RAM sticks in 2026. If your PC feels “busy” instead of fast, memory is often the culprit.
A monitor is the bottleneck everyone forgets
You might be leaving frames on the table
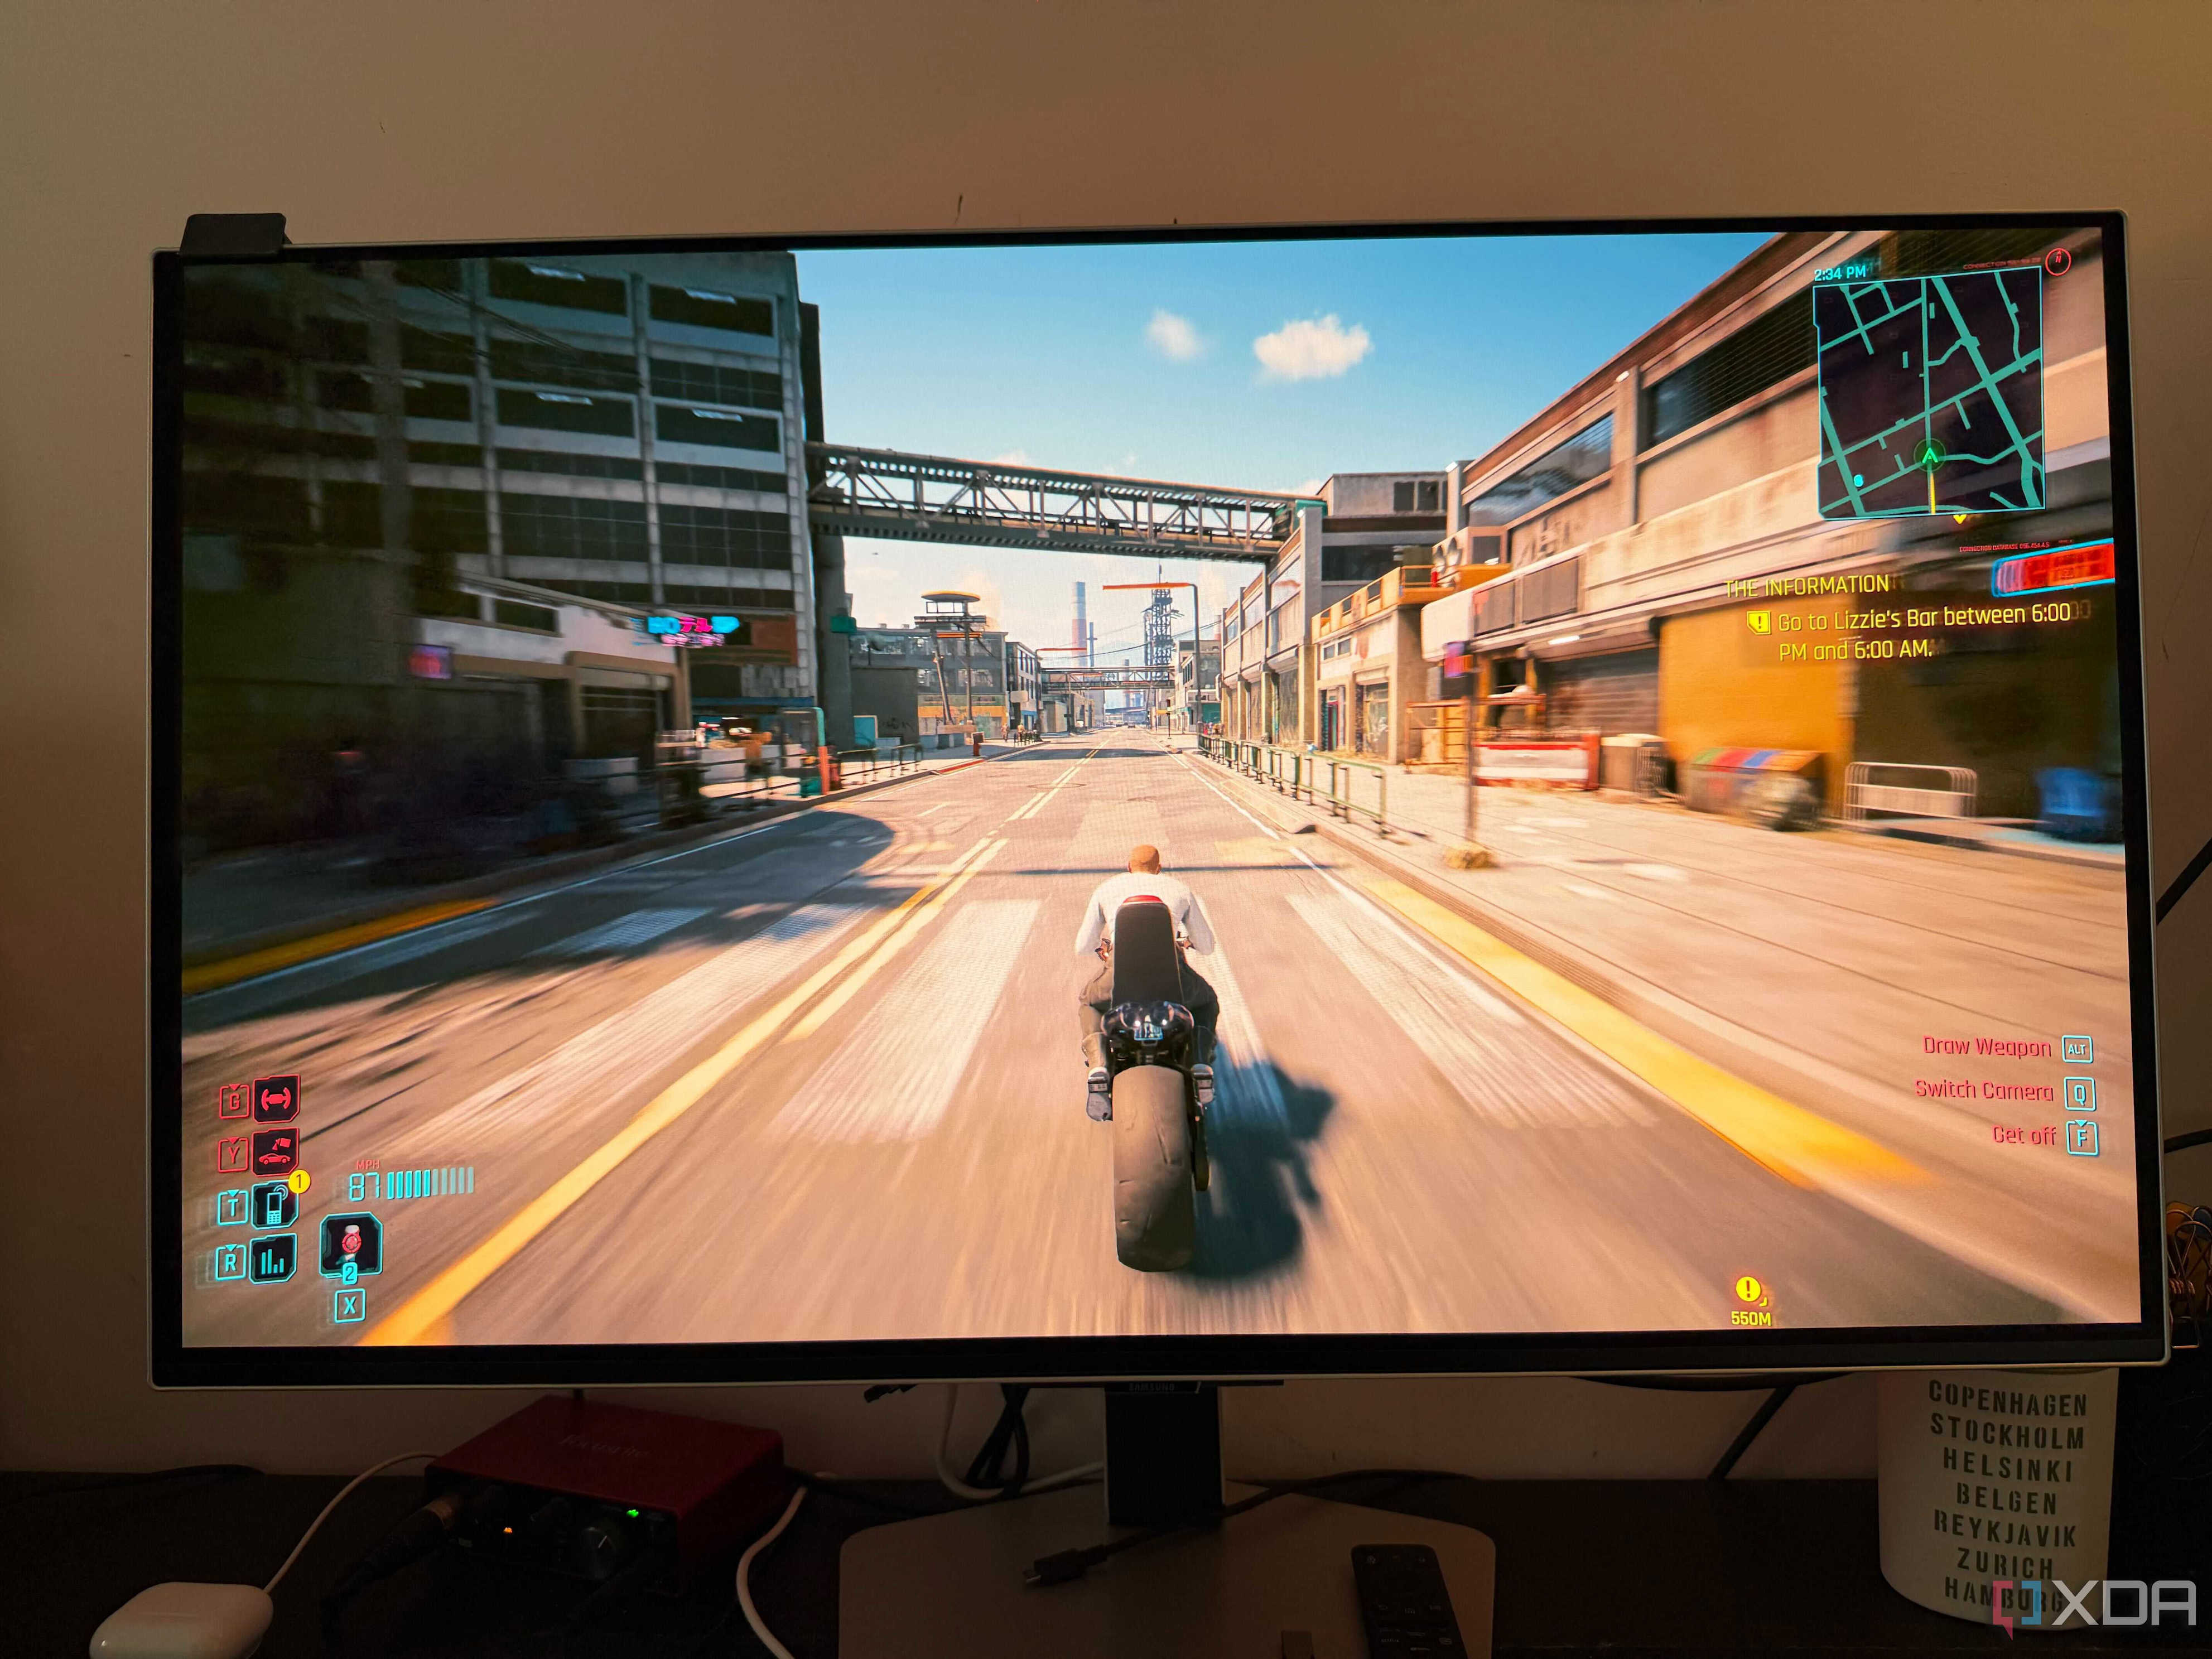
This is rare because it’s unlikely you would have a gaming PC without knowing your monitor in and out, but you’d still be surprised how many people don’t know their display is the biggest limiter in their setup. To check if it’s time to upgrade your display, go ahead and disable V-Sync in an older game. One where the graphics aren’t going to be a problem for even mid-range hardware. Think Counter-Strike 2 or Doom. Make sure you have uncapped the frame rate limit in the game’s settings, and then, compare the in-game FPS to your monitor’s refresh rate.
If your PC is pushing 130–150 FPS, and you’re staring at a 60Hz panel, you’re throwing away performance. You’ve already paid for frames you can’t see. Next, to see if you need to go one step further vis-à-vis monitor resolution, just check for your graphics card utilization. If it’s not between 95% and 99% while running a game while your CPU maxes out, the latter is having to do more heavy lifting than it’s cut out for. If your GPU usage is in the 80% range or lower, then you definitely have the headroom on your GPU to move to a 1440p resolution display for a better visual experience without losing significant performance.
Alternatively, you can always just use DSR on NVIDIA GPUs (or VSR on AMD) to move to a higher resolution for testing without ever swapping out your display. On NVIDIA, open the NVIDIA Control Panel and select Manage 3D settings. Here, in the Global Settings tab, click on DSR – Factors and select 1.78x DL for 1440p, or 2.25x DL for 4K. Once applied, hit Apply, and you’ll have unlocked a higher resolution in your display tab, as well as in your games. Choose the higher resolution you want to test, and see if performance has dipped significantly or remains the same even on a new resolution.
Make sure your “Scaling” is set to ‘No Scaling’ and “Perform scaling on” is set to GPU instead of Display in the Adjust desktop size and position menu inside the NVIDIA Control Panel.
If you notice little to no difference in your average FPS in your usual games with your graphics preset, that means you can definitely move up in resolution. What you’ll get is improved visual quality without a graphics or performance hit.
Running diagnostics to determine upgrades is the only way
Diagnose first, buy second.
This method removes emotion from the equation. You don’t upgrade based on marketing cycles or influencer builds, and instead upgrade based on measurable limits inside your system. By forcing bottlenecks and observing real behavior, you’ll be able to identify exactly where performance collapses first, whether thermally, electrically, or visually.
Diagnose first, buy second. After all, PC upgrades should never be reactive purchases, and must always be targeted fixes that will improve the overall quality of your user experience. That’s how you build a machine that evolves intelligently instead of expensively.
Finished reading? There’s more to explore.
Leave a Reply