
Marantz has been on a strong run lately. It’s been a little over a year and a half since the company introduced its flagship AV 10, a 15.4-channel processor, alongside the AMP 10, a 16-channel power amplifier rated at 200 watts into 8 ohms. That pairing has earned plenty of praise here on the forums. About six months later, Marantz followed up with the AV 20 and AMP 20, which effectively bridged the gap between the Cinema 30 and the AV 10. For many users, that combo landed right in the sweet spot. Shortly after CES this year, the company announced two new components in the form of the AV 30 and AMP 30.
Features
Starting with the AV 30, this is an 11.4-channel preamplifier that supports a full 7.4.4 speaker layout. That covers the three front channels, a complete surround and rear surround array, four height speakers, and support for up to four independently calibrated subwoofers. While it sits below the AV 20’s 13.4-channel capability, the reality is that most systems just don’t require that many channels. In that sense, the AV 30 feels positioned as the new practical sweet spot in the lineup.
RECOMMENDED FOR YOU
It supports just about every format you’d expect at this level, including Dolby Atmos, DTS:X, IMAX Enhanced, 360 Reality Audio, and even Auro 3D. Like most Marantz gear, HEOS streaming is built in, along with Bluetooth, and also supports Roon Ready. Room correction includes Audyssey MultEQ XT32 out of the box, but you can also purchase Dirac Live separately. That unlocks Dirac Live Room Correction and, if you want to go further, Dirac Bass Control and even Dirac Active Room Treatment (ART).
The AV 30 isn’t simply an AV 20 with fewer channels, though. The internal architecture differs in a couple of different areas. The AV 30 uses two ESS High Performance DACs, while the AV 20 and AV 10 rely on multiple stereo DACs from the ESS Reference line. In fact, the DAC implementation in the AV 20 is significantly more expensive overall than what’s used in the AV 30. The HDAM topology is also different. The AV 20 employs 17 HDAM SA3 modules, whereas the AV 30 uses a single 15-channel HDAM SA2 board. Even the chassis construction changes, with copper-plated internals on the AV 20 and AV 10, compared to a steel chassis in the AV 30.
Moving over to the AMP 30, this is a (Marantz Original) 6-channel Class D power amplifier, and it represents a slightly different approach compared to the AMP 10 and AMP 20. Instead of maximizing channel count, Marantz focused on higher output per channel within a slimmer form factor. The AMP 30 is rated at 200 watts per channel into 8 ohms with two channels driven, and it can deliver 400 watts per channel into 4 ohms. If more power is needed, channels can be bridged to provide 400 watts into 8 ohms, which effectively allows the amplifier to operate as a high-power three-channel unit.
Design
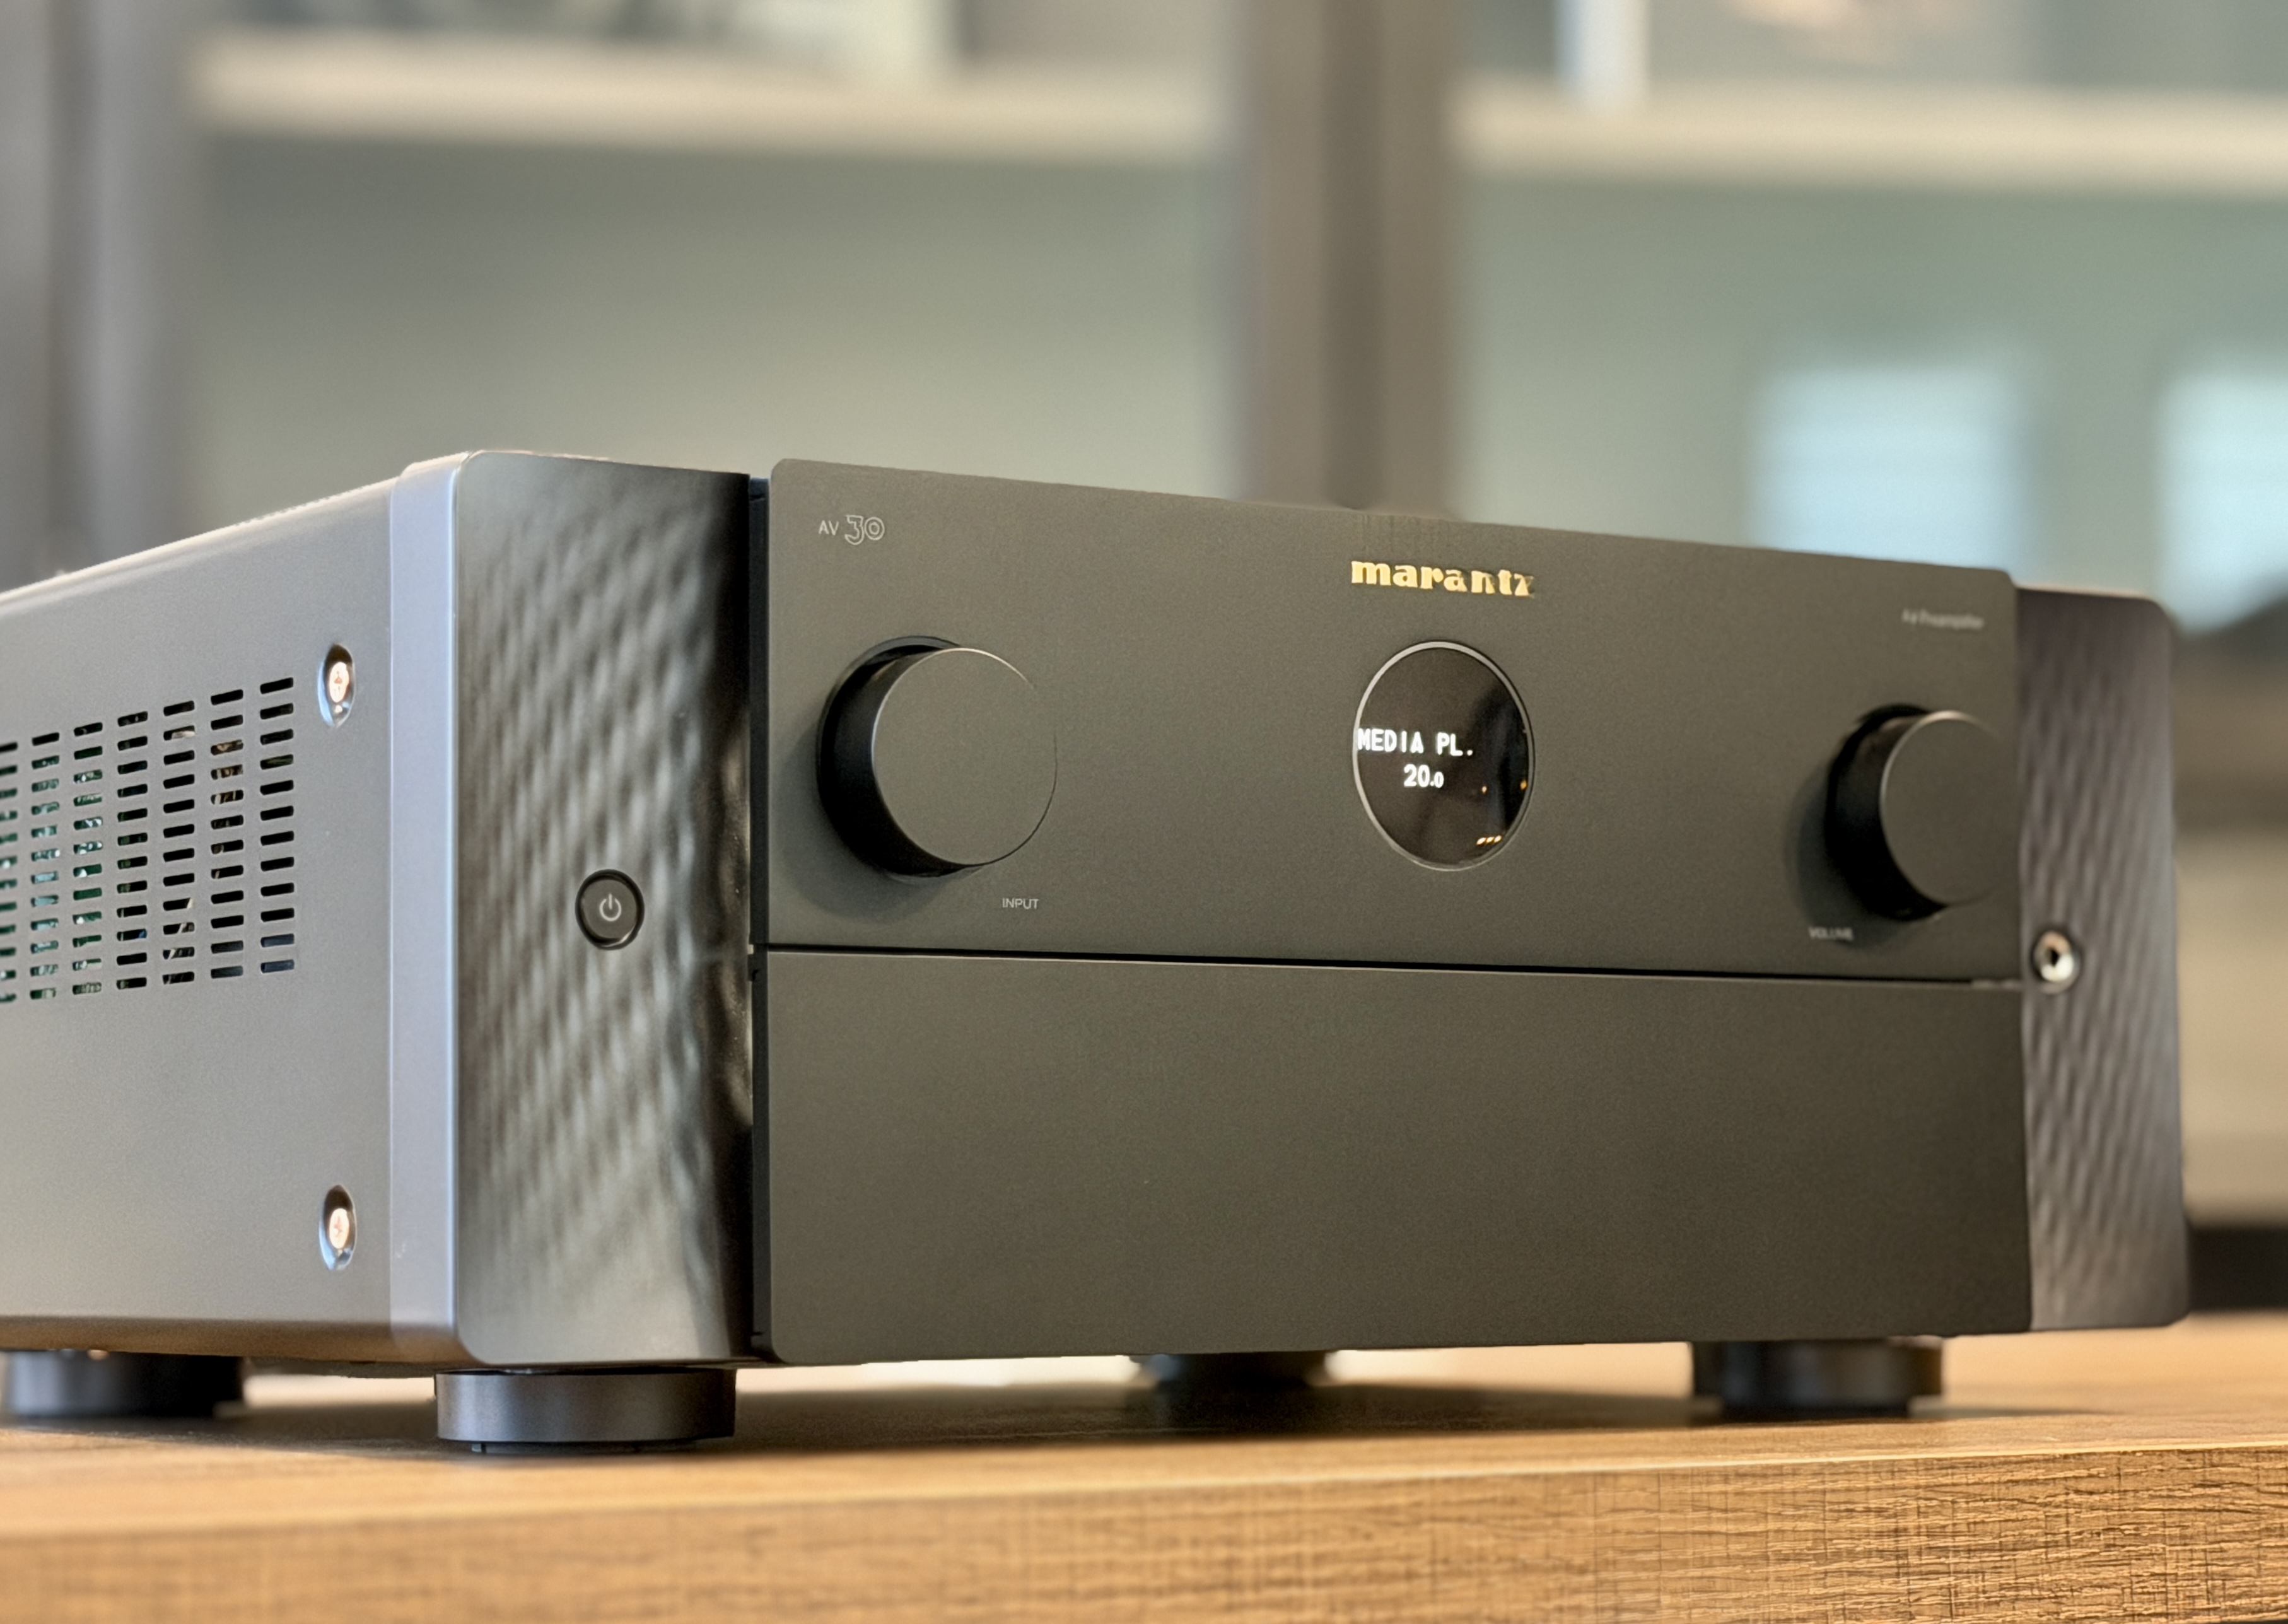
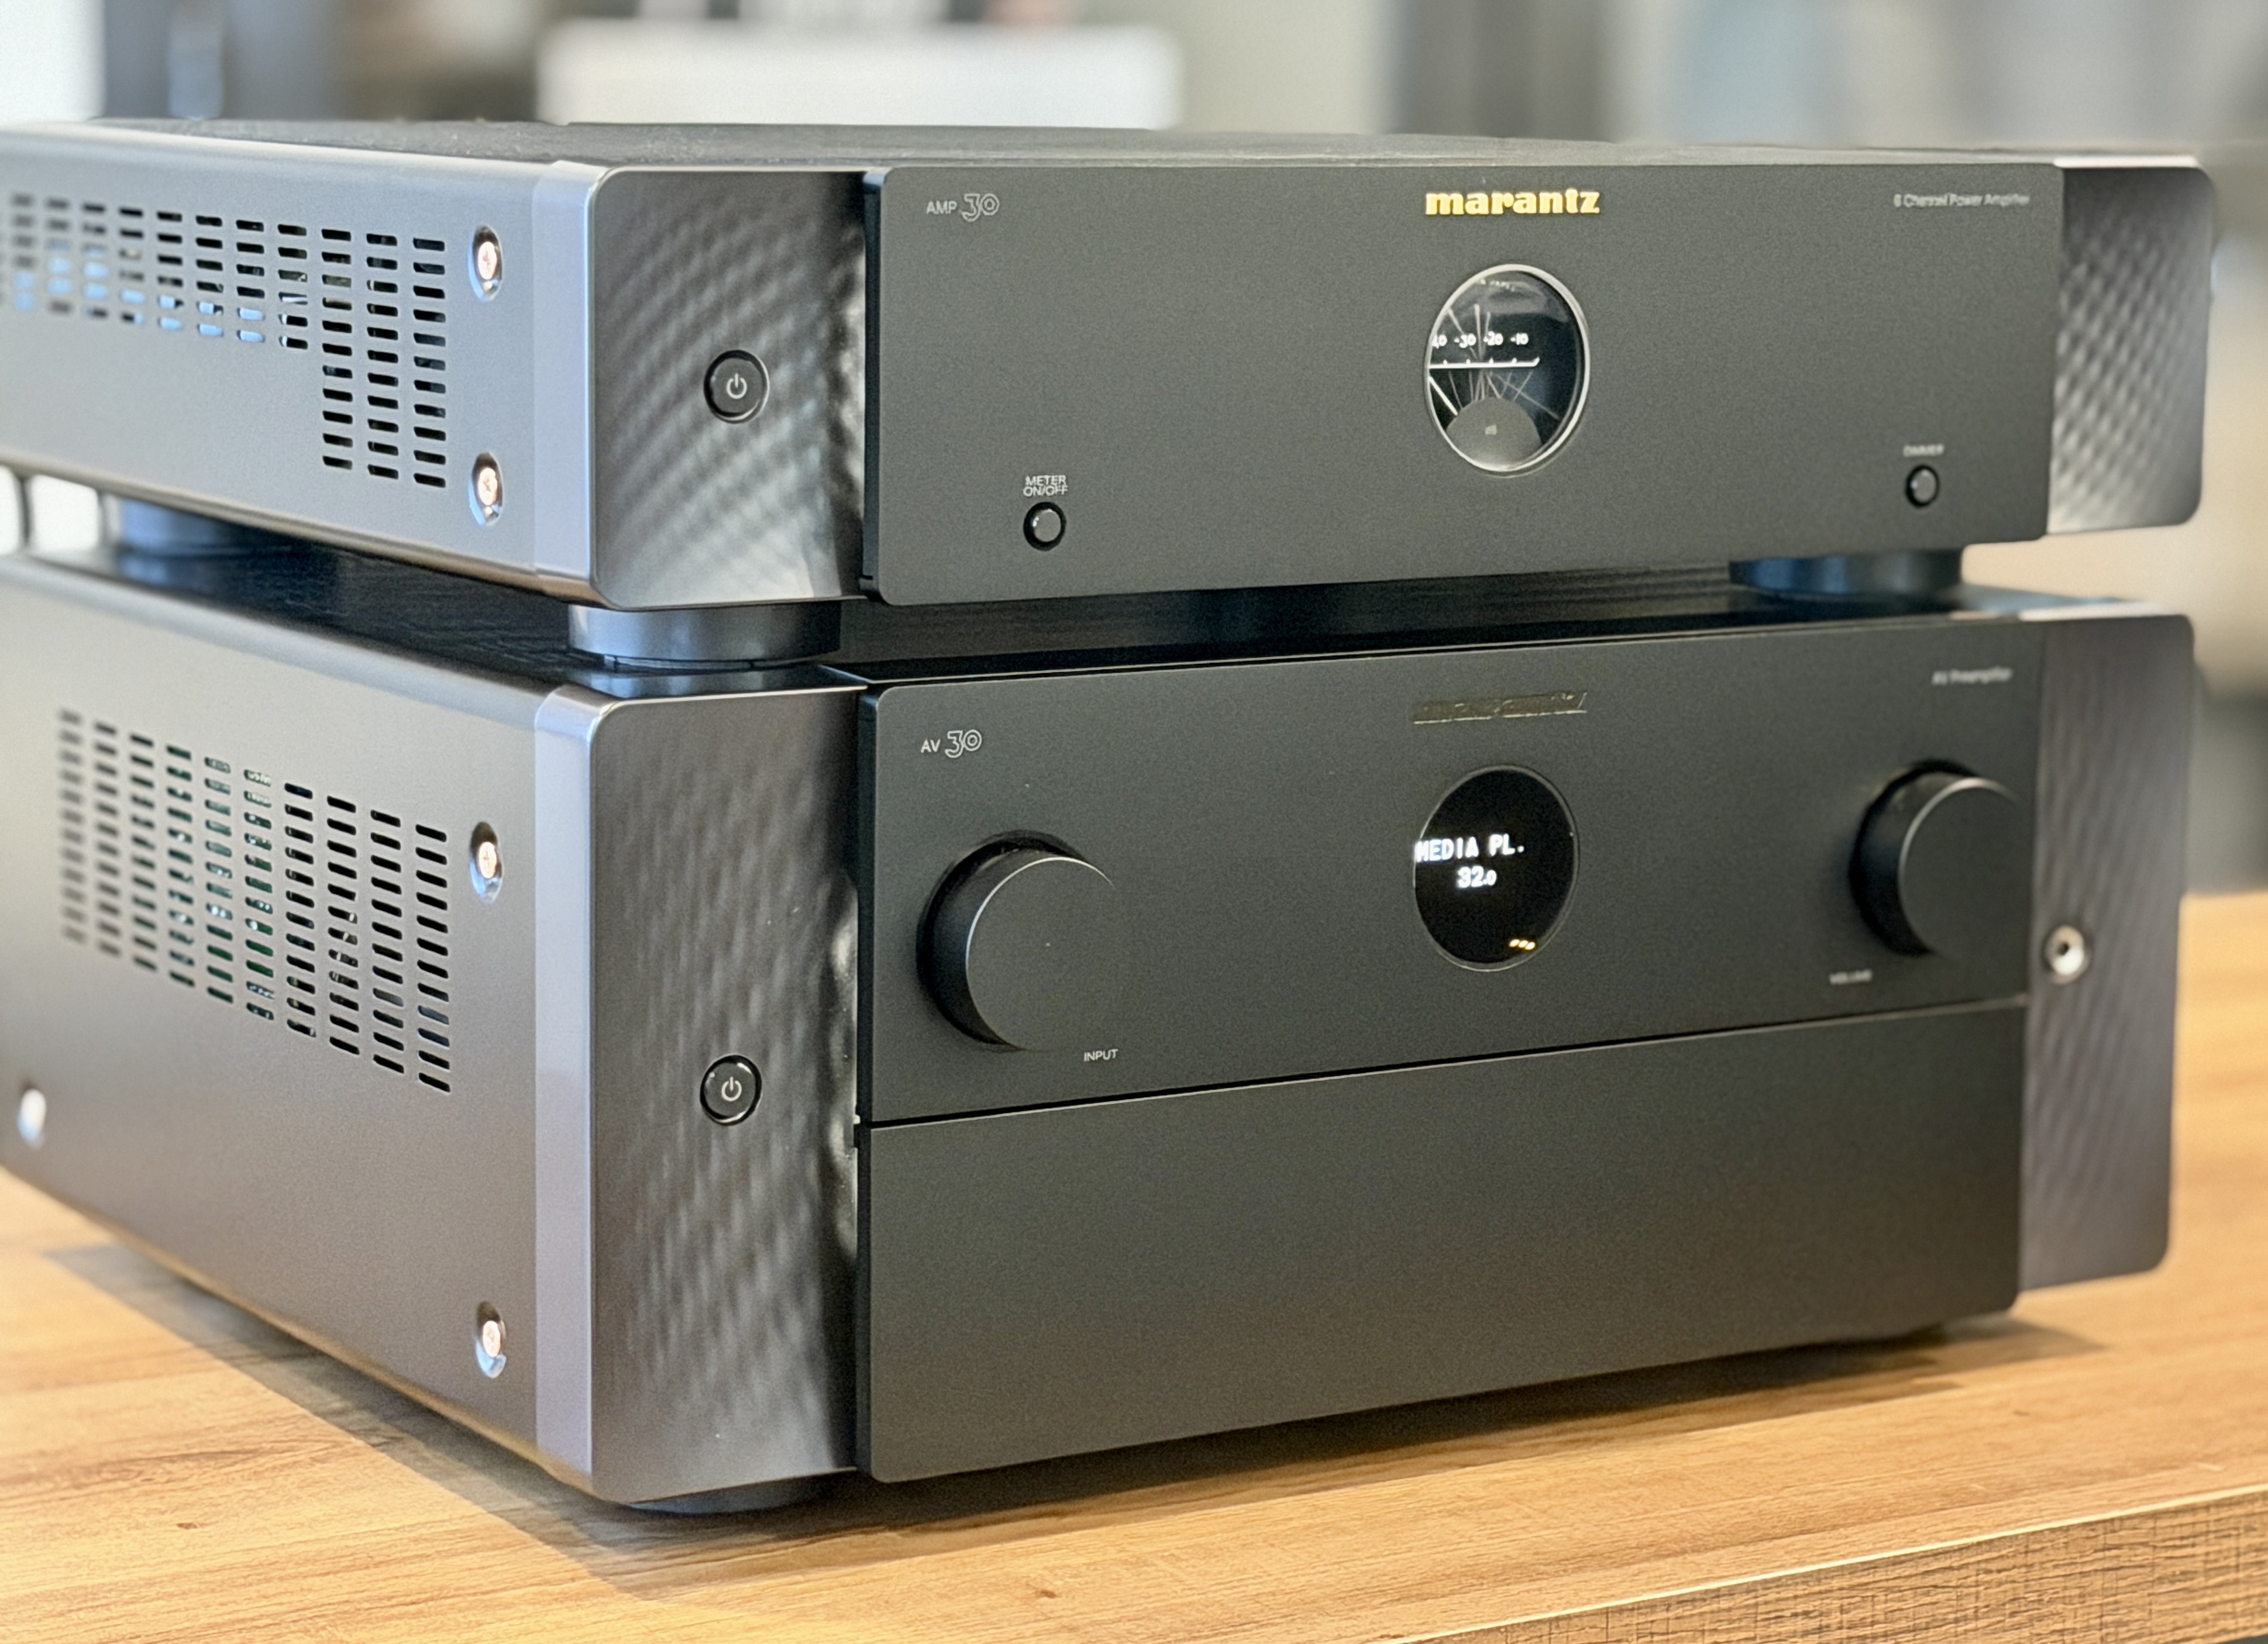
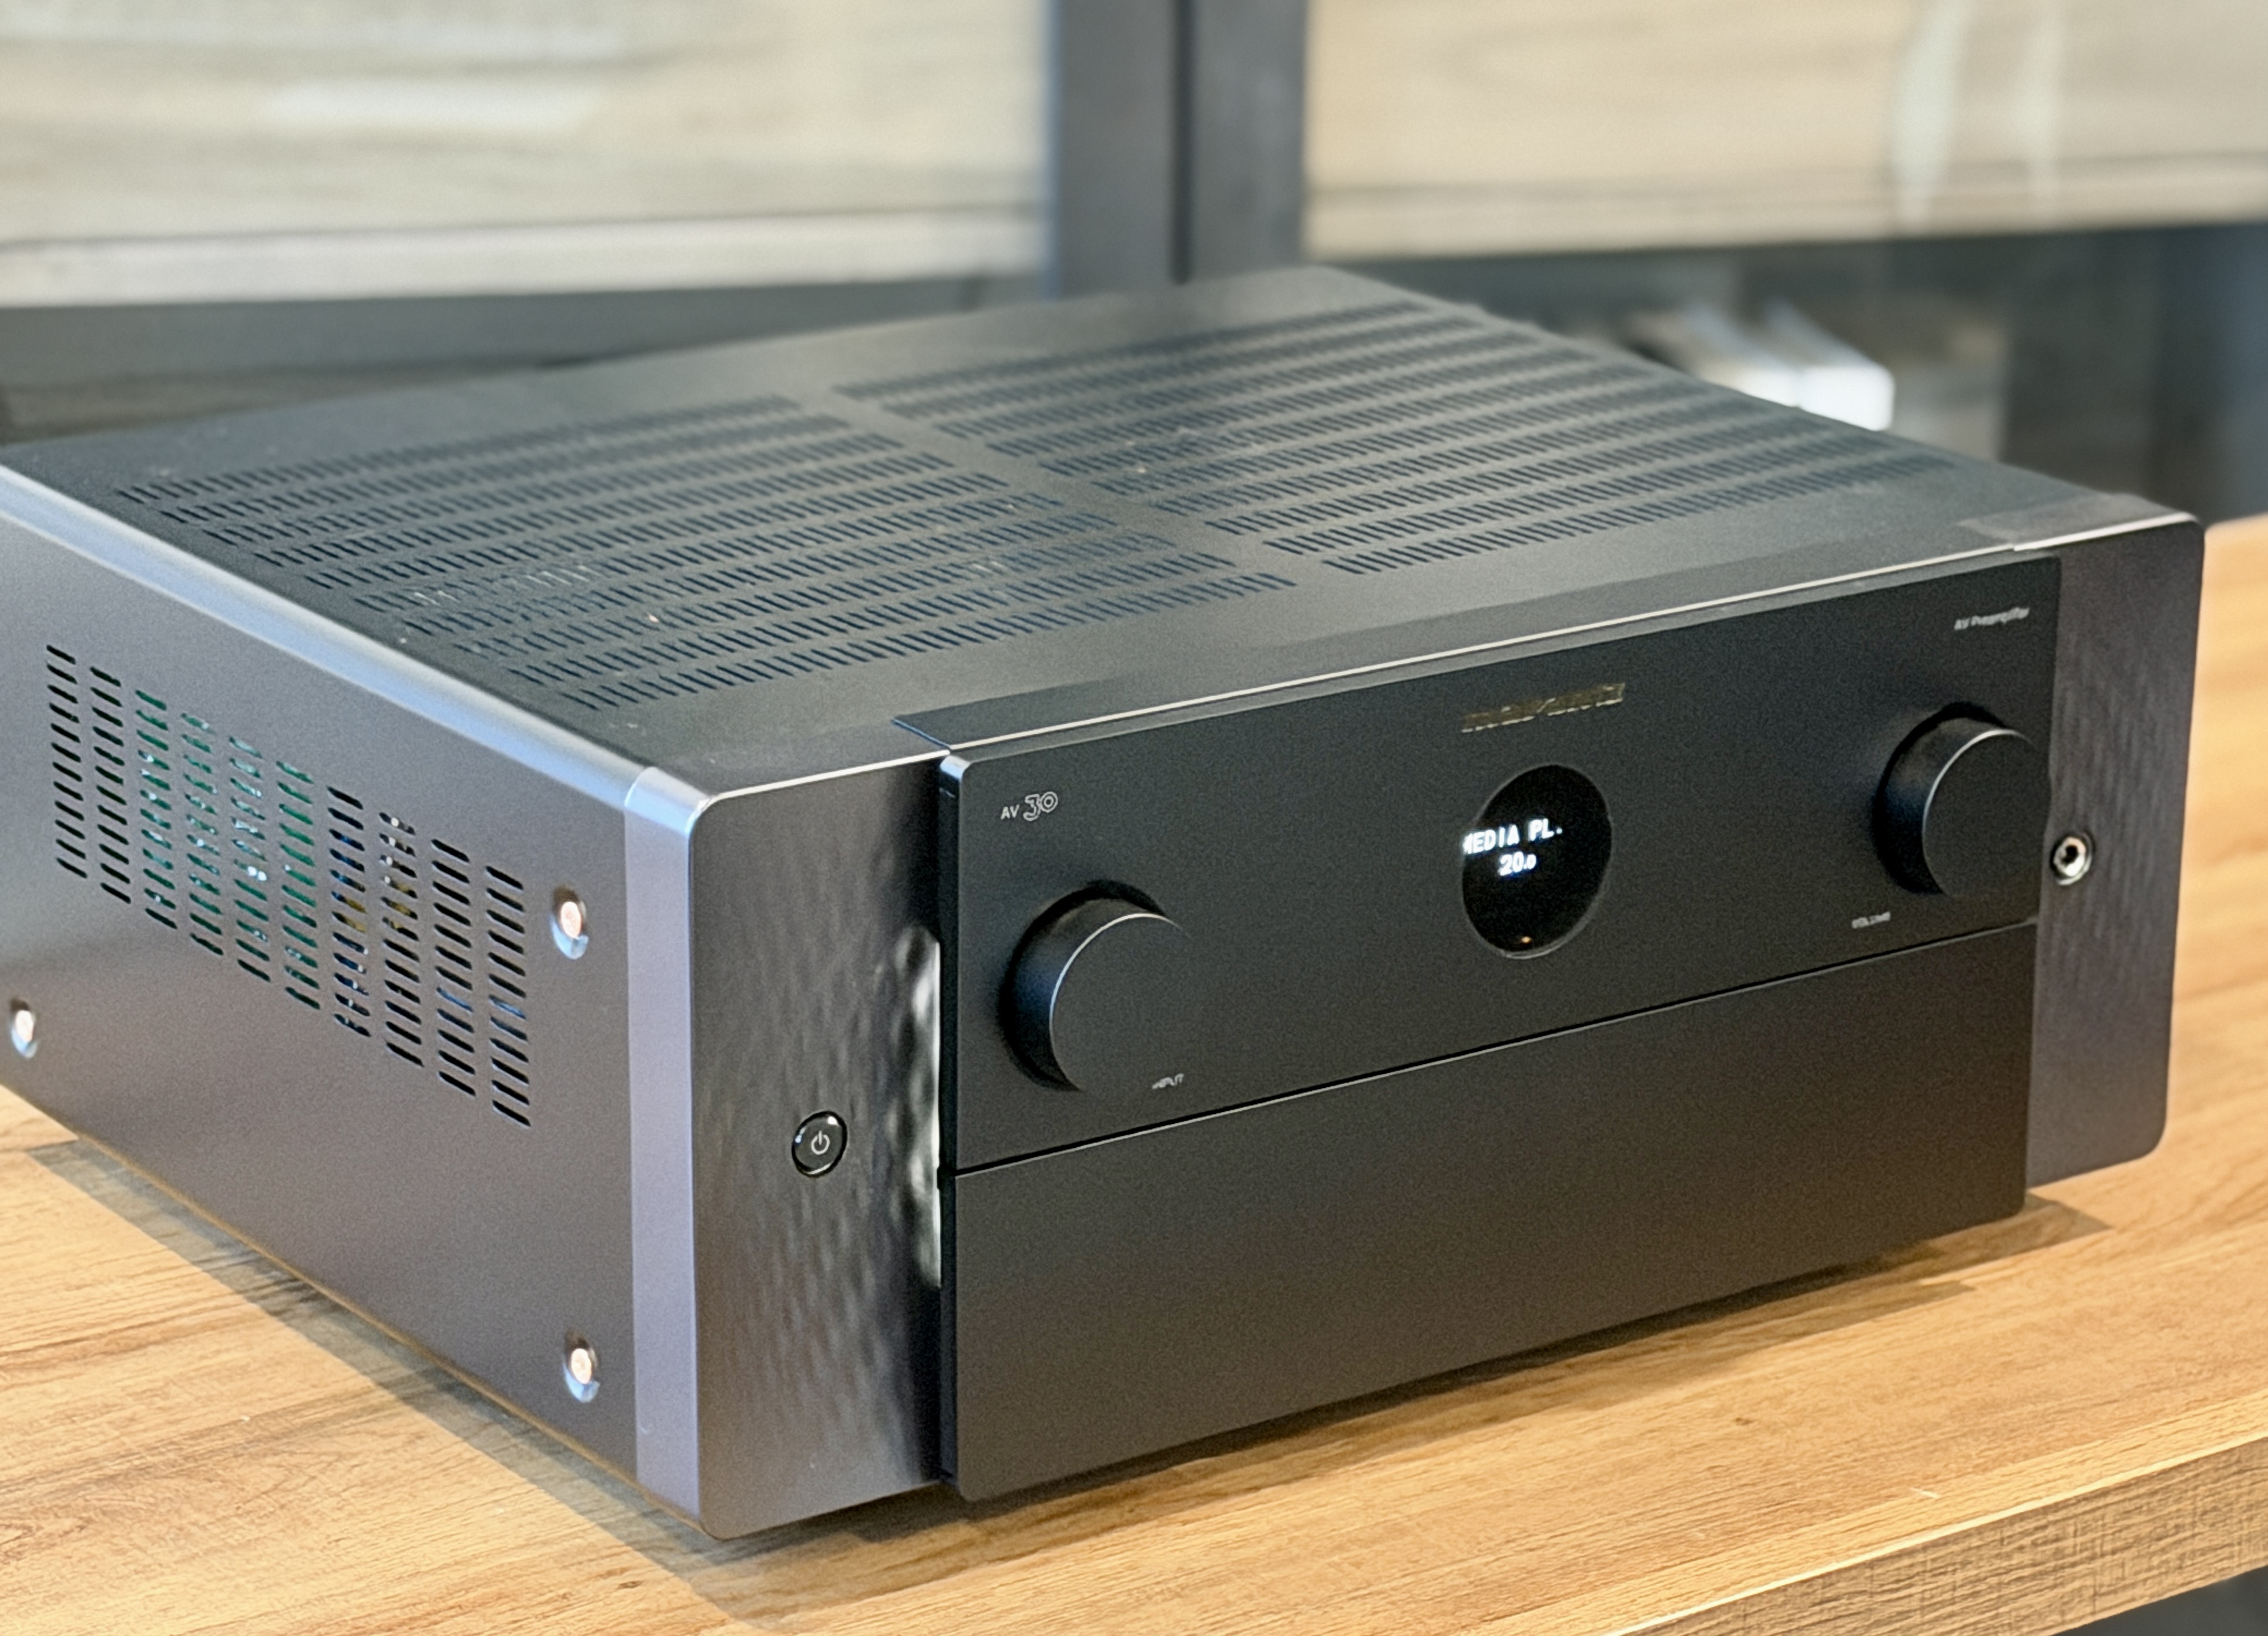
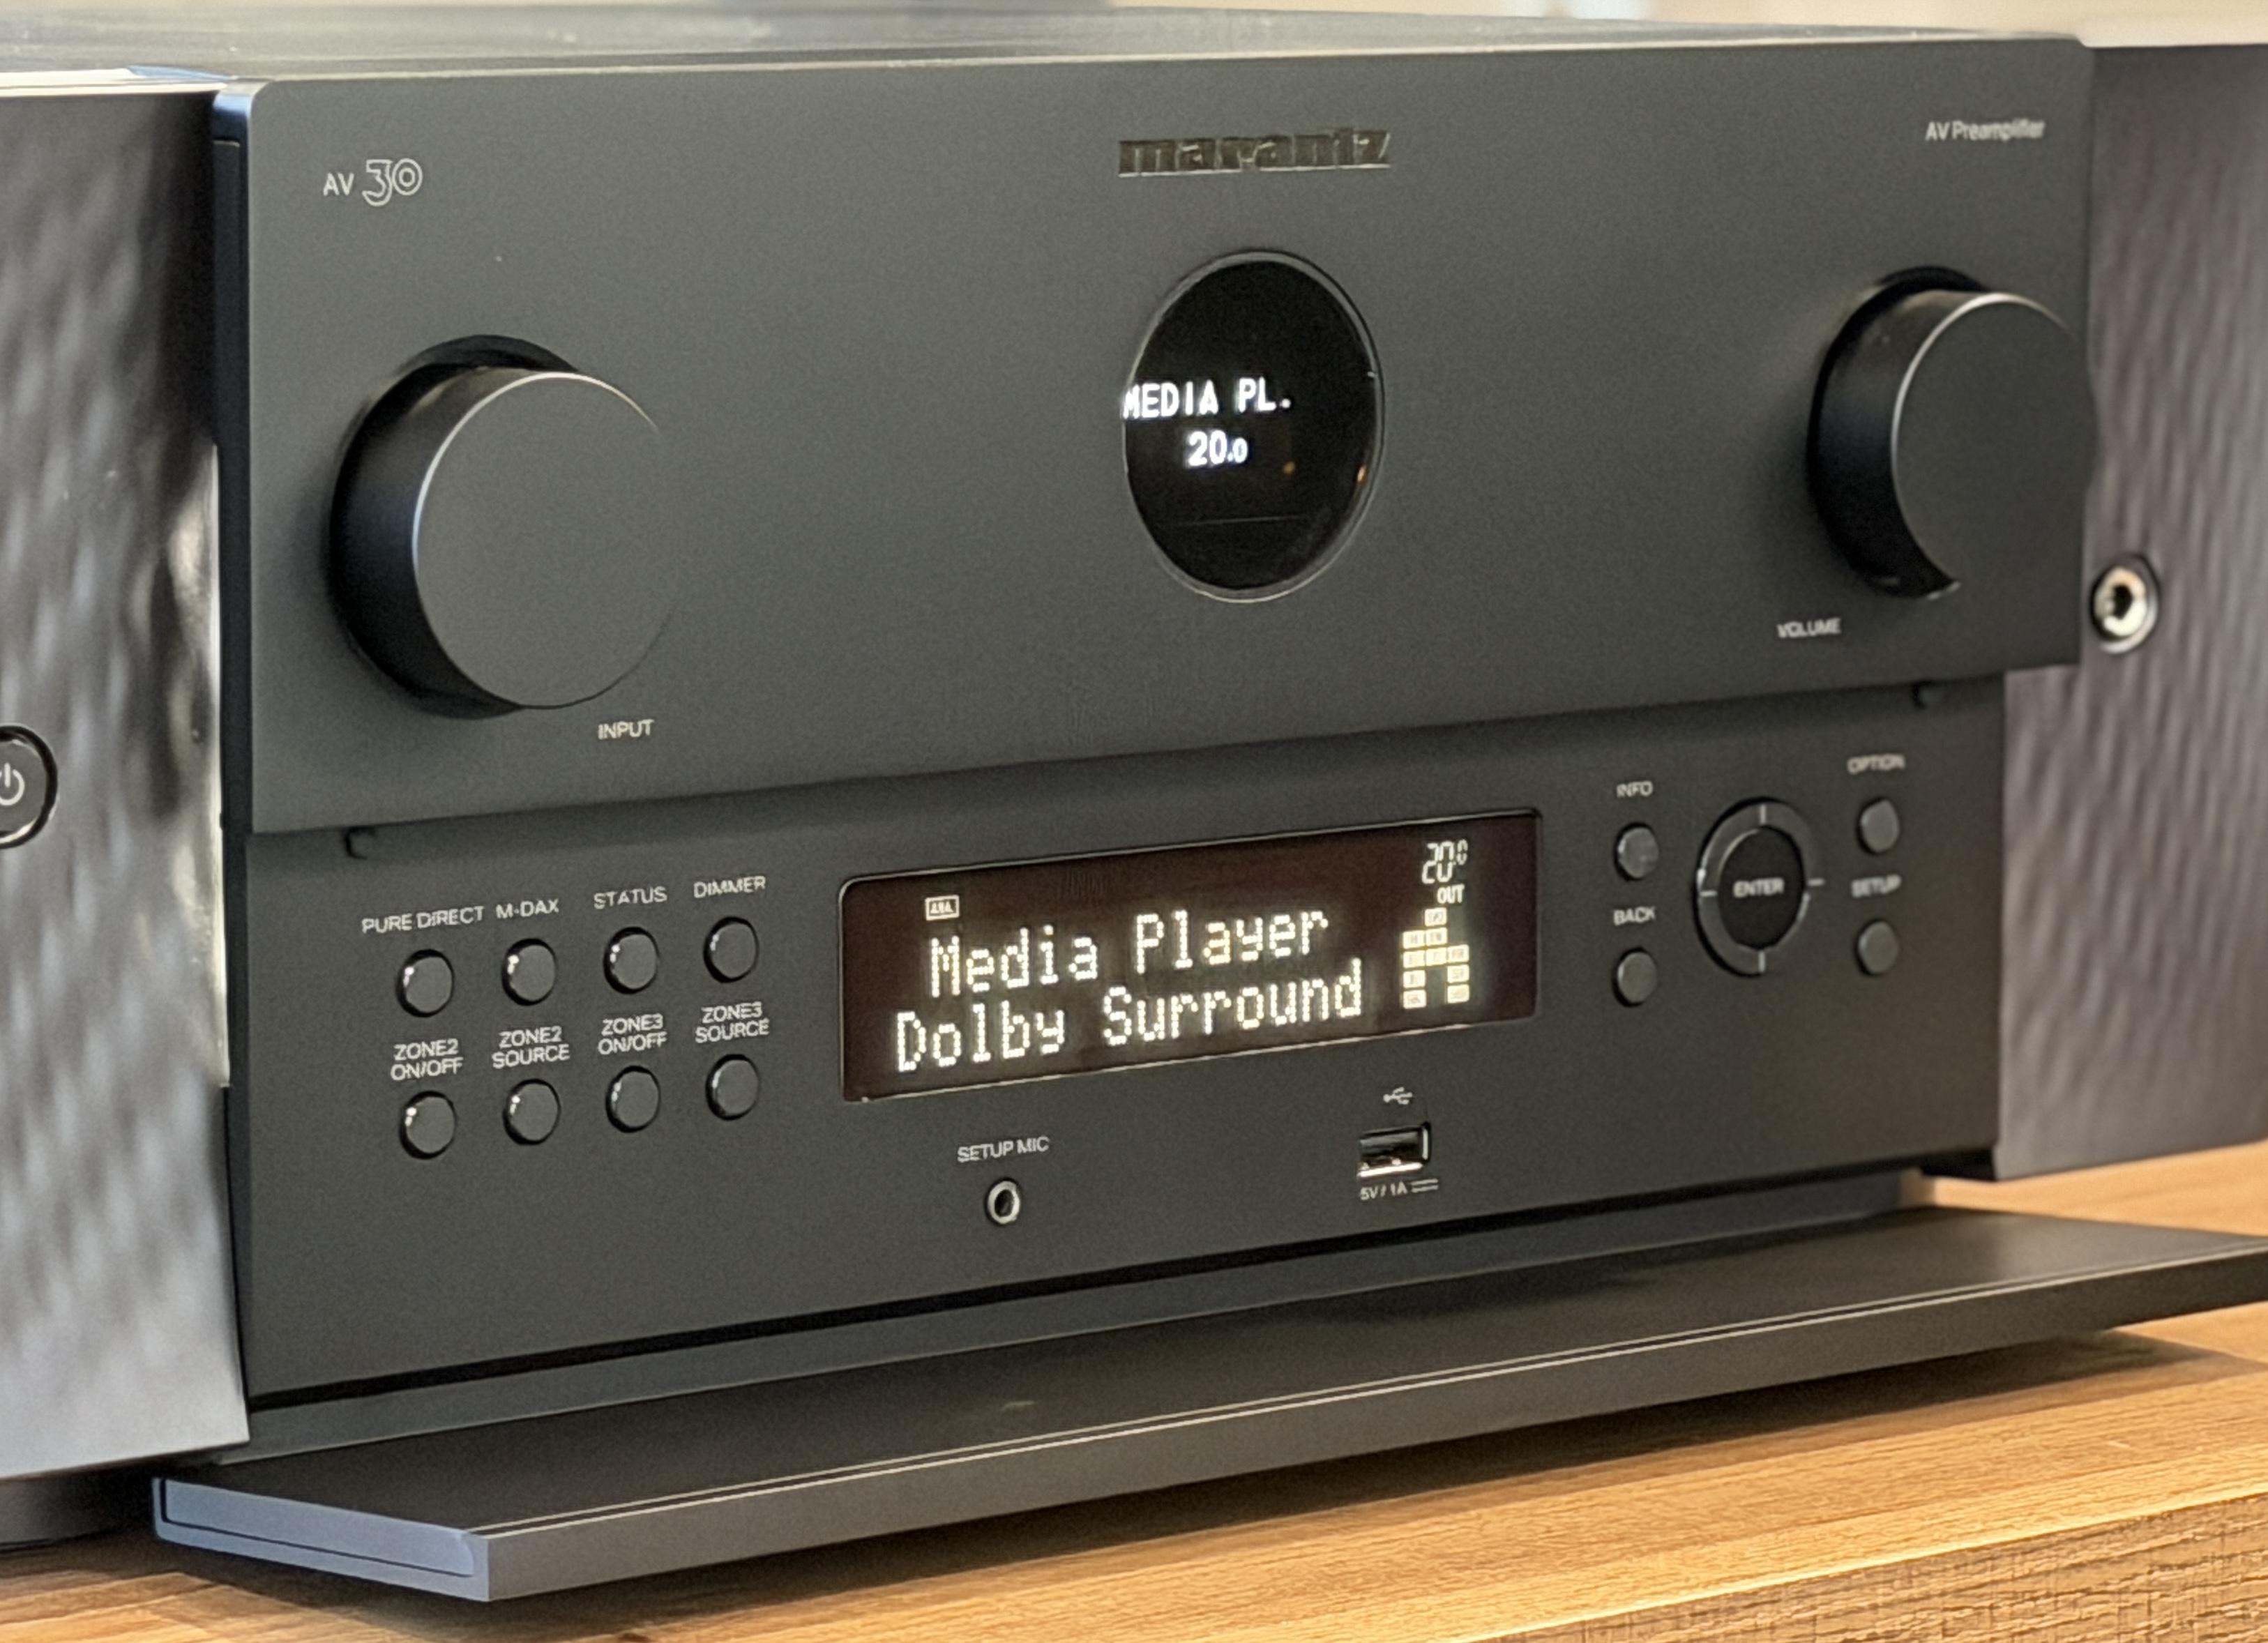
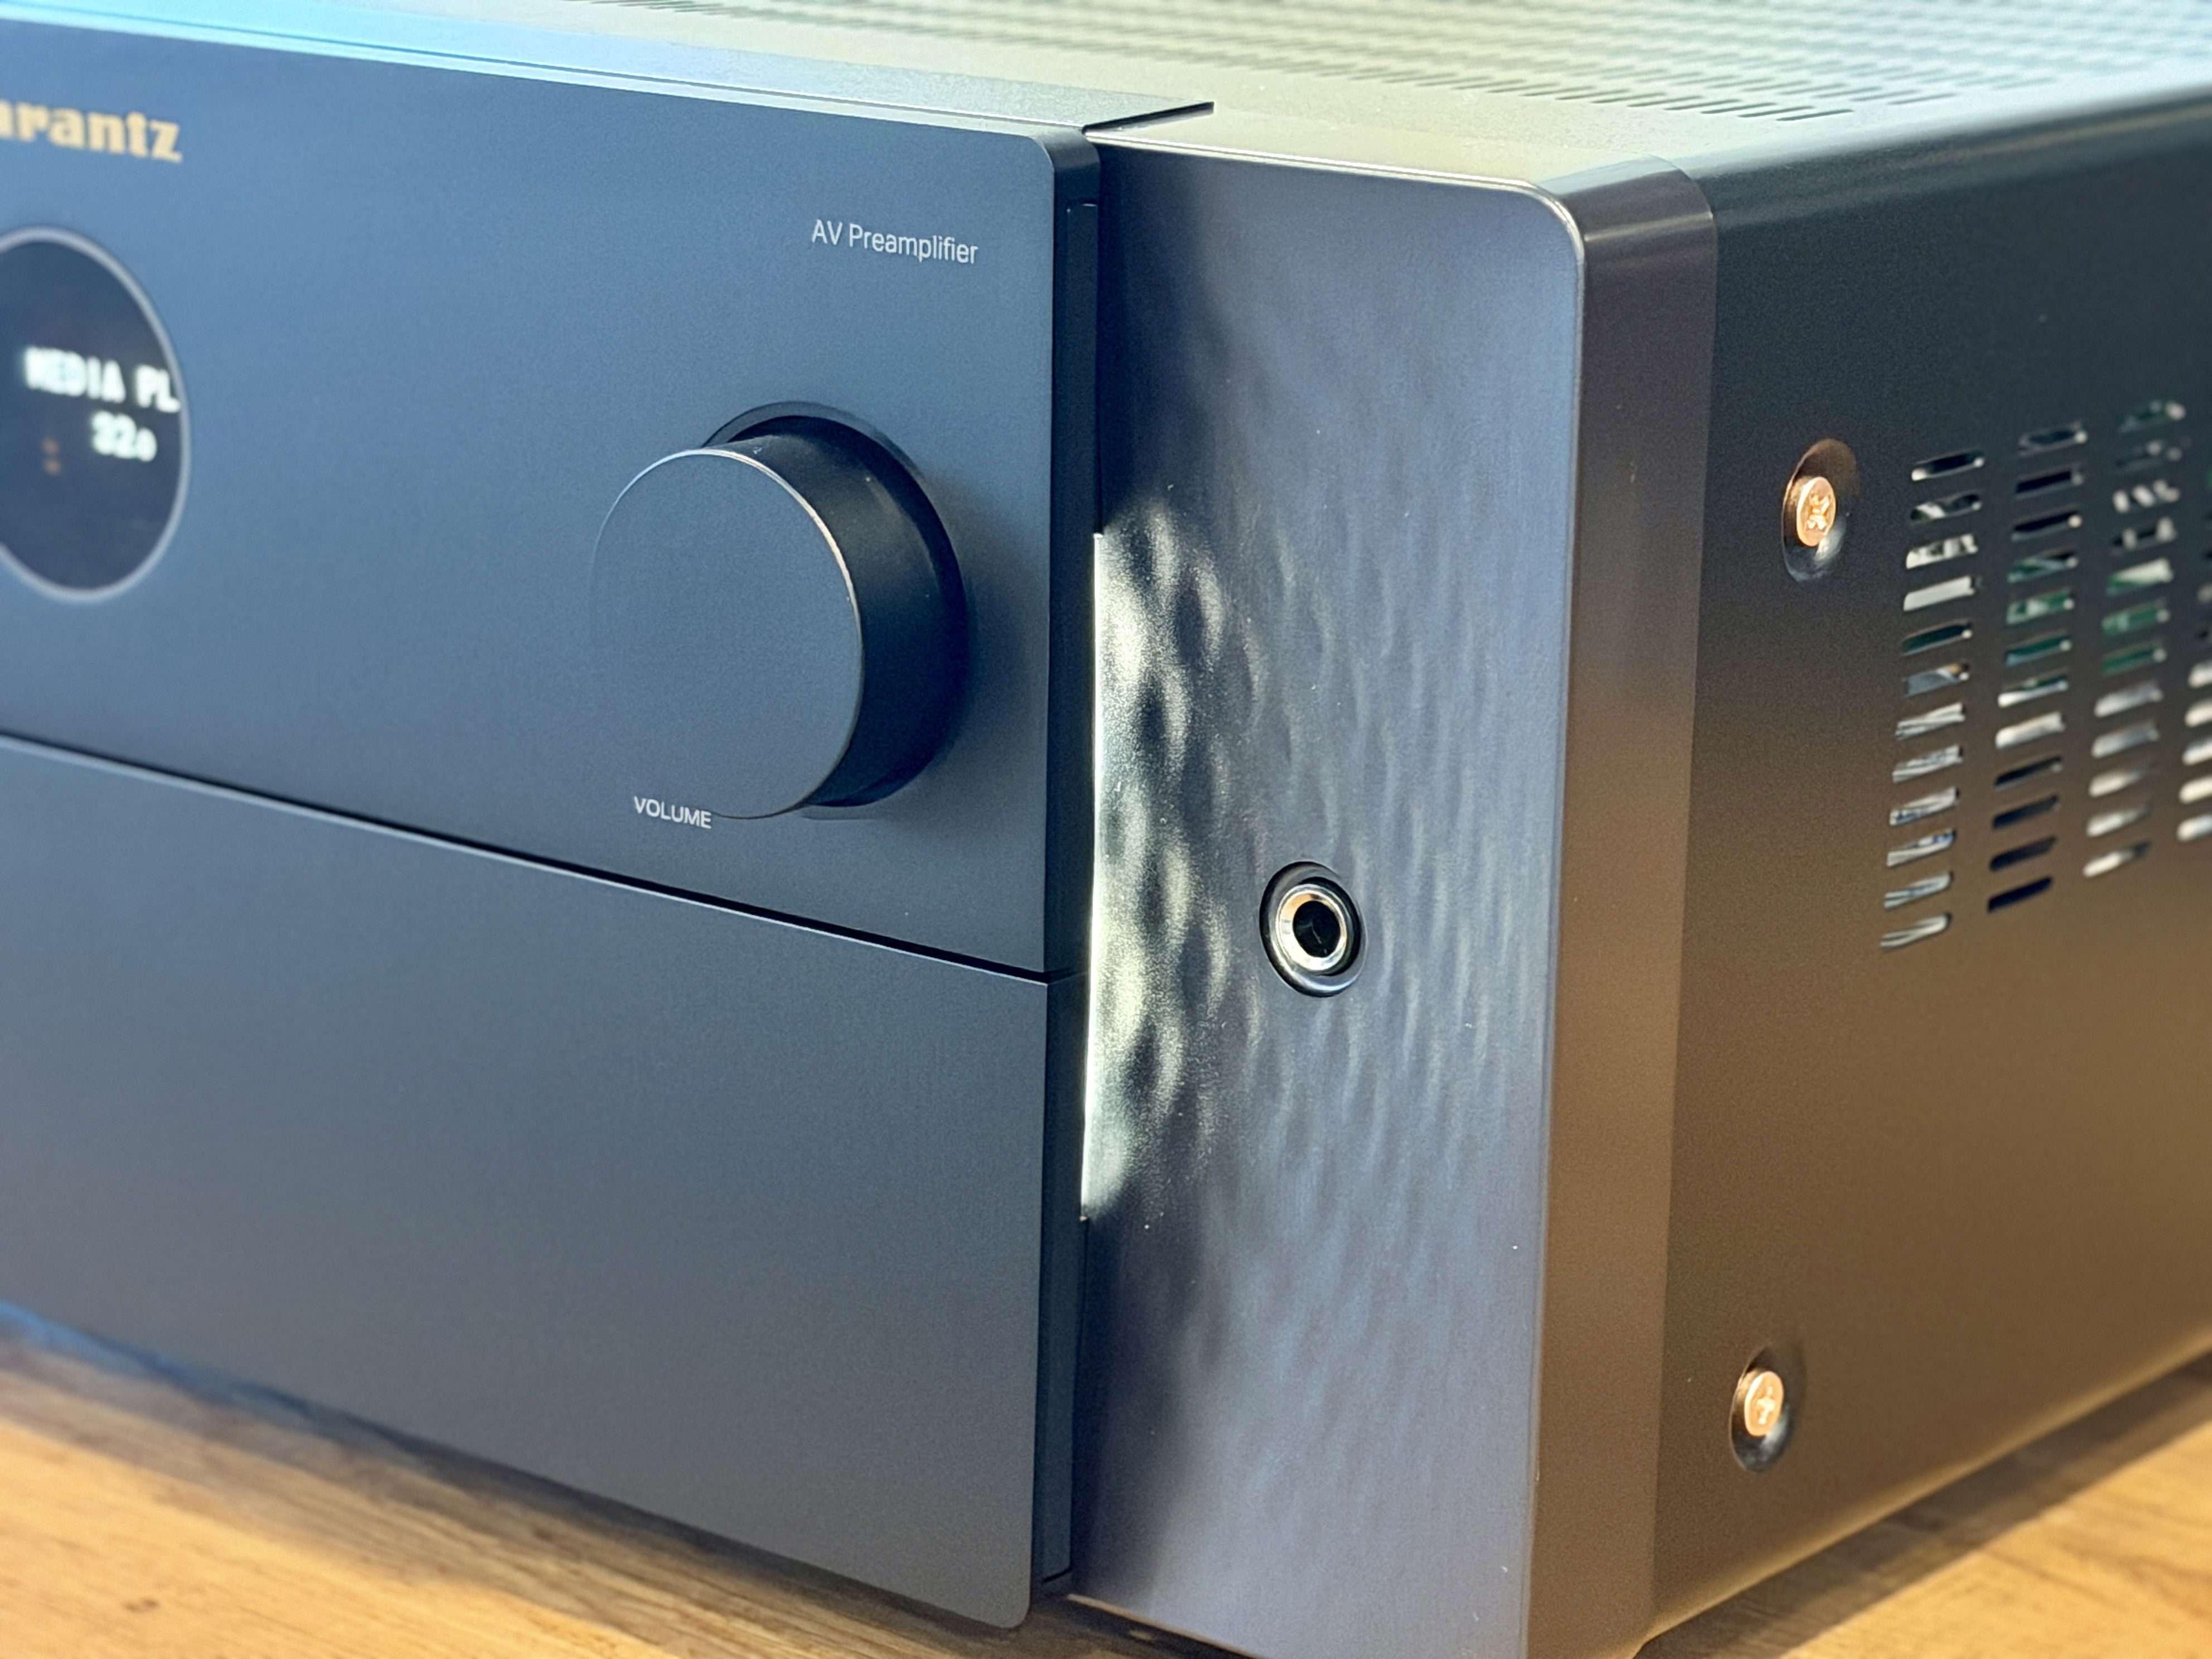
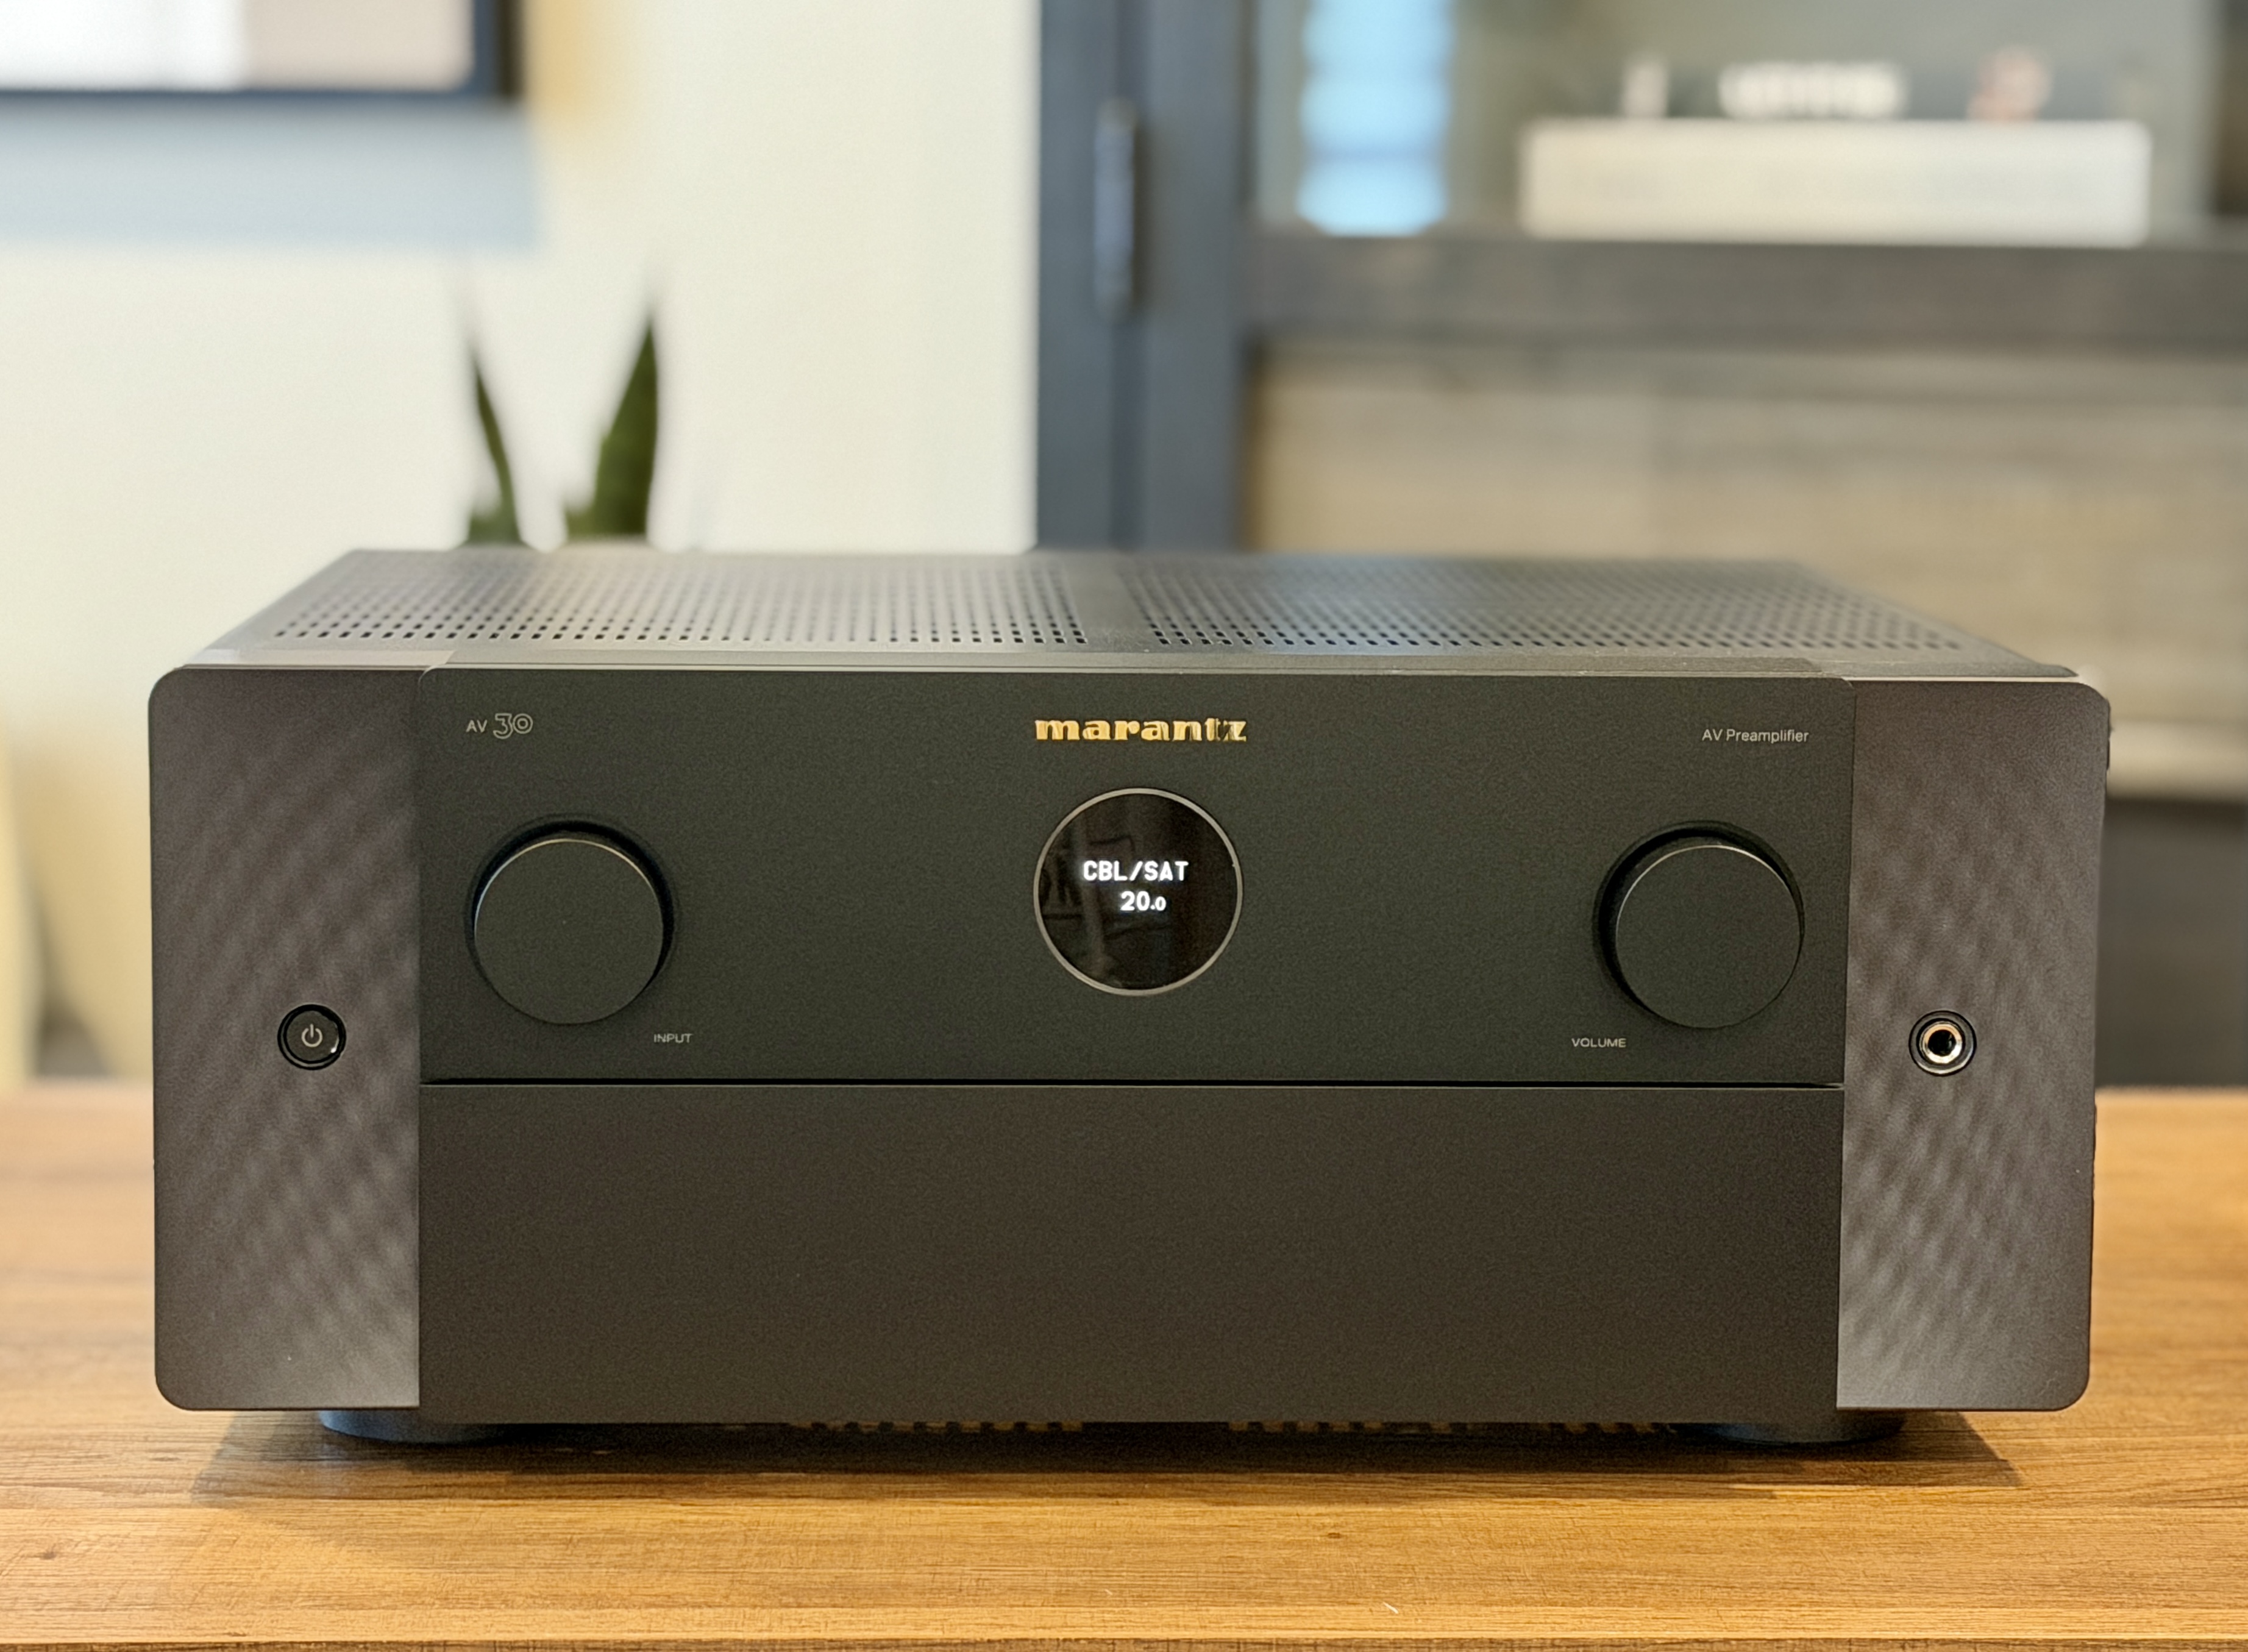
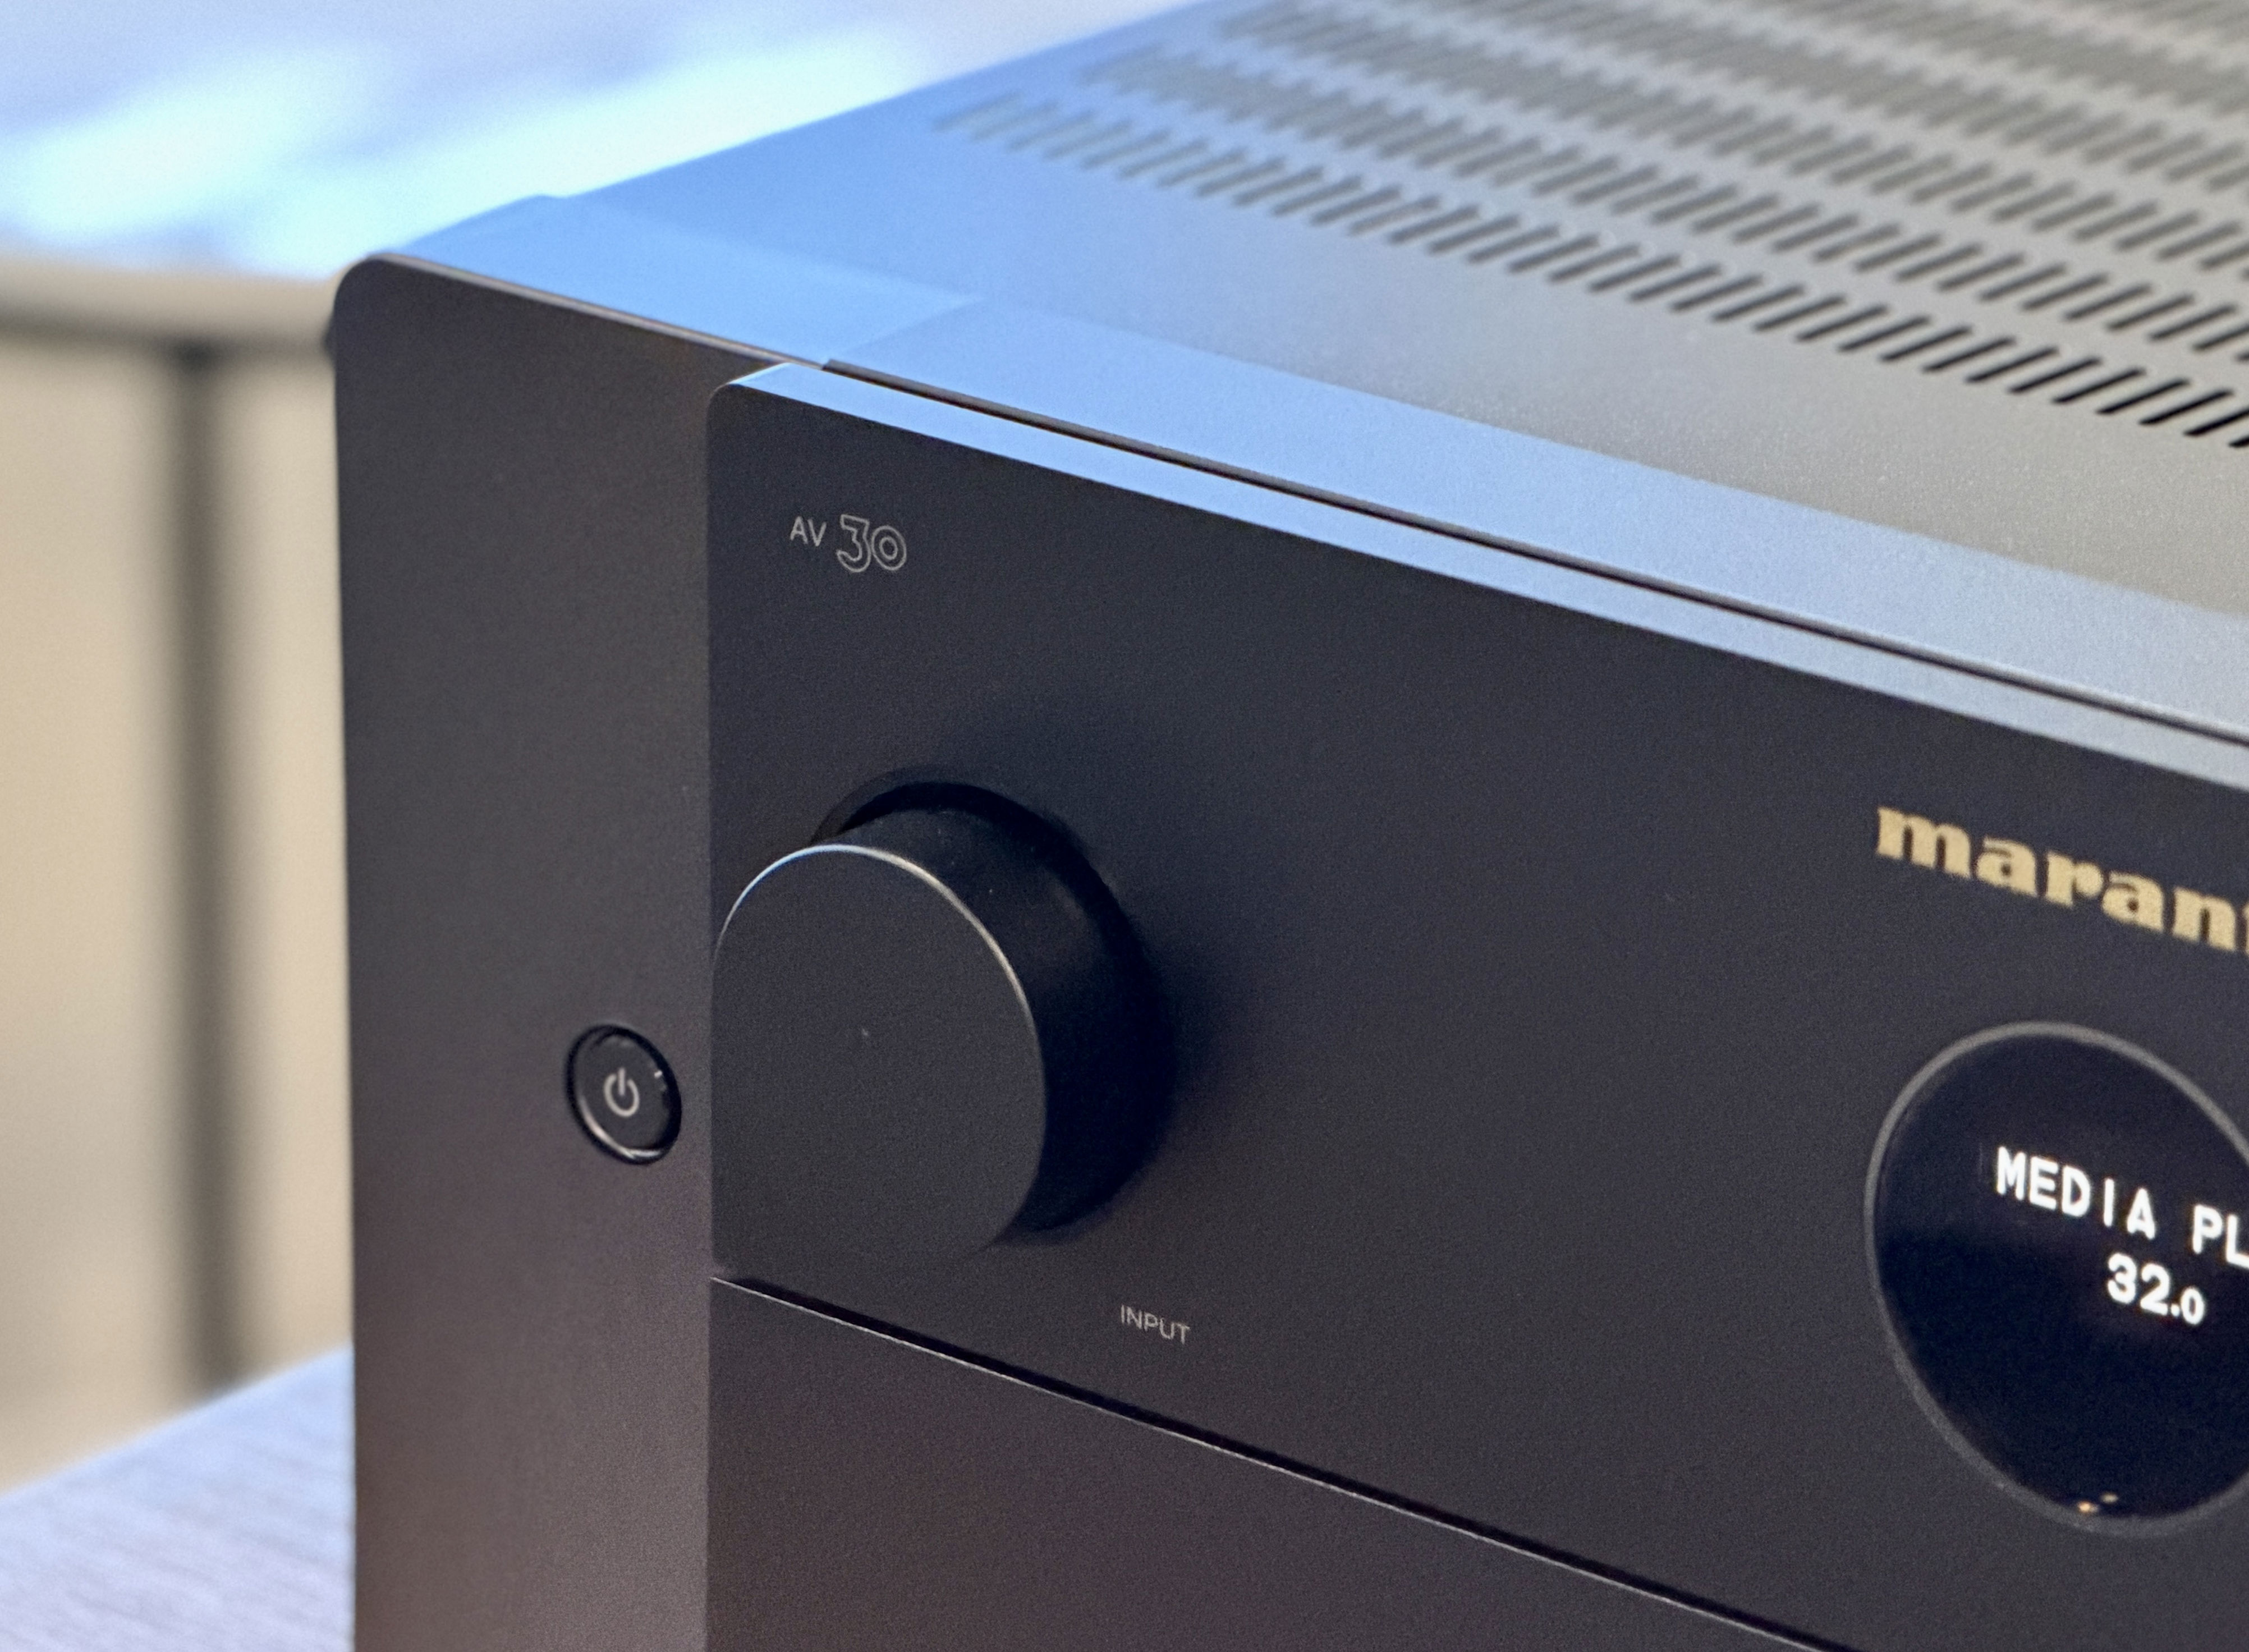
The first thing that stands out when unboxing the AV 30 and AMP 30 is how closely they follow Marantz’s current design language. Both units clearly carry the visual DNA of the AV 20 and AMP 20, which is a good thing given how well-received those designs have been. The familiar circular porthole display sits front and center and offers basic information at a glance. On the AV 30, a larger display and additional controls are tucked behind a fold-down front panel, which gives the processor a clean look.
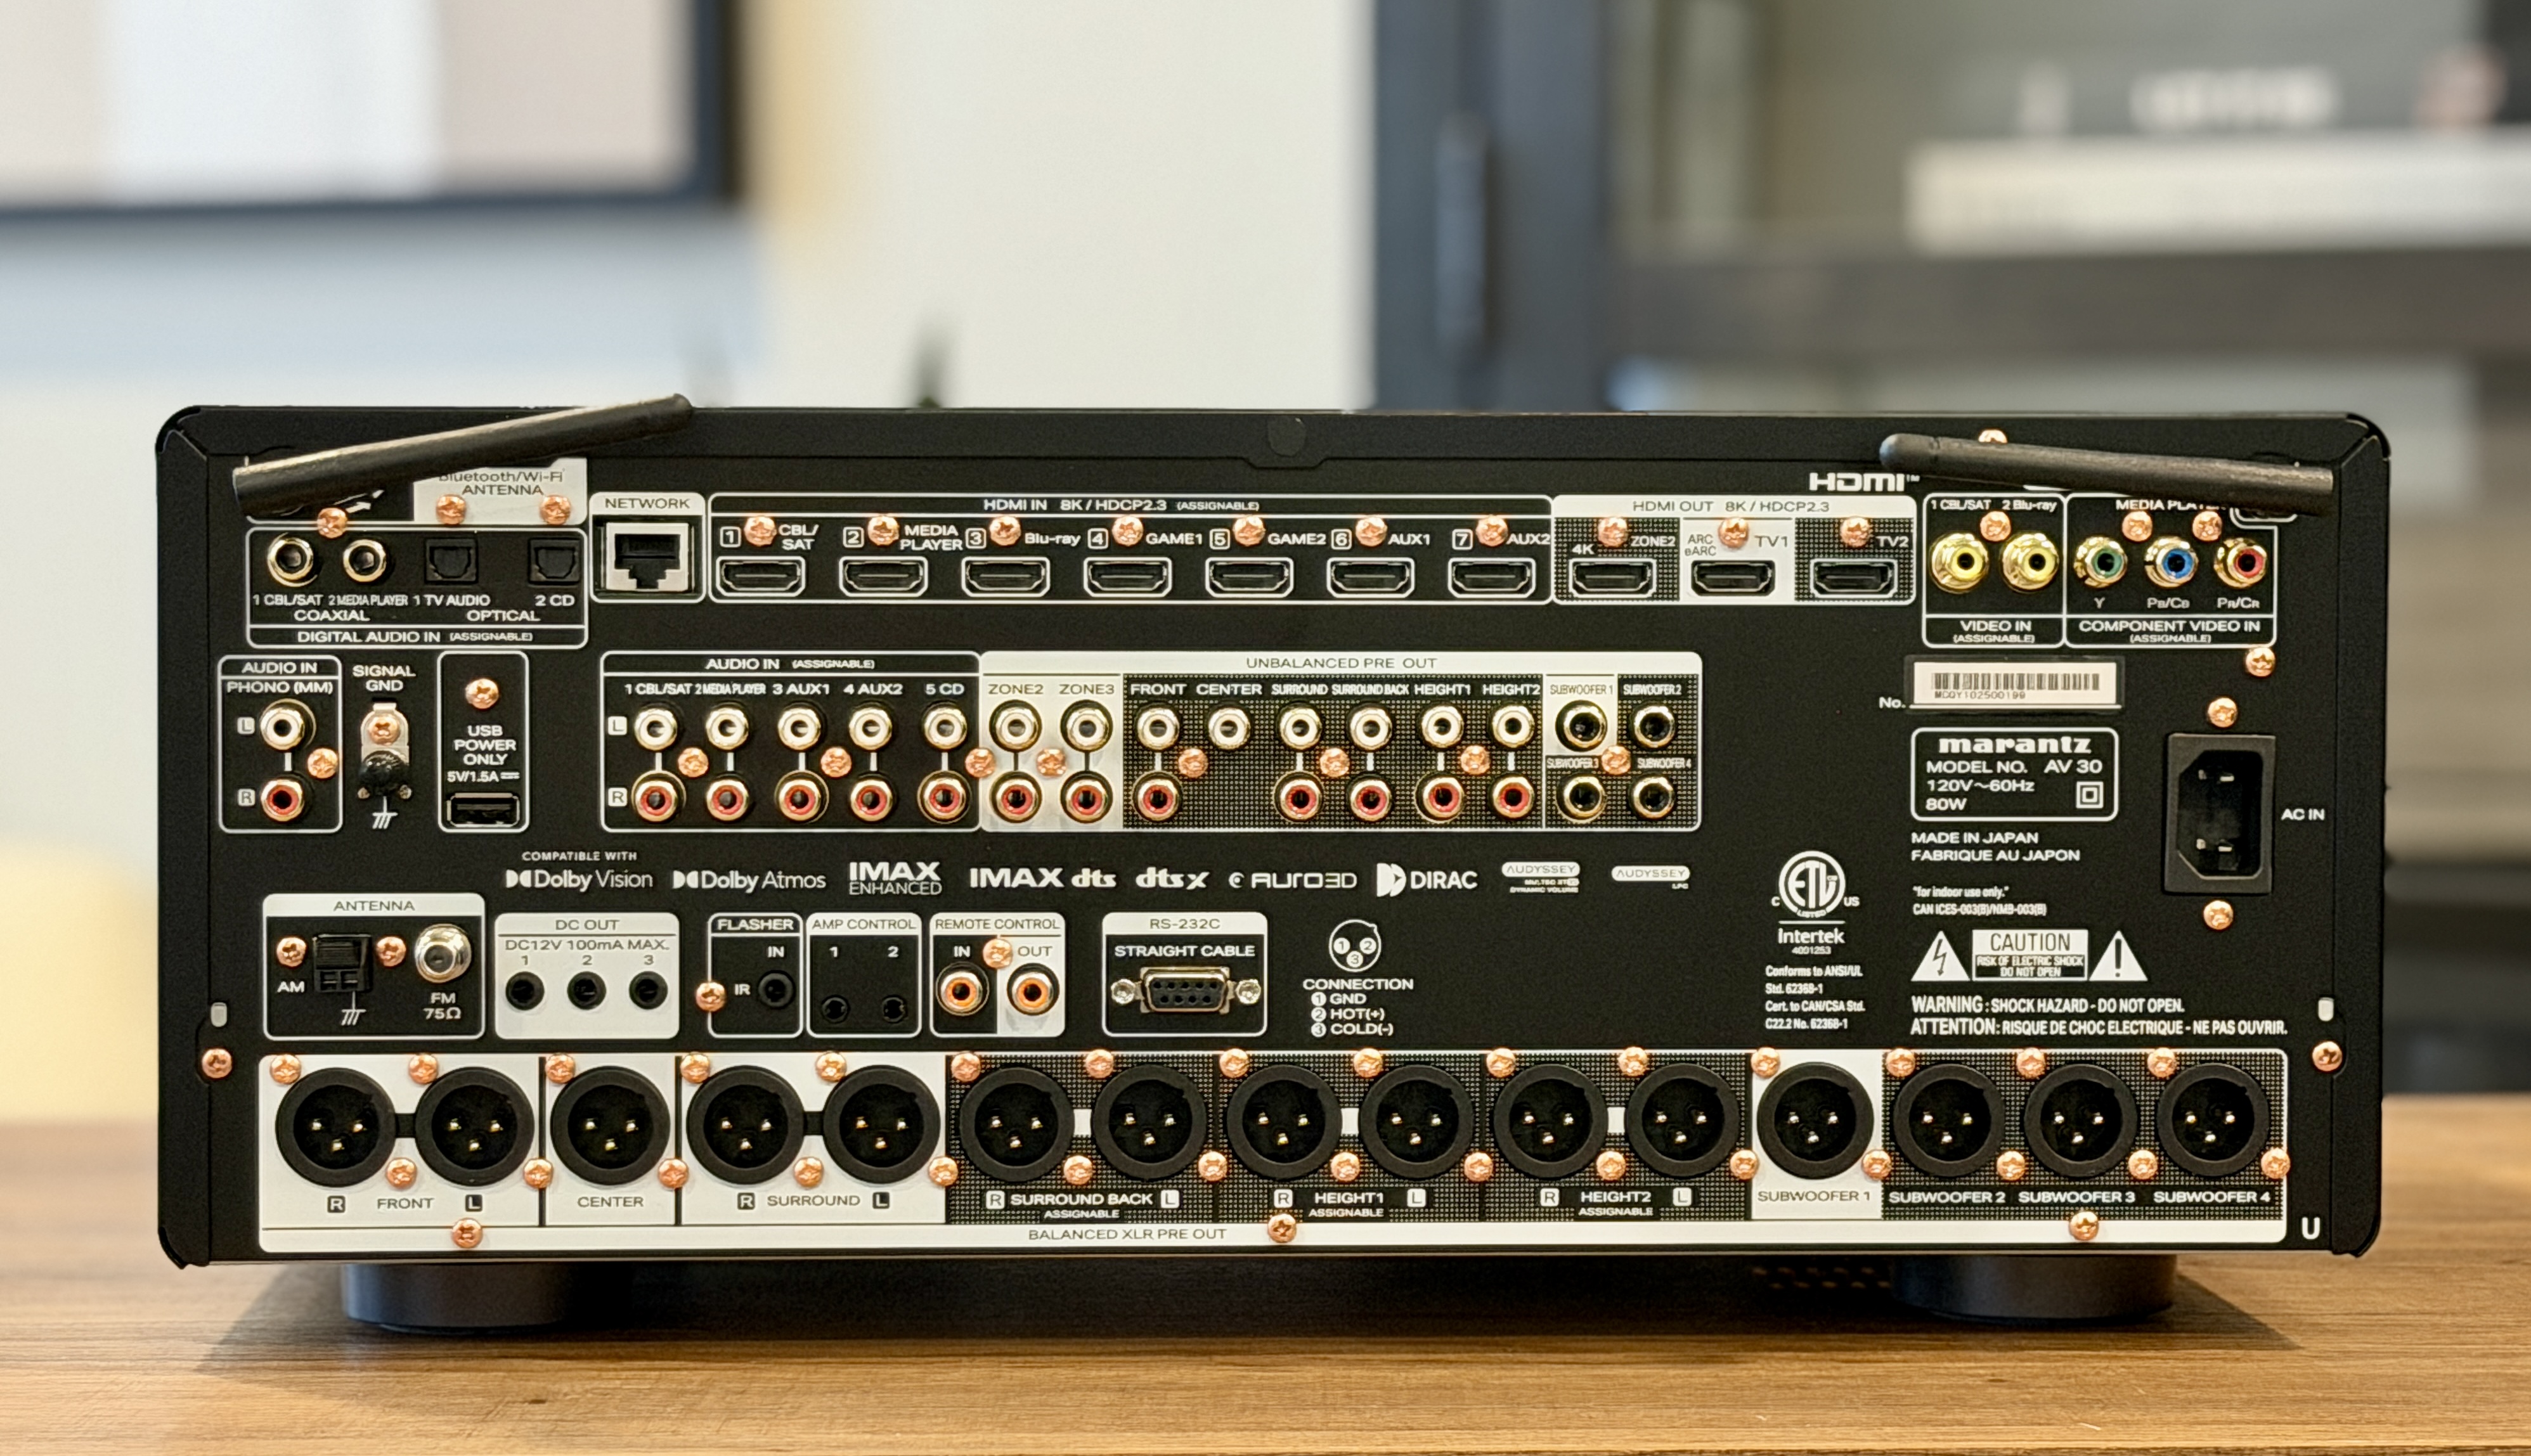
Around the back, the AV 30 is loaded with connectivity options. It includes seven HDMI inputs and three HDMI outputs, all supporting HDMI 2.1 with up to 40Gbps bandwidth, with even one of the outputs supporting eARC. All HDMI inputs handle 8K video, 4K at 120Hz, HDR10+, Dolby Vision, and HLG. Balanced XLR outputs are provided for all channels alongside your standard RCA outputs. You even get legacy video options like composite and components for anyone still running older gear. The AV 30 measures 17.4-inches × 15.6-inches × 7.5-inches and weighs approximately 24.5 pounds.
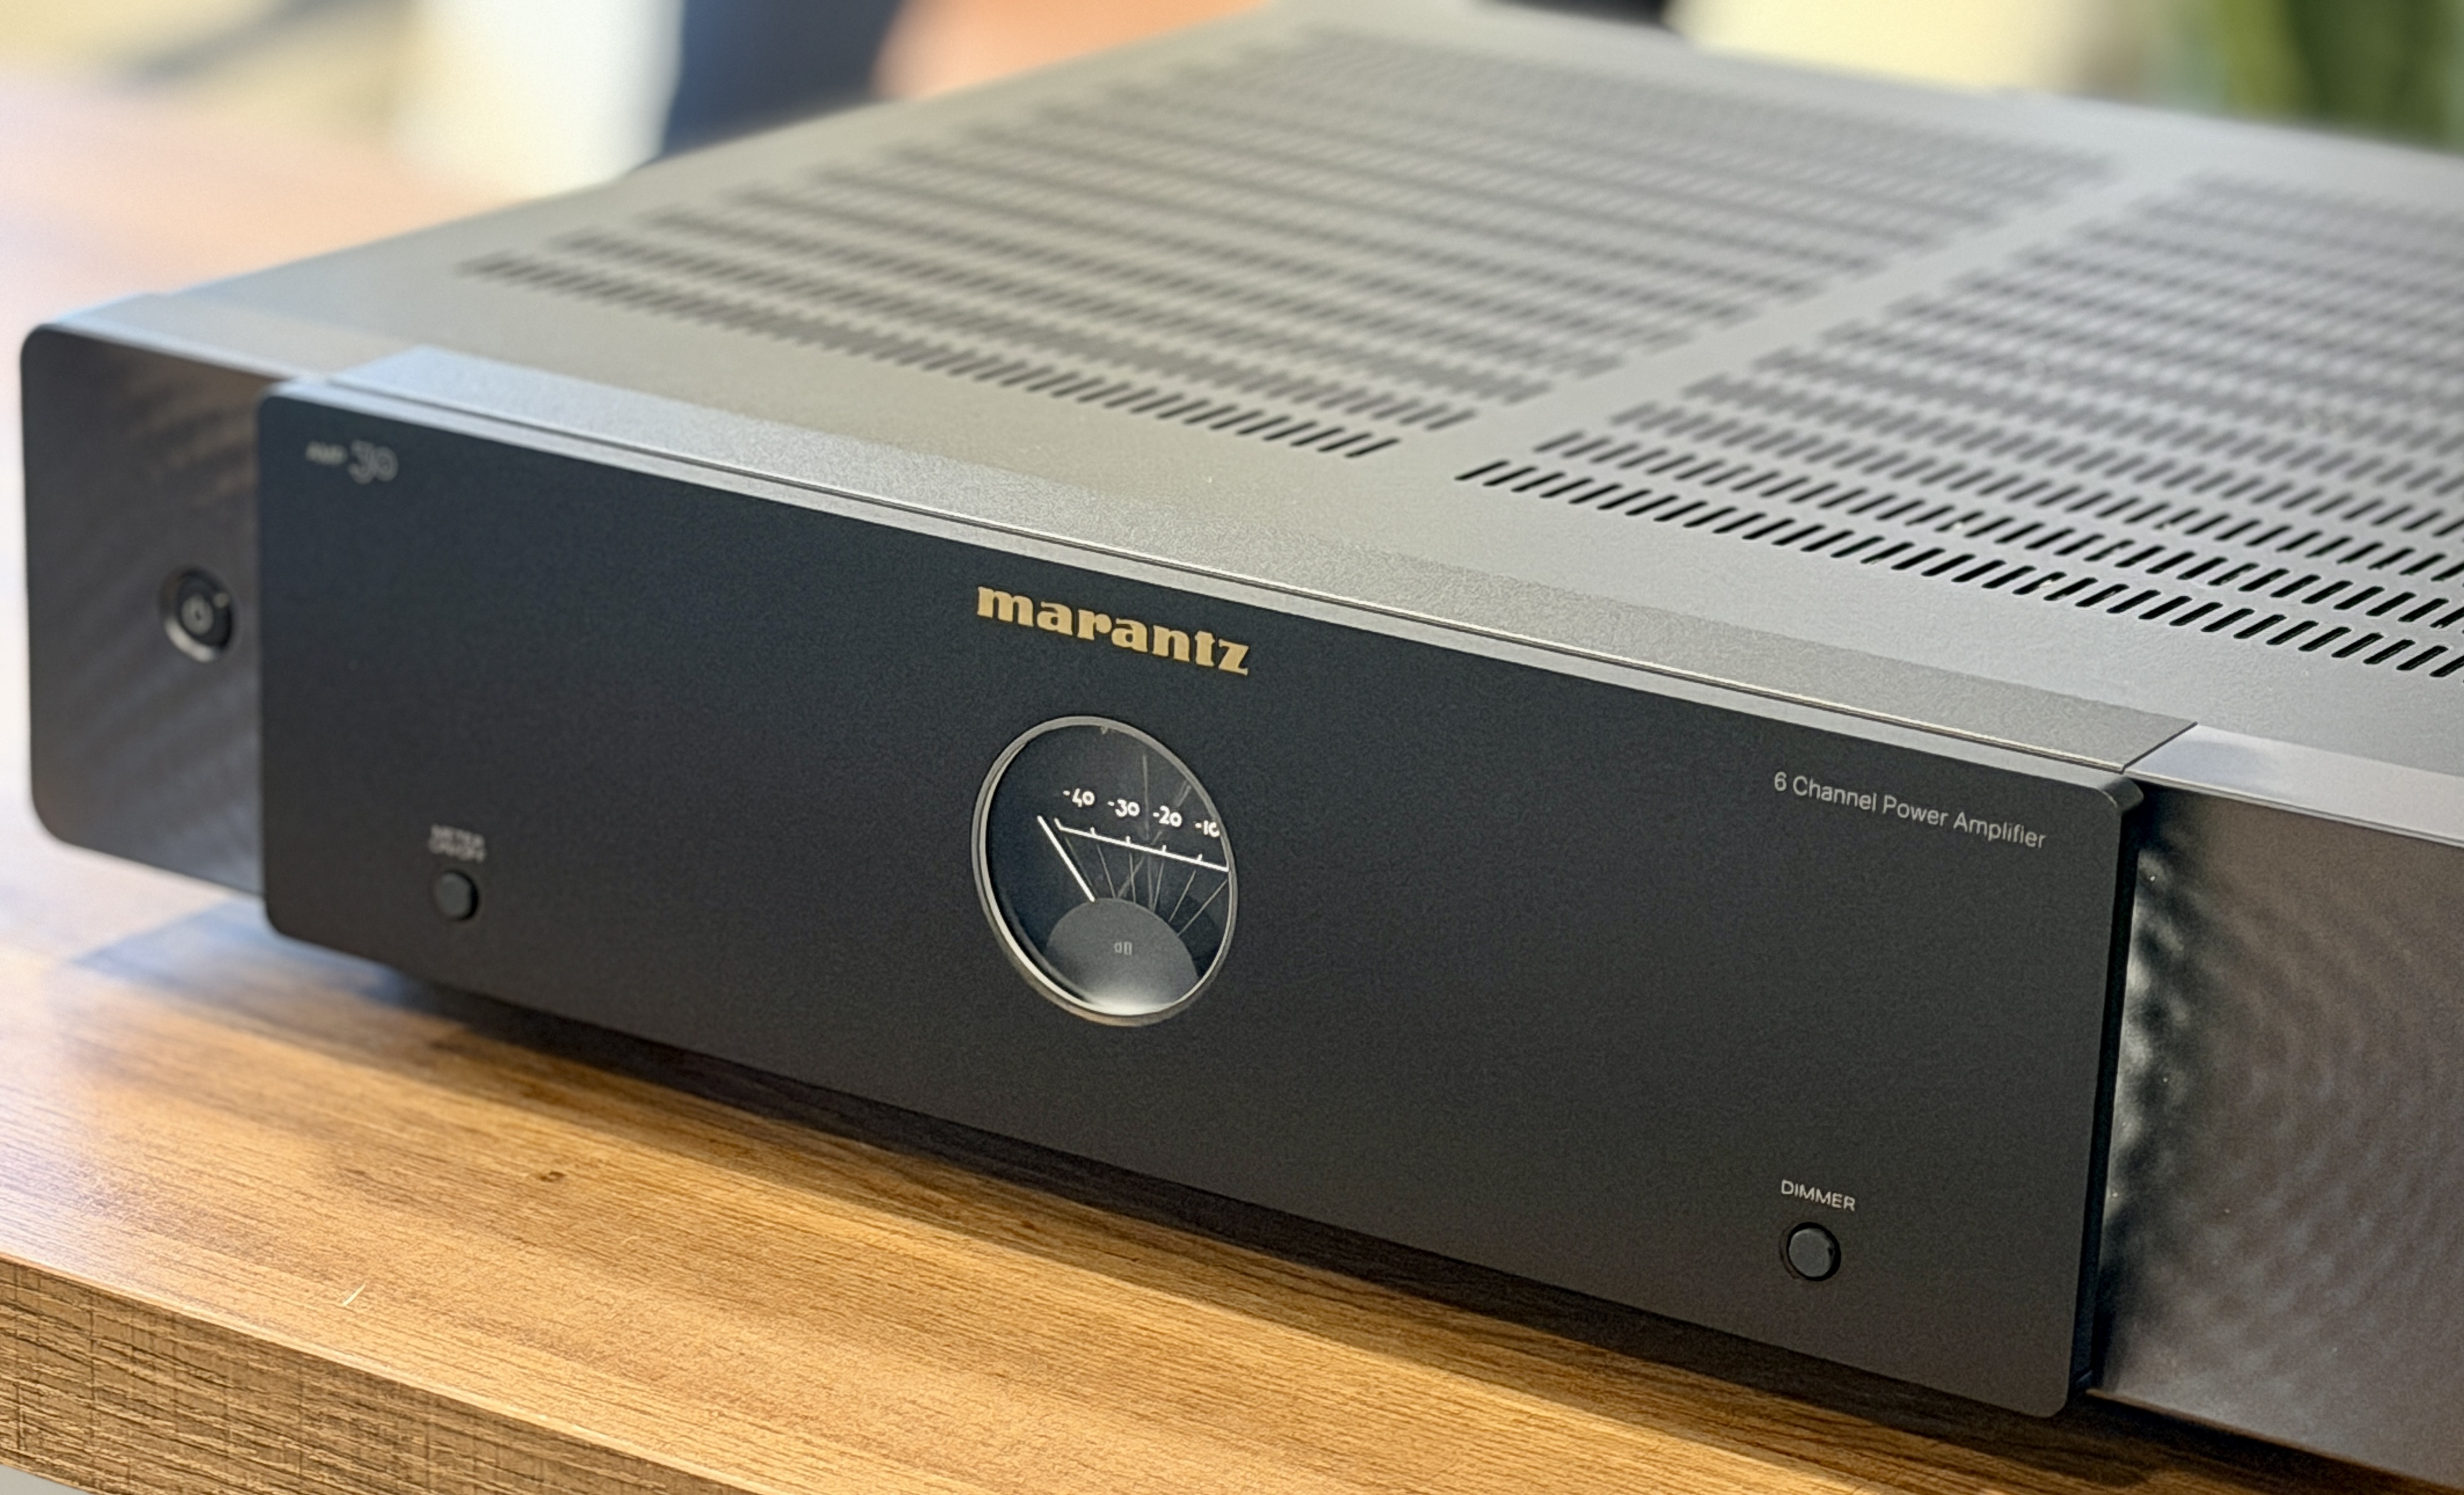
At the time of this review, both the AV 30 and AMP 30 are available only in a black finish. The textured side panels can be backlit, dimmed, or turned off entirely, which is a nice touch for those who prefer either a subtle glow or a completely dark rack. The AMP 30 takes a slightly different approach on the front panel, replacing the circular OLED with a softly illuminated level meter. The design is subtle and gives nods to the level meters on Marantz’s vintage tube amps from the late 1960s.
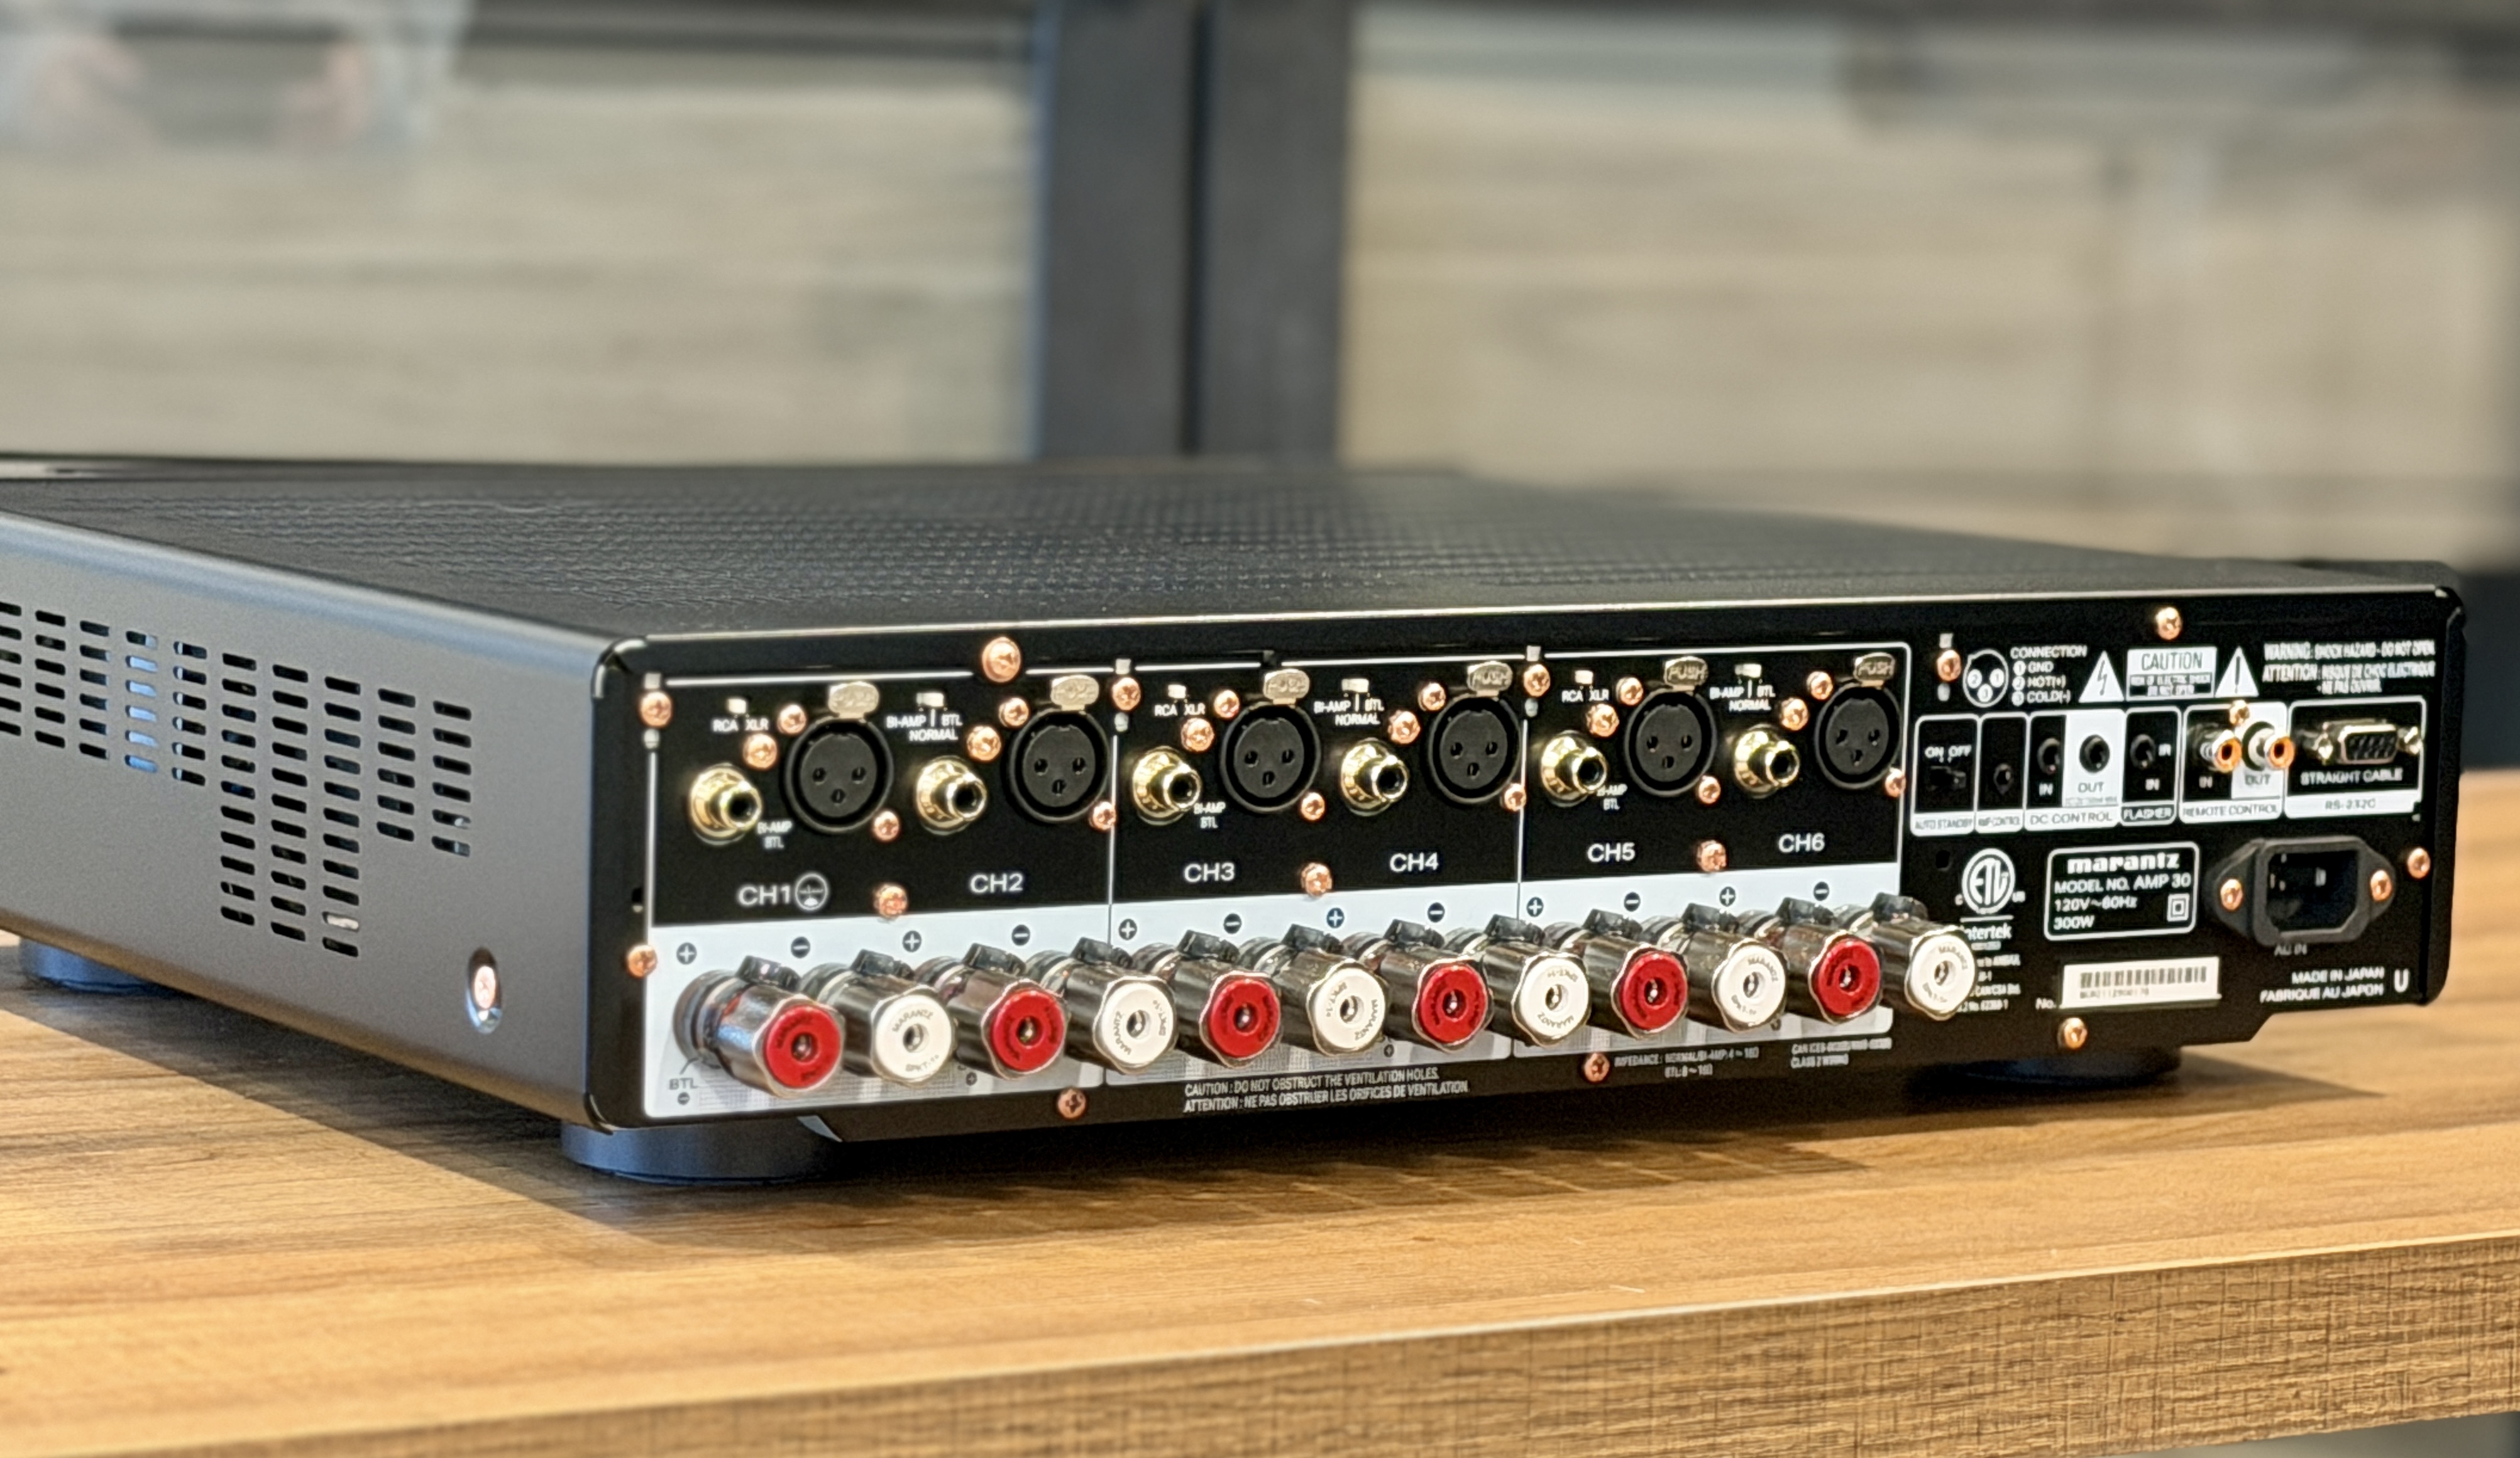
On the rear of the AMP 30, you’ll find both balanced XLR and unbalanced RCA inputs for each channel, along with control and trigger connections and an auto shut-off option. The binding posts feel rock solid. The AMP 30 measures 17.4-inches × 17.4-inches × 4.4-inches and weighs a relatively light 22 pounds. The only thing to keep in mind is that if you’re using balanced cables, you’ll want to account for the extra depth they add.
Remote
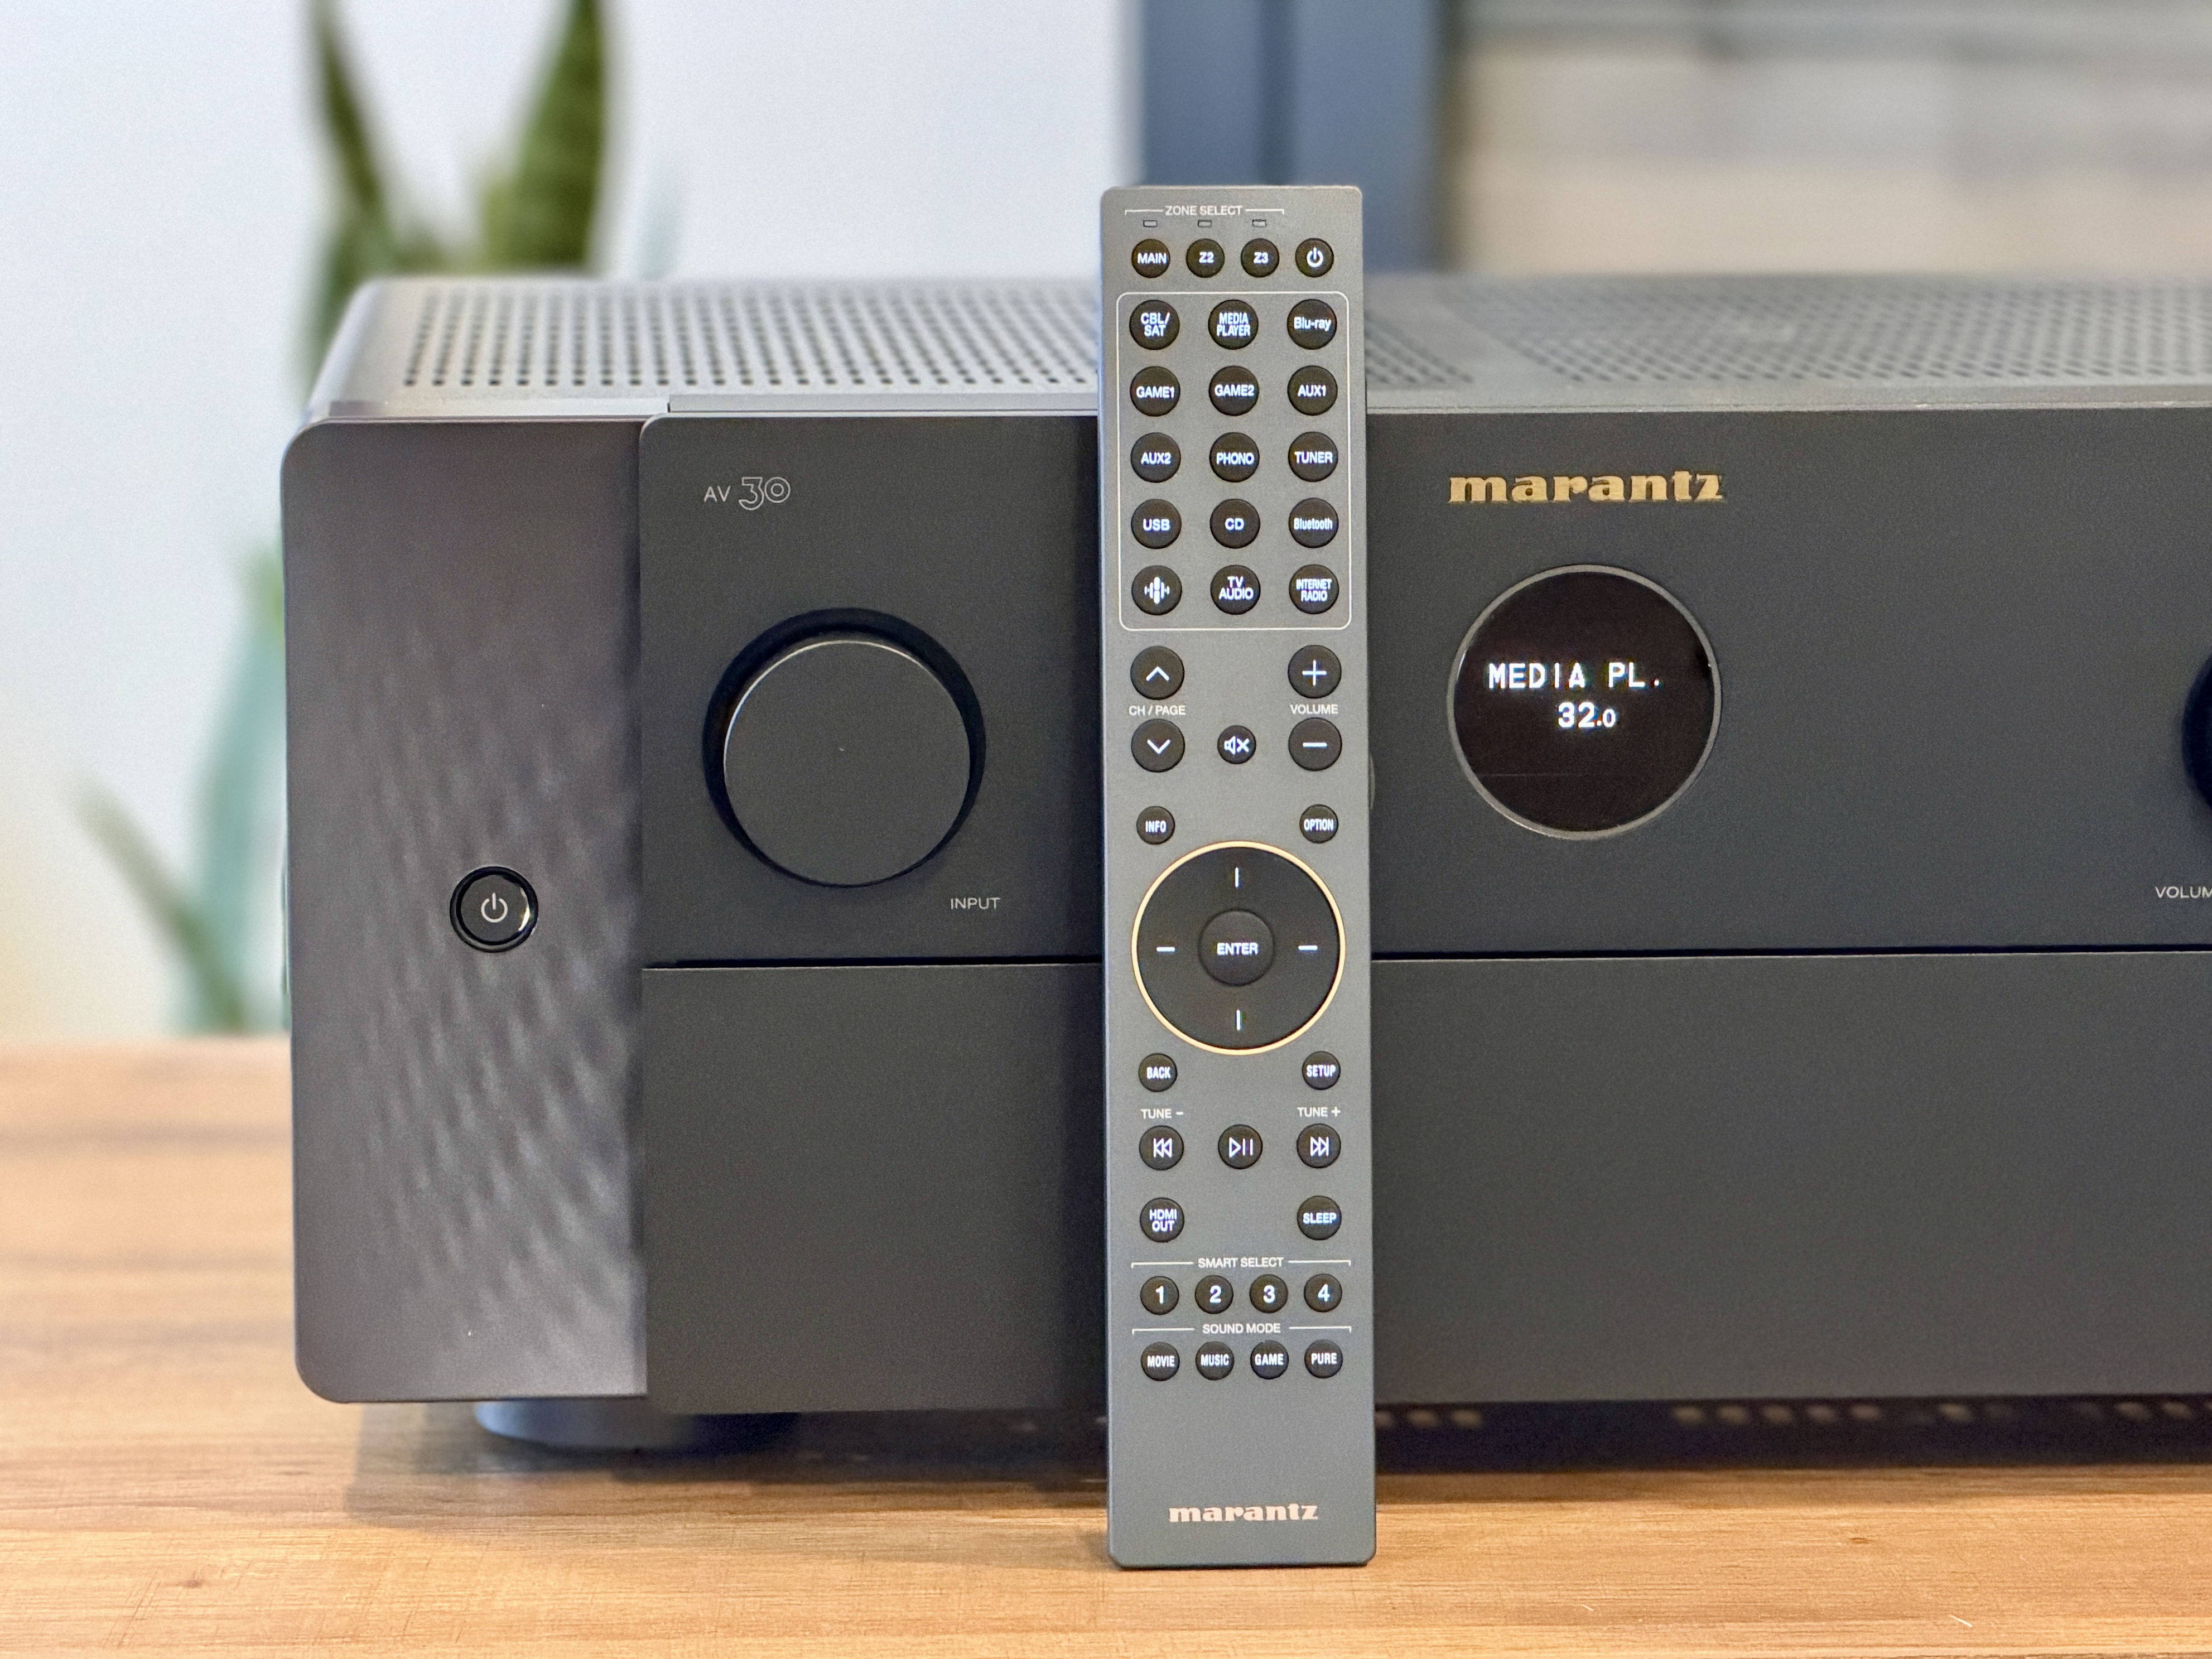
The remote included with the AV 30 is the same one used with the AV 20, and it feels like a good match for the processor. It isn’t oversized or overly busy, and the buttons have a solid feel with enough travel that it’s easy to distinguish one from another. A backlight is included, which is helpful in a dark room, though it isn’t motion-activated. Instead, there’s a small button on the side to turn it on, and after a bit of use, it becomes second nature.
Input selection sits at the top of the remote, with volume and navigation controls placed where your thumb naturally rests. Playback controls and quick-select buttons sit below that, making it easy to access commonly used settings. The four sound mode buttons are grouped at the bottom, keeping them out of the way unless you actually need them. Overall, the remote feels solid and well laid out, and I’m glad Marantz chose to include the same remote here rather than cutting back because of the lower price point.
Setup
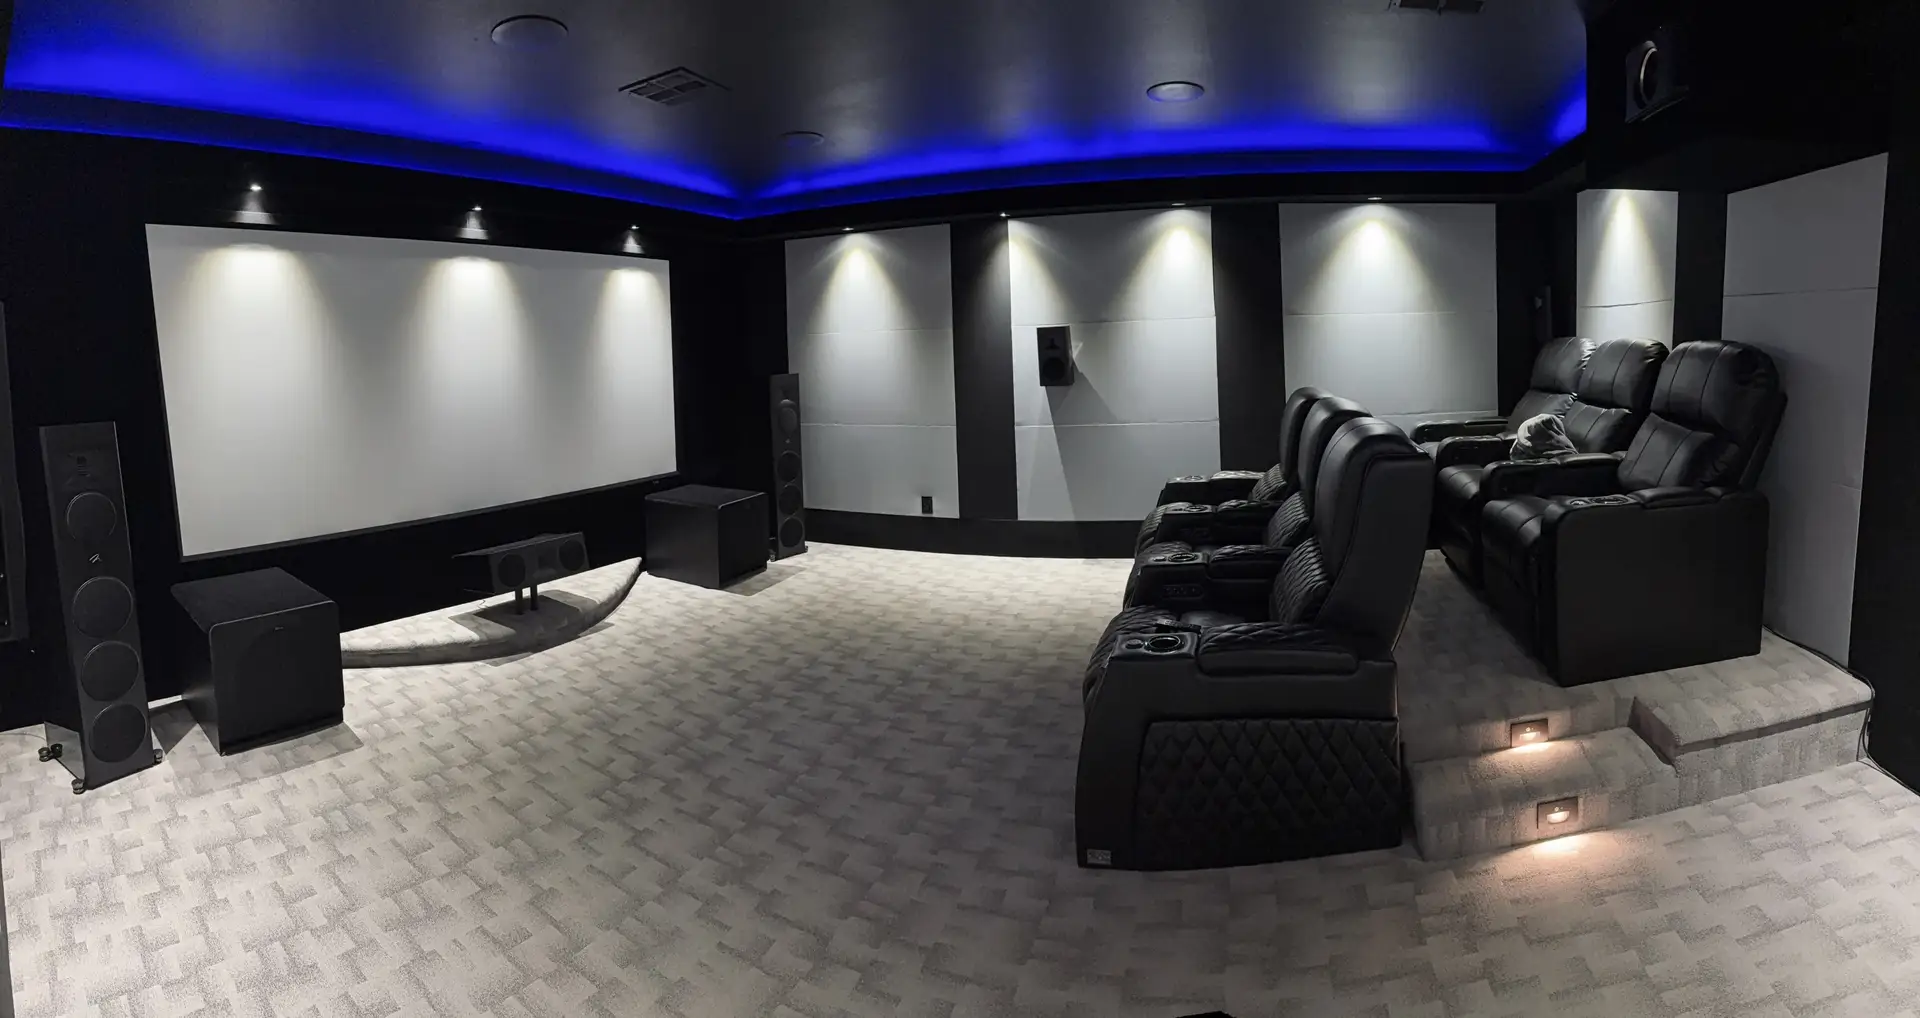
For this review, I ran the AV 30 and AMP 30 in a full 7.4.4 configuration. Since I reviewed the AV 20 and AMP 20 not that long ago, Marantz was kind enough to let me keep those units on hand for an extended period. That made it possible not only to compare the two processors directly, but also to experiment with different amplification layouts using both amplifiers.
In this setup, the AV 30 handled all the audio decoding and processing with its 11.4-channel output. The AMP 30 was configured in BTL mode to power the front left, center, and right channels, bridging pairs of channels to increase output to 800 watts per channel, since my speakers are 4 ohms. The AMP 20 was then brought in to handle the remaining channels. Eight of its channels were used to power the surround and rear speakers in a bi-amped configuration. The remaining four channels were assigned to the height speakers in a standard configuration.
The front stage consisted of MartinLogan Motion XT F200 towers paired with a Motion XT C100 center channel. Surround and rear duties were handled by MartinLogan Motion MP10 speakers, while four Motion MC8 in-ceiling speakers took care of Atmos effects. Low-end duties were handled by four Klipsch RP1400 subs. Sources included a Kaleidescape Strato V, an R_volution PlayerPro 8K, and an Apple TV.
Once everything was wired up, I decided to go the Dirac ART route. Part of that decision was based on having spent some time with ART during my AV 20 review, and I was curious to hear how it would compare between the two processors. It’s also the approach I personally prefer when it comes to room correction. For those who don’t plan on investing in Dirac Live, the AV 30 still includes Audyssey as a built-in option at no additional cost. Audyssey can be run through the MultEQ Editor app on iOS or Android for an added fee, while PC users can use MultEQ-X, which is free to install but requires a $199 license per AVR or processor. I’ve never been a big fan of Audyssey, but I ran it alongside Dirac Live anyway to compare results.

The remainder of the setup process mirrors what I covered in my AV 20 review, since the workflow is the same and I’m using the same speaker layout. If you’ve already read that review, you can skip ahead to the performance section. If not, the next part briefly walks through how the setup process works in my room and what it’s like to configure Dirac ART.
The main part of ART is specifically designed to address low frequencies, operating only up to 150Hz. This is where most room-related issues, like lingering bass and resonance, occur, so ART focuses entirely on cleaning up this part of the frequency range. One other thing to keep in mind is that you want to have as discrete control over subwoofers as possible, as ART works better with more control points.
The AV 30 supports Dirac Live if you purchase a license. Limited Bandwidth runs $259 and handles corrections from 20 Hz to 500 Hz. Full Bandwidth costs $349 and extends correction up to 20 kHz. There’s also Dirac Live Bass Control for $299, which lets you integrate multiple subwoofers more precisely. One thing to note is that the included mic doesn’t work with Dirac, so I used a miniDSP UMIK-1.
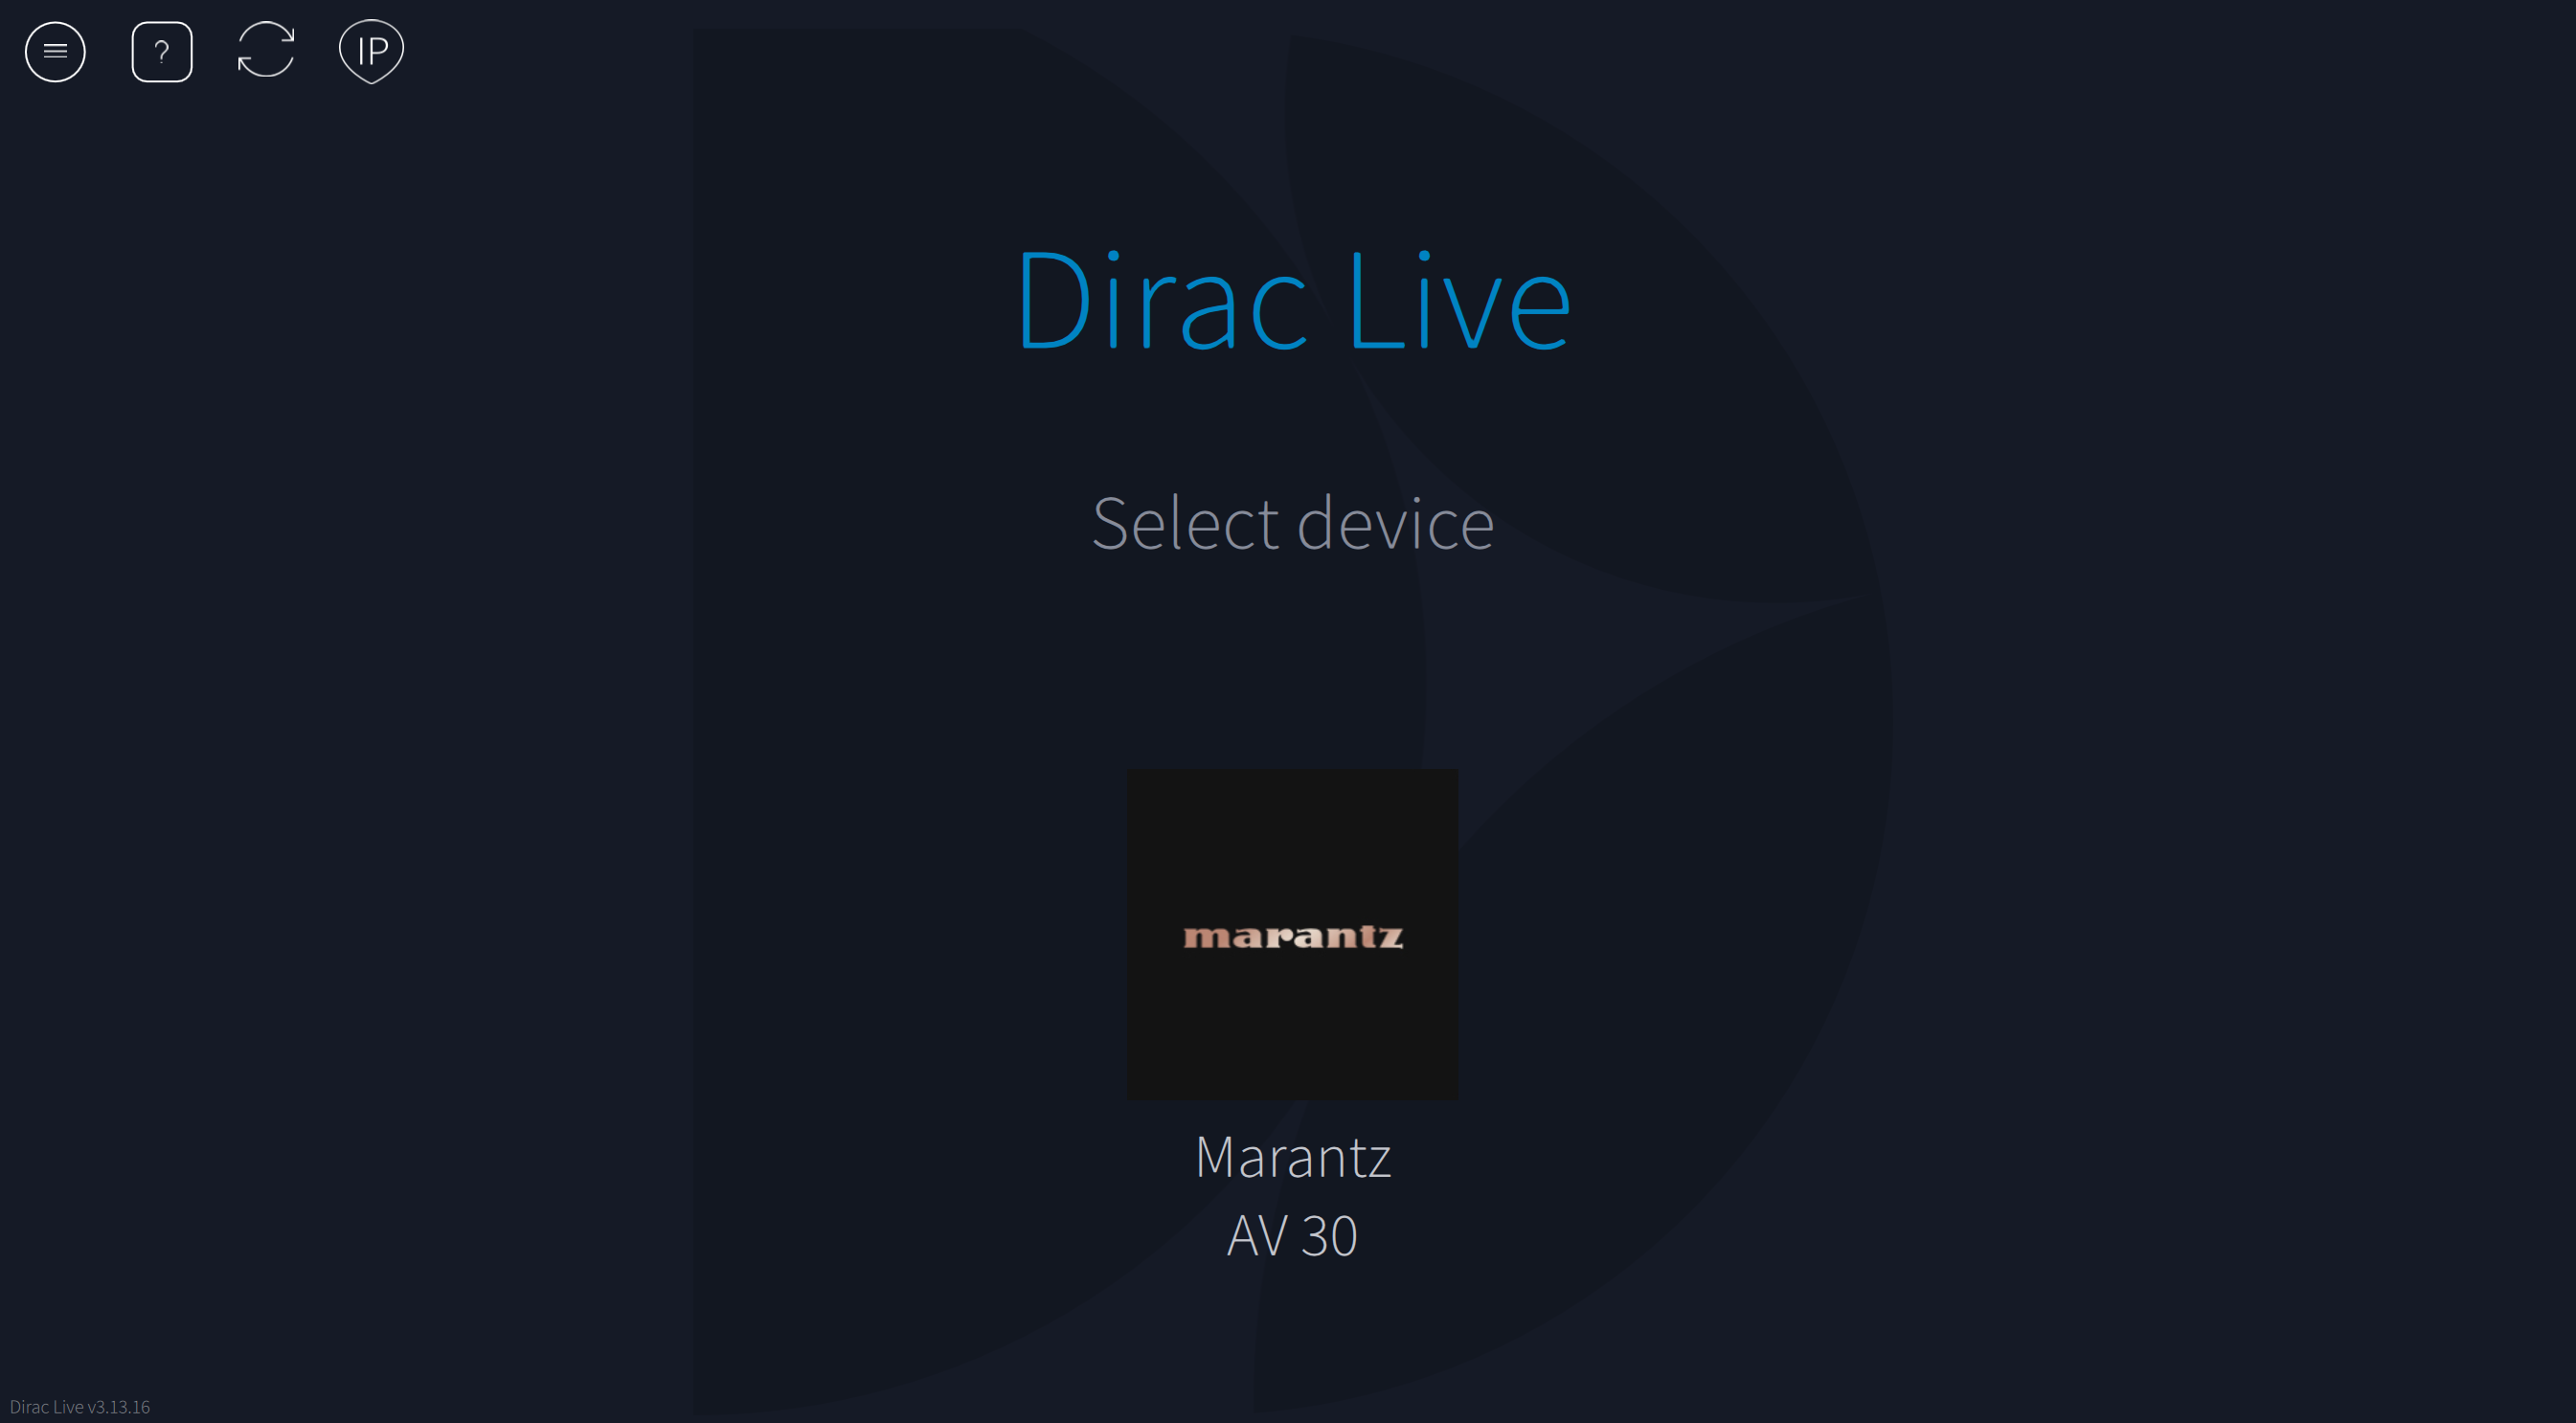
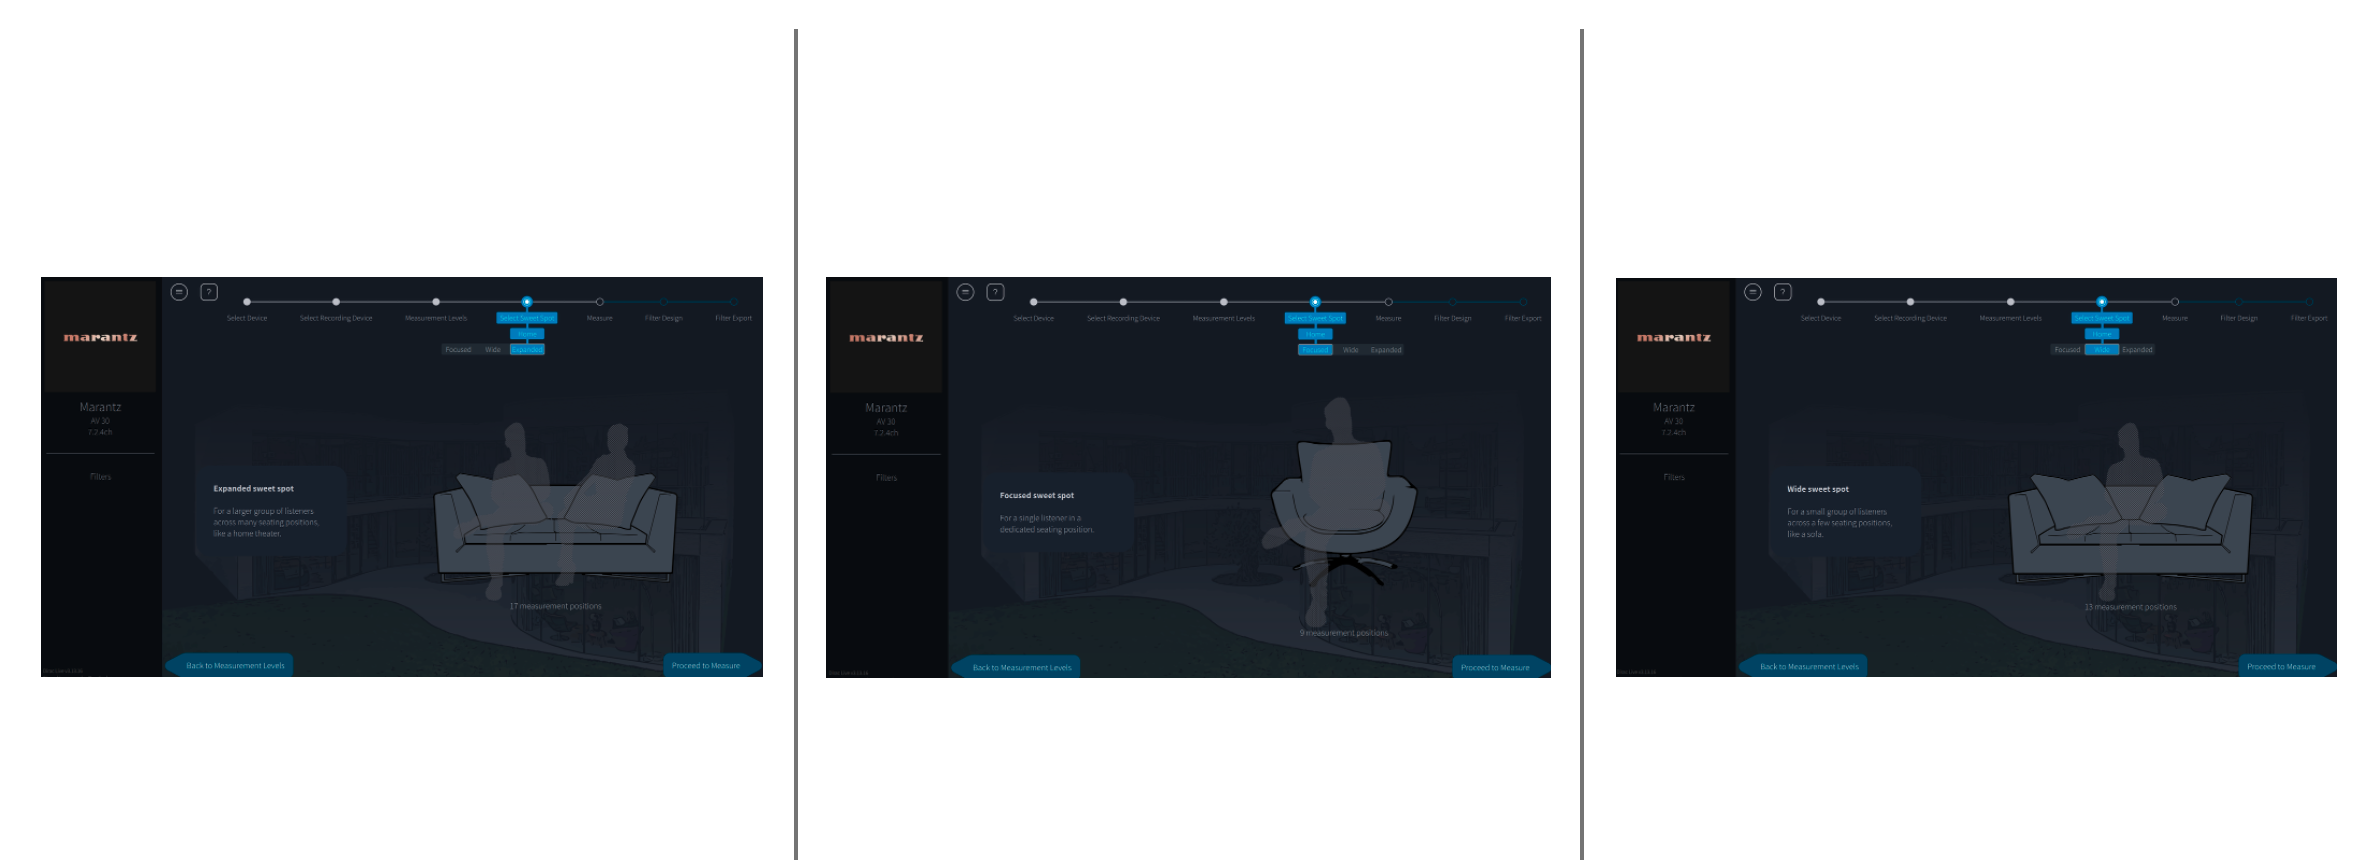
If you’ve used Dirac before, the process here will feel familiar. After buying a license, you download the software, and it automatically finds the AV 30 on your network. From there, you pick your mic, run level calibration, and select a measurement pattern. From there, you’re presented with three measurement options: tightly focused (designed for one person in a chair, requiring nine positions), focused imaging (for one person on a couch, requiring 13 positions), and wide imaging (for two people on a couch, requiring 17 positions).
What’s interesting is that these selections don’t change the calibration results in any meaningful way. They just offer different graphical representations of the microphone placements and adjust the default number of measurement positions. For instance, if you select “wide” but take only nine measurements, the results will be identical to the “tightly focused” option. The reasoning behind this is that as you add more measurement positions, you dilute the accuracy, which is why the “tight” option is preferred for precision.
The first measurement is critical since it sets the acoustic center. If you use different seats for movies, music, or casual listening, you don’t have to redo everything. You can save a preset, change the first mic position, and load it when needed.
It’s also critical to make sure that your measurements are precise. If you take nine measurements and four are inaccurate, ART will flag the issue with a red exclamation point, and the calibration won’t work properly. For best results, aim for a slightly wider microphone placement to gather the most accurate data. In audio calibration, everything is a tradeoff, and while simplicity might save time, it often comes at the expense of performance.
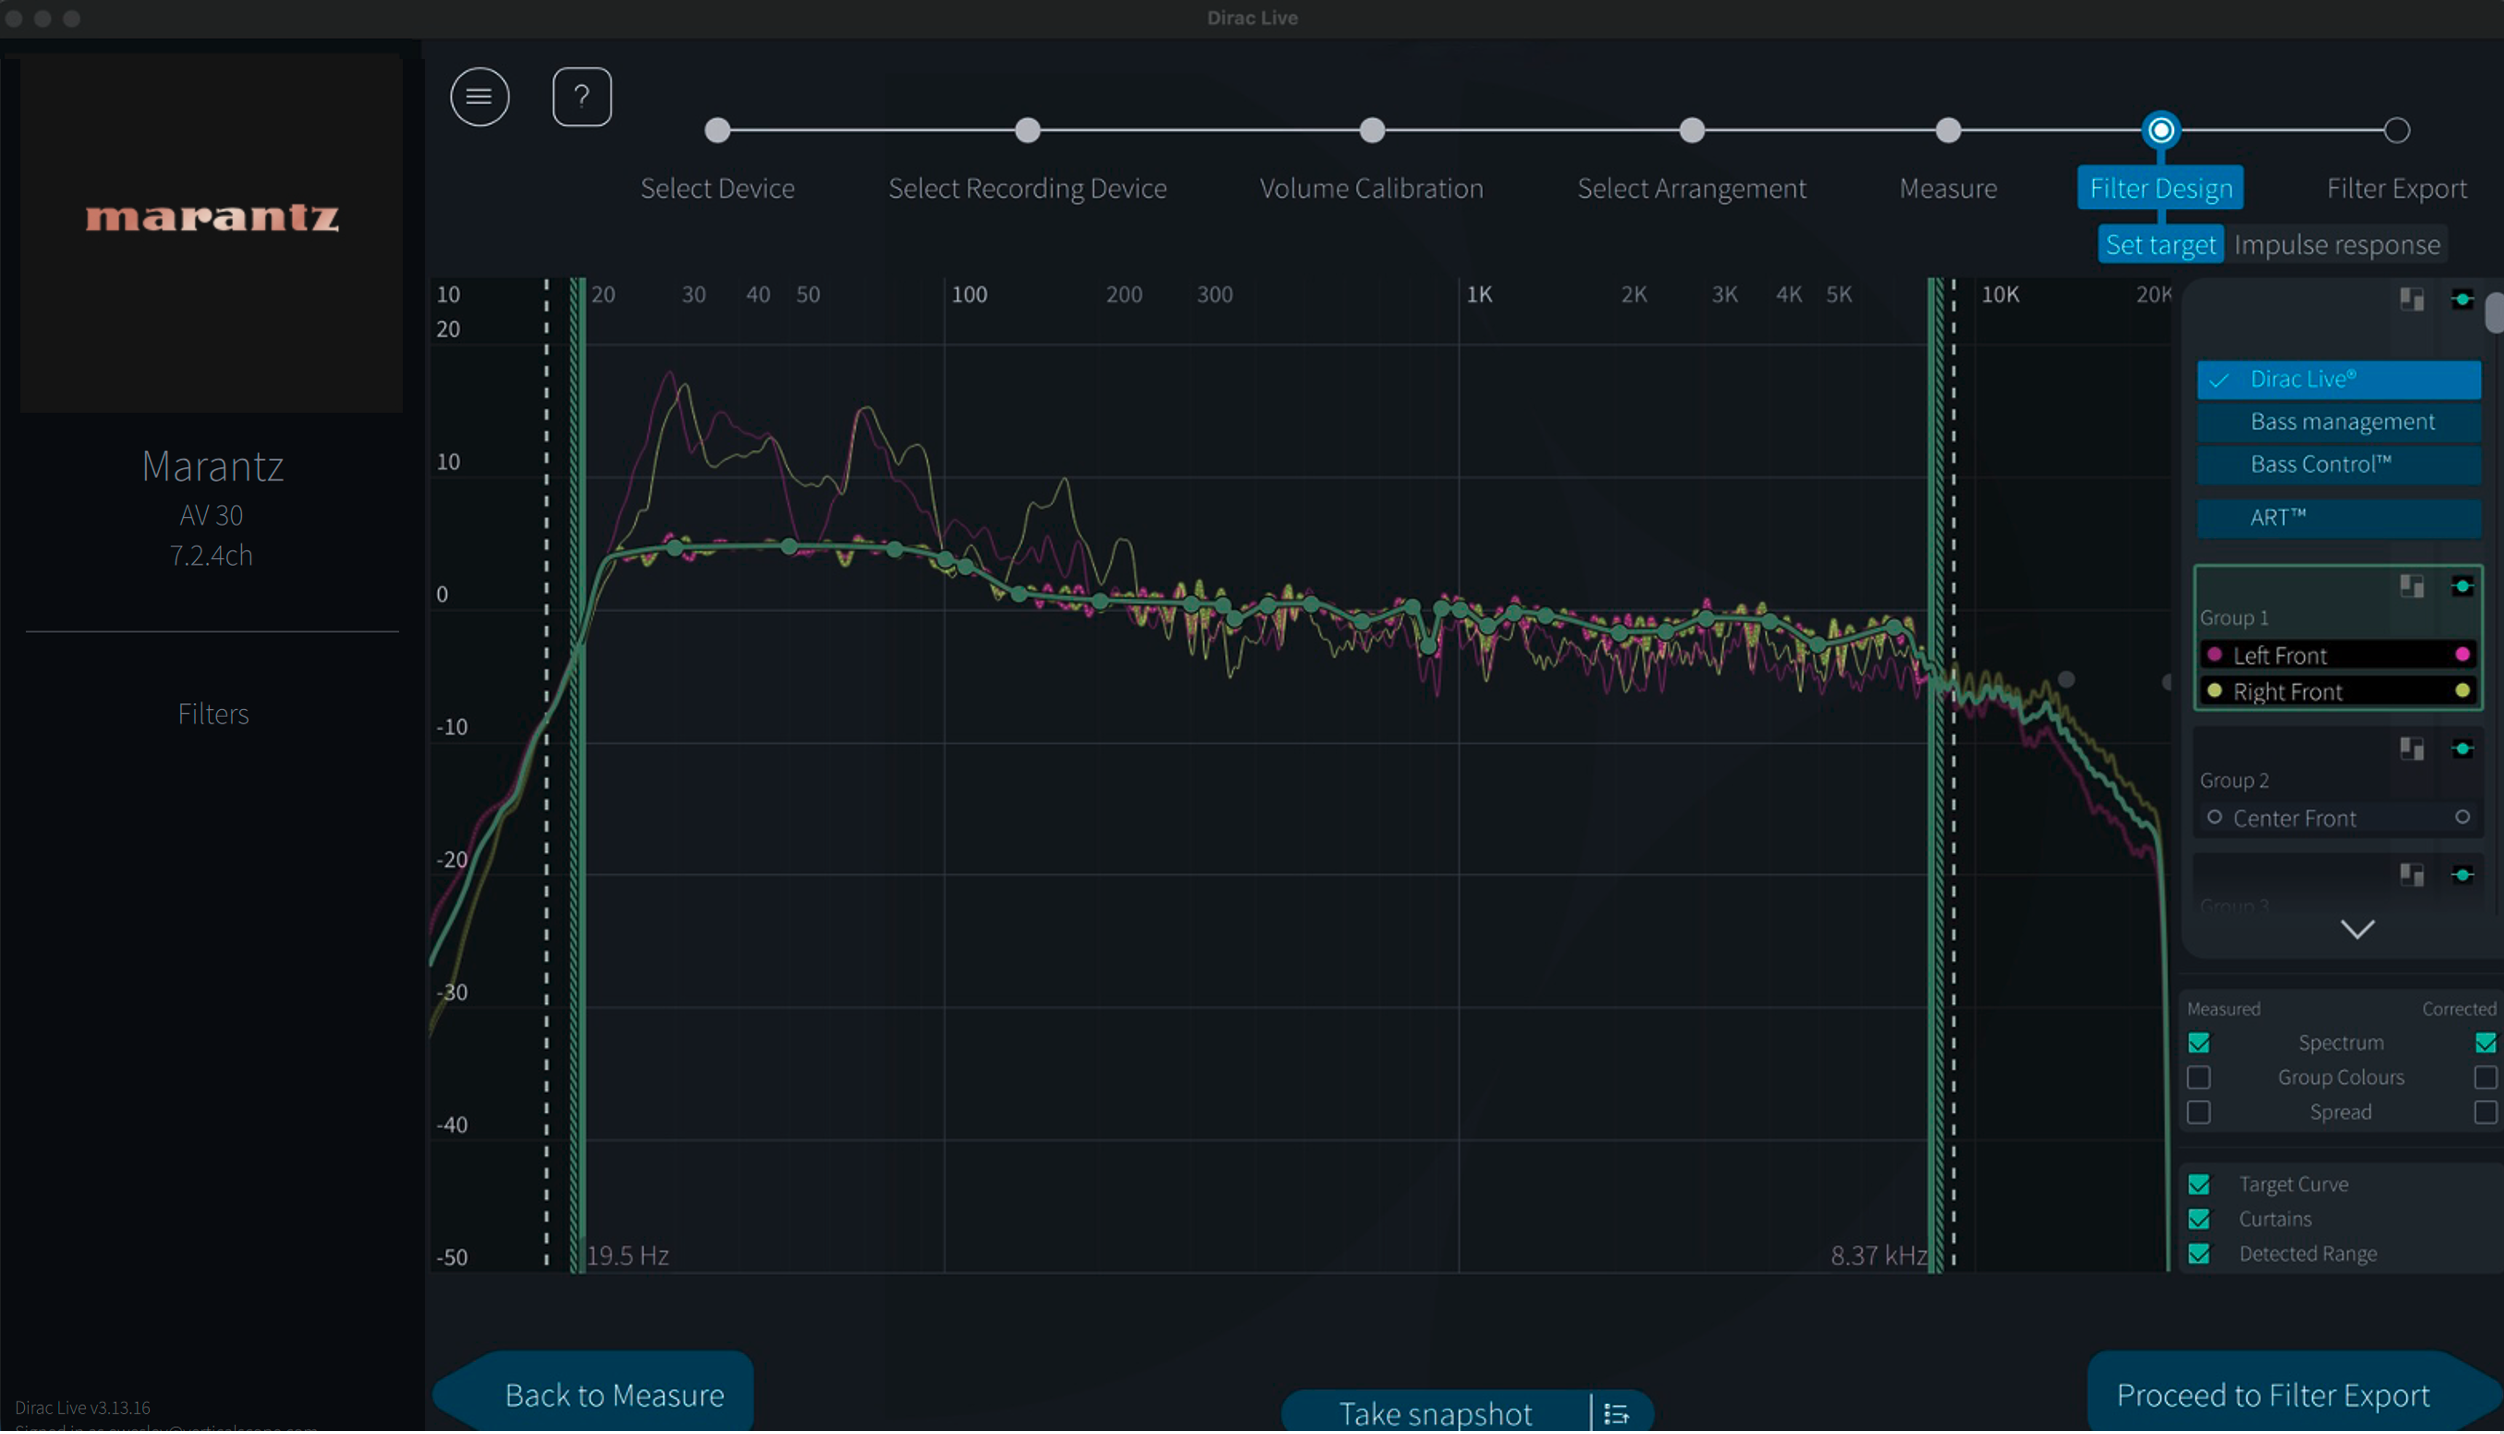
Once you run the measurements, Dirac applies up to 8dB of correction by default, which can sometimes be too aggressive. To prevent overcorrection, we manually adjust the target curve by creating intentional dips where needed. The goal is to keep the distance between the target curve and the average response as small as possible, typically a maximum of 4dB. In the Dirac Live program, you’ll see different calibration options in the upper right. Clicking on ART will take you to the main setup screen. On the right side, you’ll find ART groups, which are predefined based on the information gathered from your processor or receiver.
This is where things can get tricky. It’s absolutely critical to ensure that speakers grouped together share similar bandwidth characteristics. While Dirac does a good job of organizing the speaker groups, if a speaker needs to be reassigned, or you want it to be in its own group for the ART Support design, simply drag it into the correct group or to empty space to create a new group. Once the groups are arranged properly, you can begin tuning the parameters.
Although ART actively adjusts frequencies only up to 150Hz, its impact extends well beyond that. Depending on the system capabilities and setup, you can see measurable improvements up to three octaves above its active range. The more speakers and subwoofers in the system, the more pronounced the effect becomes.
Dirac Live ART is fully flexible. If my left front speaker has a slight null at one frequency while my right front has a different issue at 380Hz, I don’t have to compromise one to fix the other. Instead, I can split them into separate ART groups and create independent correction target curves for each. I did have to pull my right front into its own group to give it its own target curve. This is why understanding your speakers’ frequency range is essential.
For my speakers, I set a lower support range of 65Hz for the front left and right speakers, front center at 70Hz, telling ART to allow the left and right speakers to support each other by 5dB at that frequency up to 150Hz. The subwoofers were set so that their upper support range matches the lower support range for each speaker group. The surrounds were set at 96Hz, while the ceiling speakers were set at 99Hz. For ART, I allowed the four base-layer surrounds to contribute to the correction for the front left channel from 96Hz to 150Hz at a level of 5dB.
When balancing the EQ for the LCR and surround channels, the idea is to make the surrounds stand out slightly without overwhelming the mix. For my LCR, I applied a 1.2dB boost at 140Hz, kept 1kHz flat, and was at -0.5dB at 2.5kHz. On the surround channels, I bumped 140Hz up to 2.4dB, set 1kHz at 0.7dB, and crossed the zero threshold at 2.5kHz. These small adjustments allow the surround effects to pop just enough to be noticed, without drawing too much attention or overpowering the main mix by increasing their overall level.
For the ART design, I organized my speakers into 5 groups: fronts, center, surrounds, rear surrounds, and tops. For the top surrounds, the speakers support each other by -12dB, with side surrounds providing -9dB of additional support. The same principle applies in reverse, with side surrounds supporting each other by -12dB and the tops providing -9dB of support. While my bed layer speakers play up to 96Hz, the top surrounds stop at 99Hz. I also added some additional support from the sides to the front.
Dirac Active Room Treatment approaches room issues in a way that’s closer to passive acoustic treatment, but does so dynamically and in real time. Rather than targeting a single frequency or resonance, ART works across the room’s overall harmonic behavior. This is similar in concept to the Allison step effect, where reflections from nearby boundaries can cancel or exaggerate certain frequencies depending on placement. While ART’s active processing is limited to frequencies below 150Hz, its influence extends well beyond that range. In measurements, you can see its impact reaching up to three octaves above the active region. The more speakers and subwoofers involved in the system, the more effective ART becomes.
Once you’ve finished, hit the Calculate button, and Dirac Live will process the results. This step takes longer than a standard Dirac Live Room Calibration, which makes sense given the amount of data being processed. Once it’s done, you can export the filter and head back to the Marantz UI to load the calibration.
Performance
I spent a good amount of time late last year with the AV 20 in my room, so I was curious to see how the AV 30 paired with the AMP 30 would hold up in both music and movie playback, and whether I could really hear a difference between the two. Marantz has long been associated with a slightly warmer presentation that still preserves detail, and with Dirac now part of the equation, I wanted to hear how that familiar character translated here. I started with two-channel listening before moving on to more demanding movie material.

I began with Cranes in the Sky by Solange. This track is a great test for vocals and midrange balance, with a clean, polished production built around a sparse instrumental backdrop. Solange’s voice sits front and center, and any unevenness in the upper midrange tends to show up quickly. Through the AV 30 and AMP 30, vocals came across smooth with good separation from the surrounding instruments. There was a sense of space around her voice that made the presentation feel relaxed but still detailed.
From there, I moved on to something far more demanding to see how the system handled dynamics. B.Y.O.B. by System of a Down is chaotic by design, with sudden shifts in tempo, aggressive guitar layers, and especially the frantic drum work that kicks in around the 2:32 mark. This is a track that can quickly collapse into a wall of noise if a system loses control. Here, the Marantz combo never sounded overwhelmed. Drum hits had real impact while staying clearly defined, and the rapid changes in pace never felt smeared. The bass line carried plenty of weight without stepping on the midrange, and the song’s energy stayed intact from start to finish.
I did spend some time earlier in my review process A/B testing the AV 30 against the AV 20. When watching movies, it was honestly very difficult to pick out meaningful differences. With all channels active and so much information being thrown at you, both processors sounded excellent, and any differences were extremely subtle. Two-channel music is where I noticed a slight distinction. The AV 30 is still very detailed, but there were a few moments where guitar strings and midrange details felt just a touch more pronounced on the AV 20; the difference was very minor. Considering the AV 30 doesn’t carry all the same hardware features as its larger sibling, it holds its own remarkably well.
Spending time with all three Dirac processing modes—Room Correction, Bass Control, and ART—made it clear just how much ART changes the overall presentation. On its own, Dirac Room Correction delivered a solid, immersive baseline. Moving up to Bass Control, low-frequency response tightened up noticeably, with better definition and more consistent output across the room. Engaging ART, however, reshaped the presentation in a way that was immediately audible. The soundstage felt more organized, with improved separation and a sense of space that’s difficult to fully convey until you hear it in your own room.
When it comes to watching movies or TV shows, I’ve recently been on a Stranger Things kick. I rewatched the latest season, and while it didn’t quite hold up to the earlier ones in terms of overall quality, it still felt like a solid ending to a series I’ve been watching for nearly ten years. Seasons 4 and 5 are presented in Dolby Atmos, while seasons 1 through 3 are limited to 5.1 surround. What I didn’t realize until recently is that the show’s creators, the Duffer Brothers, played a significant role not only in bringing Dolby Atmos to Netflix, but also in pushing for higher audio bitrates, with streams reaching up to 640 kbps and even 768 kbps.
Now, this still doesn’t match physical media, but for a streaming service, it’s really good. The reason I bring this up is that watching Stranger Things on Apple TV through the AV 30 really highlights what’s possible with well-encoded streaming audio. The Atmos soundtrack is reproduced with impressive dynamics and never sounds compressed. Dialogue remains clear, and the soundstage feels expansive, with accurate placement of effects around the room. One scene that particularly stood out was near the end of Episode 7, when Eleven confronts One / Vecna / Henry in the rainbow room. The flickering lights in that scene translated into convincing overhead effects, making it feel like activity was actually happening above you rather than just around it from speakers.
When I want to really show off what a system can do, I almost always go to the final scene of 1917, where Lance Corporal Schofield is racing across the battlefield to deliver his message to Colonel Mackenzie. In my 7.4.4 setup, this scene is still one of my go-to demos. Thomas Newman’s score has a lot of weight and emotion behind it, and the AV 30 had no trouble handling those big musical notes. A few minutes later, when Schofield finally speaks with Colonel Mackenzie, played by Benedict Cumberbatch, the system shifts gears nicely. His voice carries a natural weight and presence, while background effects remain audible but never distracting.
Final Thoughts
After spending time with both the AV 30 and AMP 30 in a full 7.4.4 setup, it’s clear that Marantz took a very deliberate approach with this pairing. Rather than simply scaling down its flagship models, the focus here is on delivering a processor and amplifier combo that covers what most serious home theater enthusiasts actually need. The AV 30 handles immersive formats and room correction with ease, while the AMP 30 delivers plenty of controlled power where it matters.
The AV 30’s support for both Dirac Live and Audyssey gives you flexibility in how you tailor the system to your room, while the AMP 30 provides the headroom needed. Dirac is still an additional cost, and at this price point, I don’t think Audyssey alone is going to satisfy everyone, but having the option to step up makes a meaningful difference, especially if you’re using Dirac ART. At $4,000 each for the AV 30 and AMP 30, this isn’t entry-level gear, but it also feels appropriately positioned for what you’re getting. Moving to separates brings clear benefits, and even running the AV 30 on its own makes a strong case for itself. For anyone looking to build a separates-based system without jumping all the way to Marantz’s flagship tier, the AV 30 and AMP 30 form a very compelling option.
FAQ
What is the difference between an AVR and a surround processor?
An AVR combines audio processing and power amplification into a single chassis. A surround processor handles decoding, processing, and switching only, and requires external power amplifiers. Separates allow more flexibility in amplifier choice and system scaling. They also tend to offer better thermal management.
What is the benefit of multiple independent subwoofer outputs?
Independent subwoofer outputs allow each subwoofer to be calibrated separately. This improves bass uniformity by addressing room modes more effectively. It also allows different placement strategies without compromising phase alignment. Systems like Dirac Bass Control or manual tuning benefit from this flexibility.
What does bridging an amplifier channel do?
Bridging combines two amplifier channels into one higher-powered output. This effectively doubles the voltage swing and increases power into higher-impedance loads. Bridging is commonly used for front LCR channels. It does require speakers that can safely handle the increased output, though.
Finished reading? There’s more to explore.
Leave a Reply